How to install and configure online chat widget
Umnico omnichannel messaging platform provides a multifunctional live chat widget for a website. The feature allows agents to respond and reach out first to the website’s visitors in real time, and integrate social media and instant messengers for seamless customer communication.
Live Chat’s flexible settings make it easy for any business to customize it to fit its needs. If necessary, Live Chat can only be used as a messenger widget (a button with messengers on a website) to provide customers with a convenient way to reach customer support.
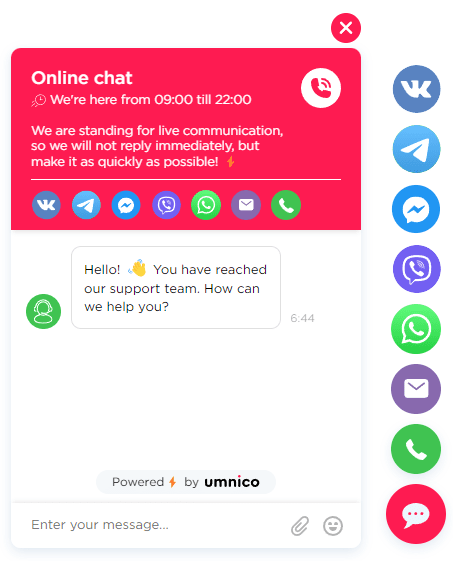
How to create a live chat widget
To set up a live chat widget, go to the tab “Settings — Live Chat”.
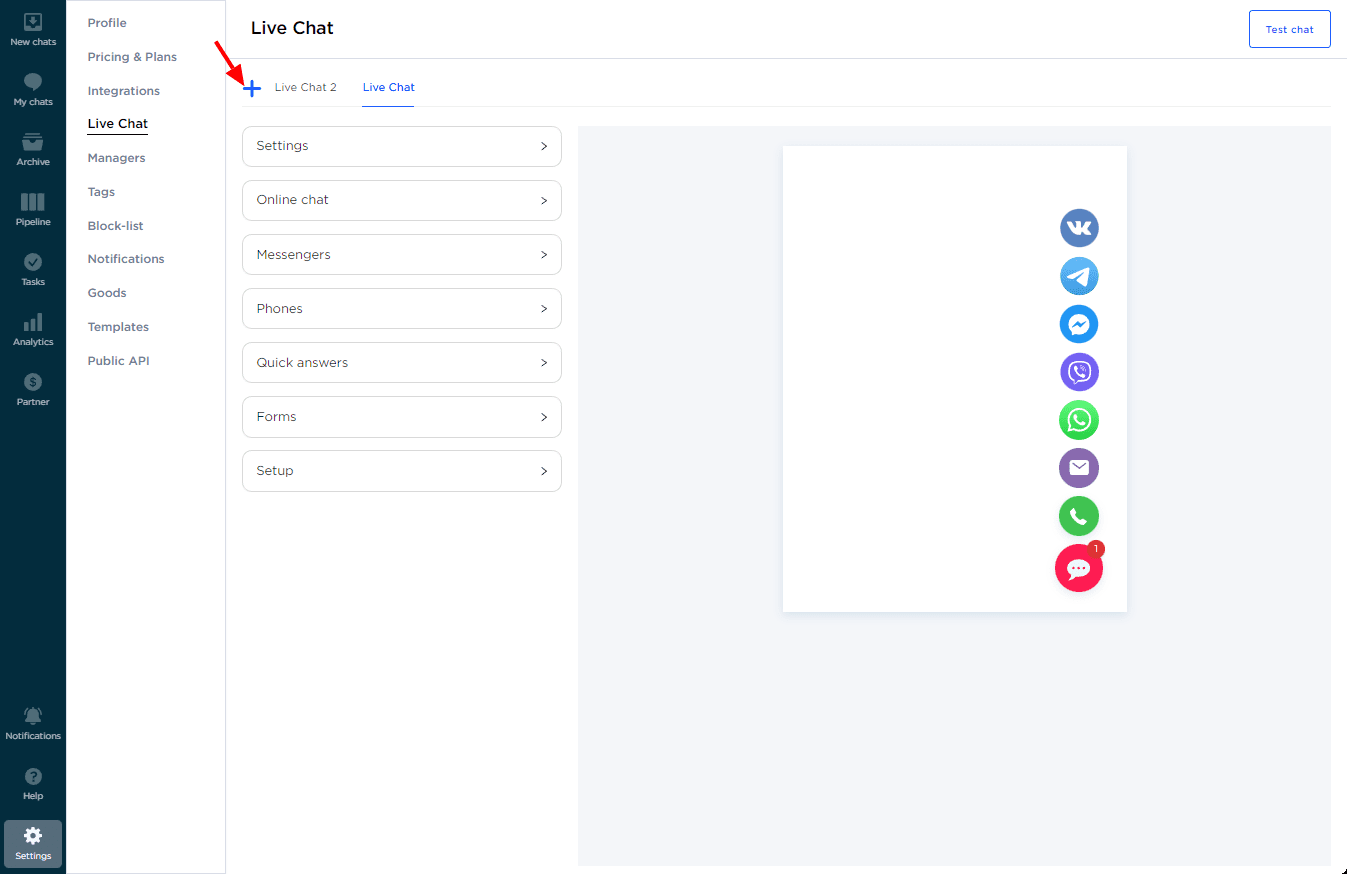
You can create an unlimited number of widgets by clicking on the “+” icon.
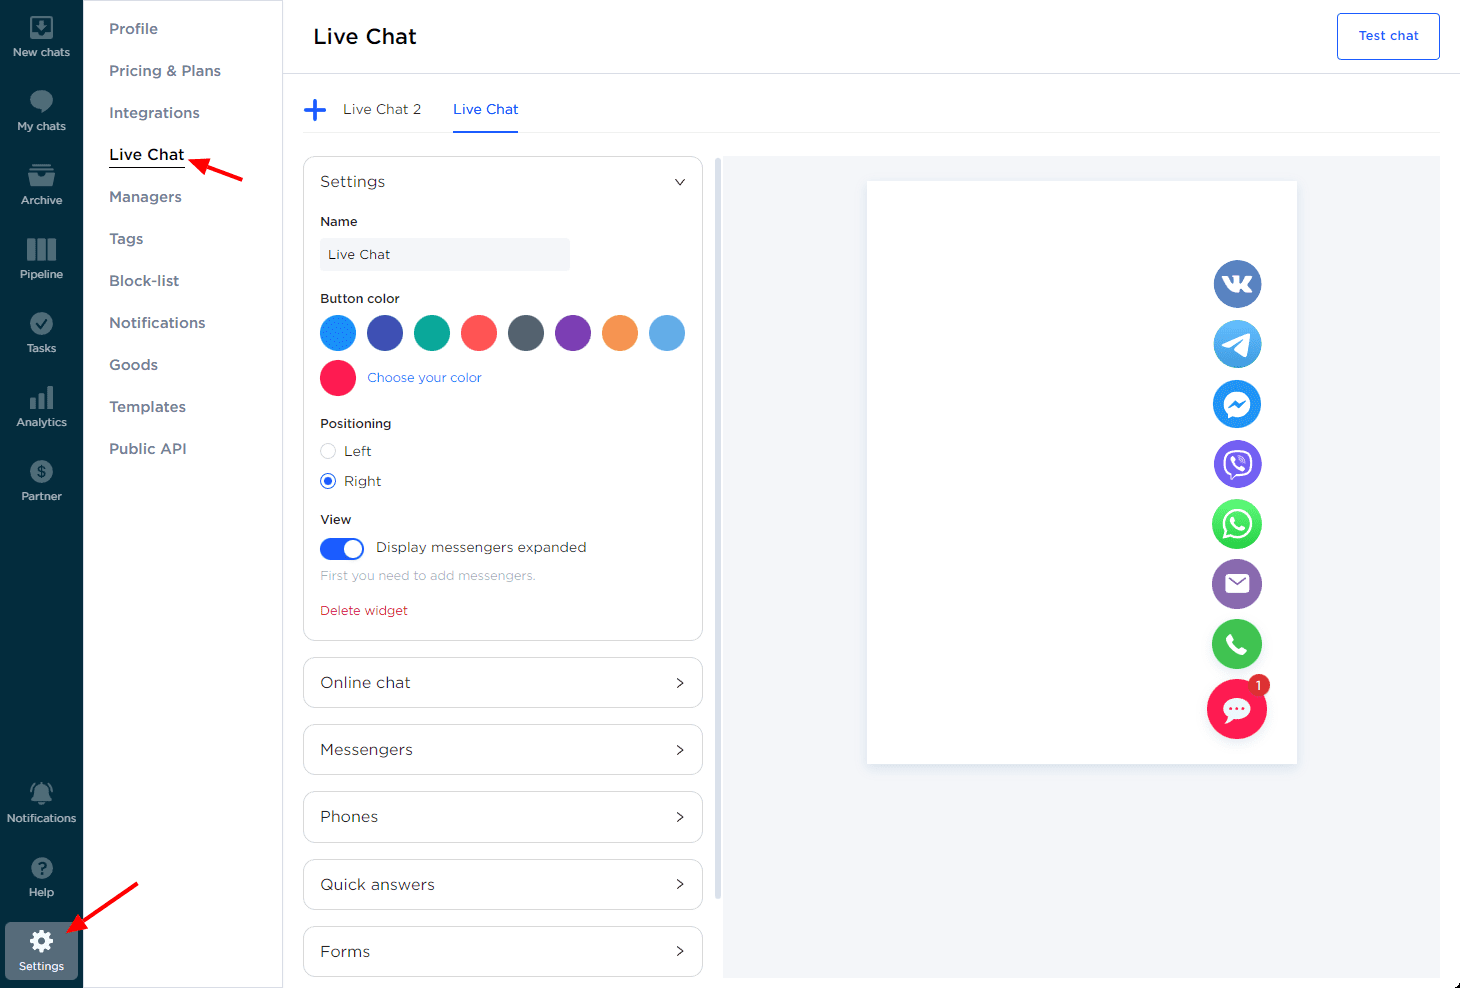
Now, let’s review the available settings.
How to configure the widget’s design
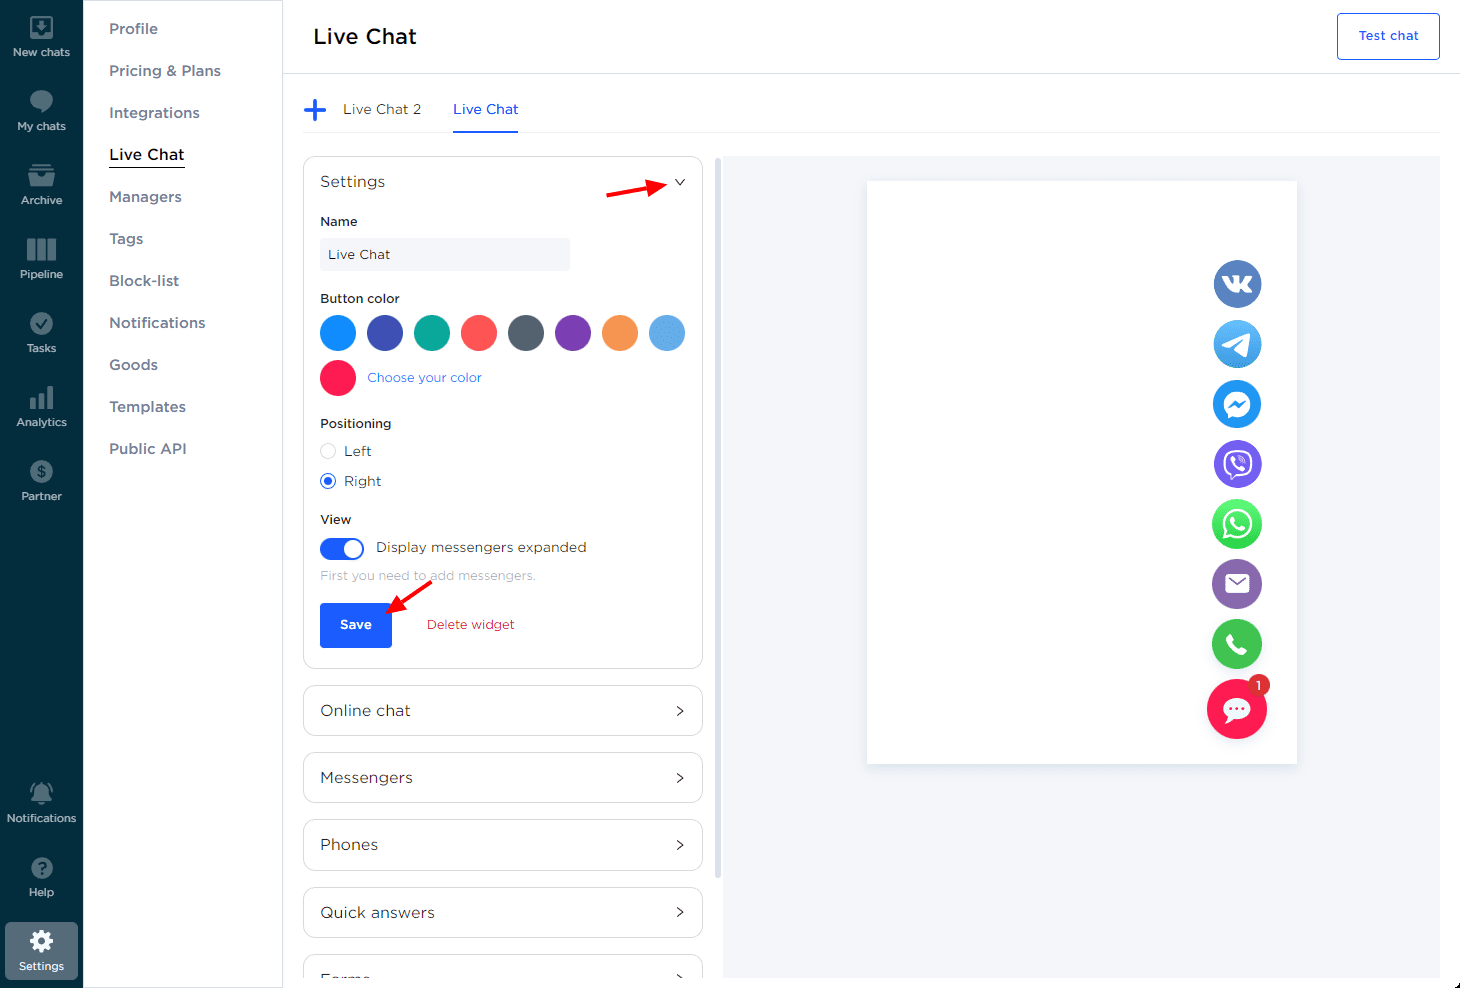
Go to the “Settings” section where you can edit the widget’s appearance: the color of the widget button, its location, and what instant messengers to display along with it. Once selected, click “Save”.
How to customize the welcome window
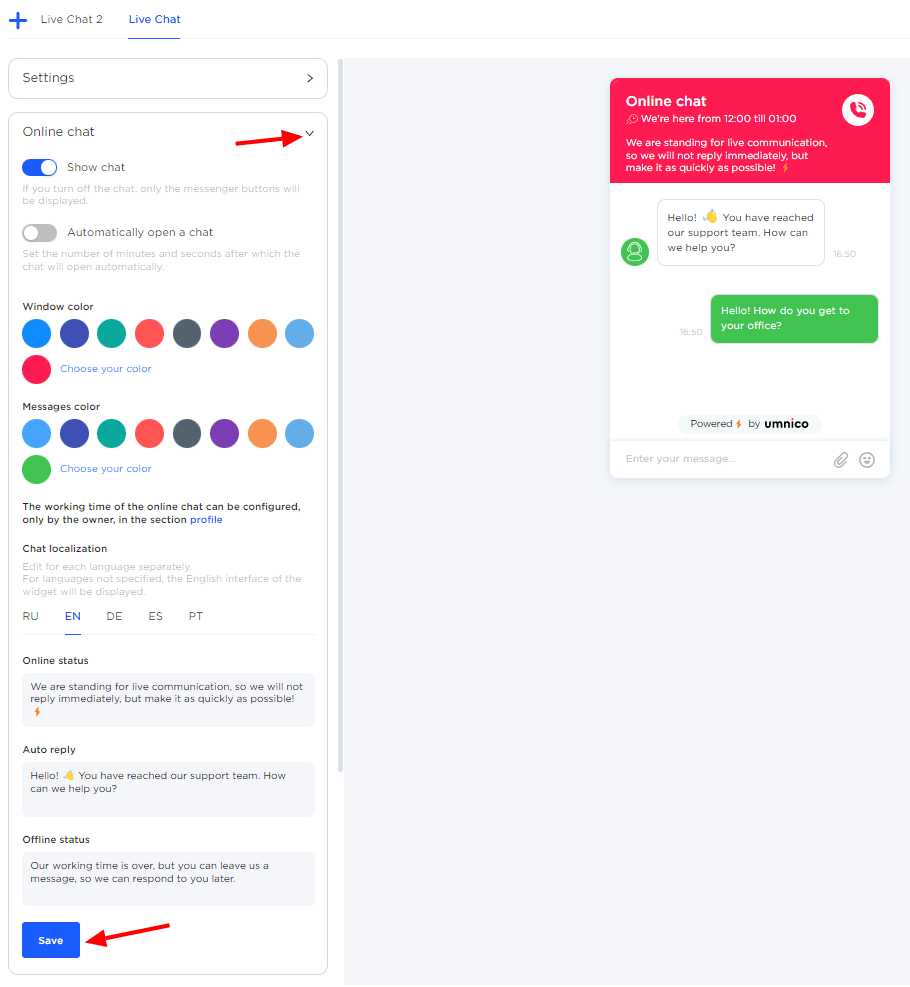
Select the “Online chat” tab. Here you can edit the color of the window and messages, chat localization, automatic response text, and online/offline statuses.
How to add messenger buttons
Select the “Messengers” tab and add links to messengers and social media in the required windows.
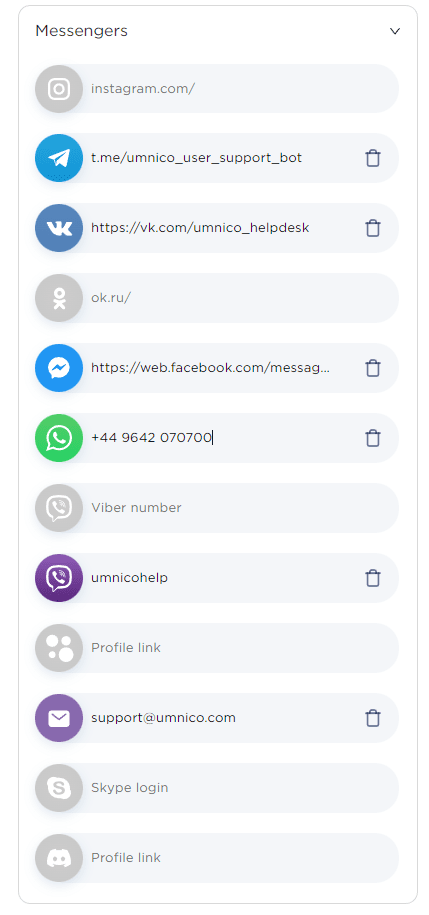
The buttons will appear in the chat widget.
How to add a phone button
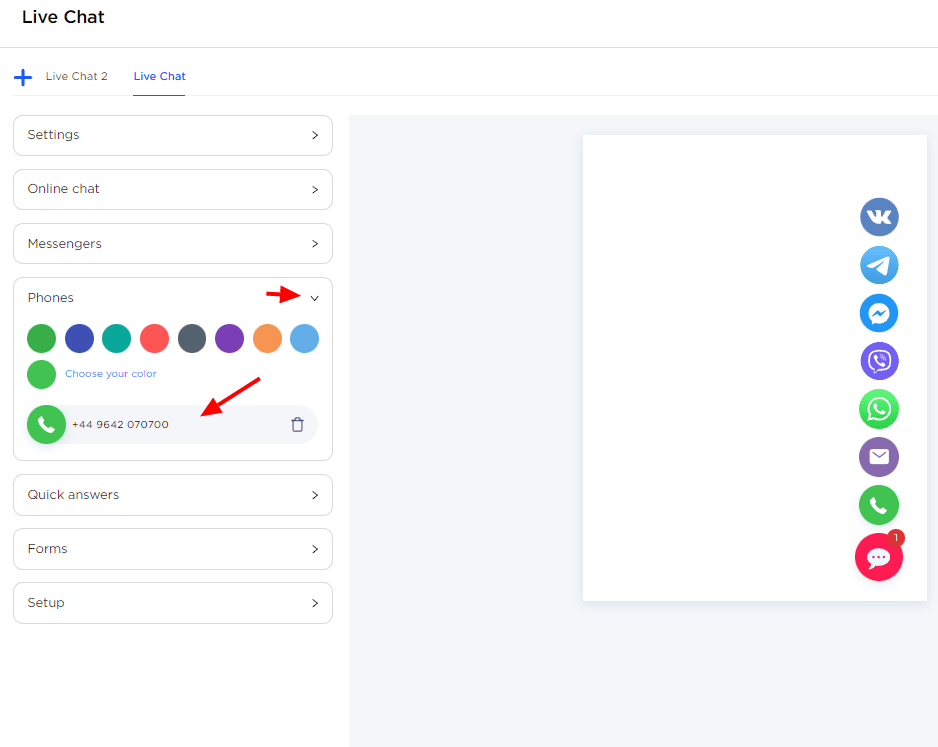
You can also add a phone button to the chat widget. To do so, go to the “Call button” tab, add the phone number and select the button’s color.
How to use quick replies
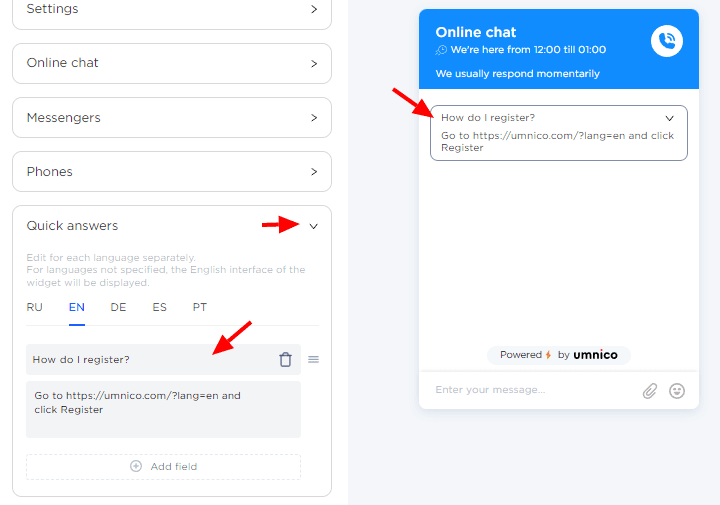
To add quick replies to Live Chat, go to the “Quick replies” tab, select localization if necessary. Add a question and an answer to it. The answer will be displayed to an agent in the chat window when clicking on a question.
How to add forms in the live chat widget
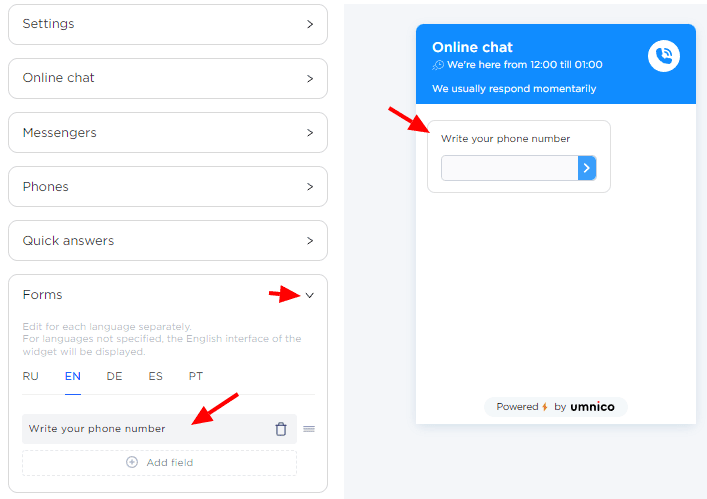
To add forms that the website's visitors can fill out, go to the “Forms” tab. Select a localization, if necessary. Indicate what details to request from a customer.
How to test live chat on a website
After creating a widget, you can test it by clicking on the “Test chat” widget button.
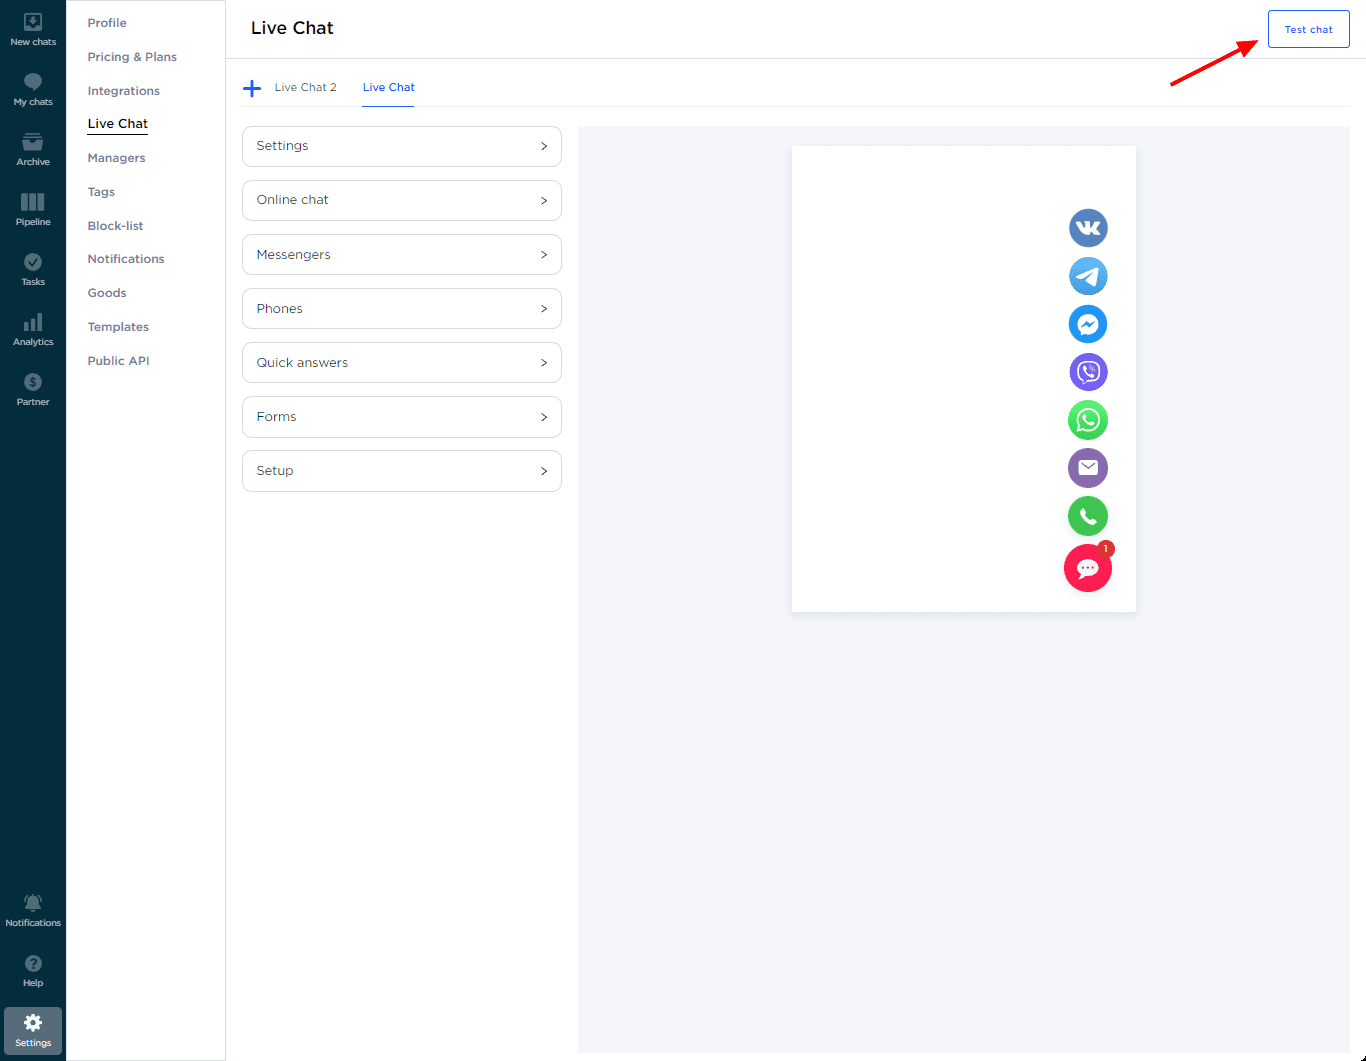
How to add another chat widget
If you require additional widgets, you can create them by clicking on the “+” button and adding any number of new widgets.
Automatic distribution of inquiries among users
For customer inquiries to be assigned sequentially to available users, choose automatic request distribution. In the Sales Funnel, click on the Light Bulb icon, select “Distribution of deals” and set up trigger parameters: channel, distribution order and operators.
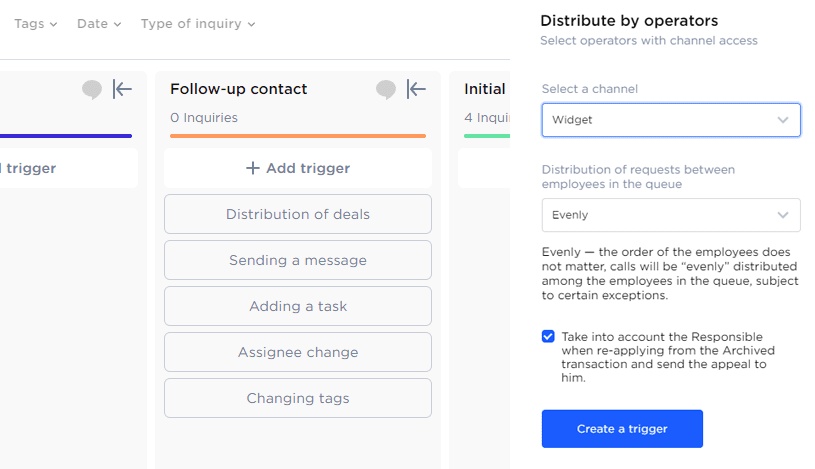
For repeated inquiries, you can additionally track whether the user had a chat with the customer before or not.
The trigger can always be changed, reconfigured or removed. Prior to deletion, all actions initiated by the trigger are saved.
How to add Live Chat to your website
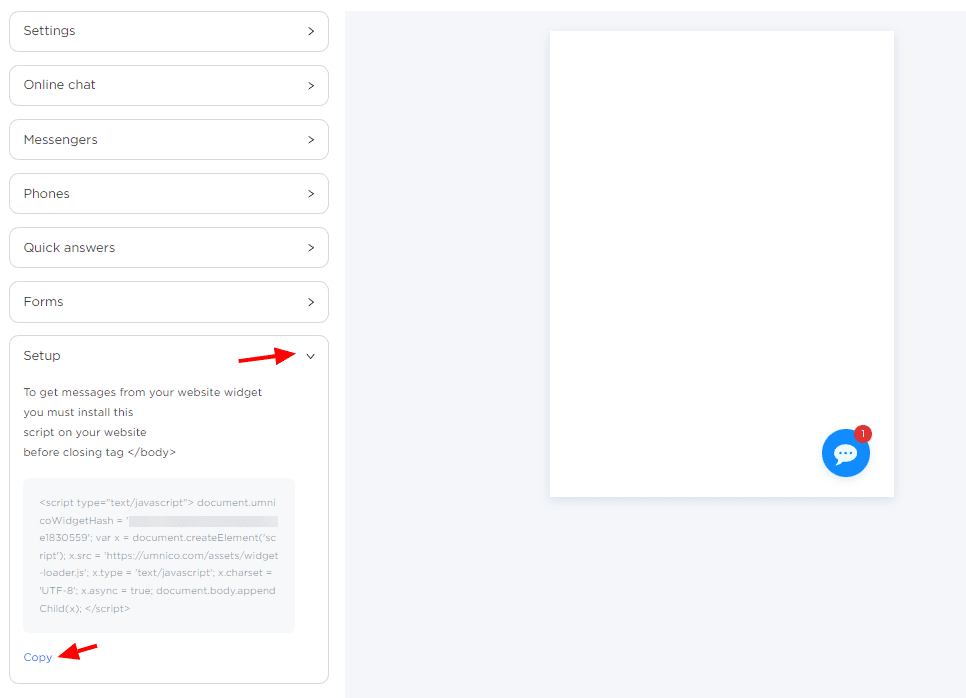
When the widget is configured, it is time to add it to your website. To do this, you need to add a piece of code on each page of the website before the closing </body> tag. The code can be found in the “Setup” section of Widget settings.
Should you have any questions, contact us via the “Help — Chat with the operator” section. We will be glad to help.
Discover the best practices for using live chat for customer service in our guide.
 Return to list of articles
 3-days free trial period