Connecting MAX to Bitrix24
The audience of the MAX messenger has already exceeded 100 million users. The app offers extensive opportunities for business communication with clients in both direct messages and group chats and channels. Umnico omnichannel messaging platform allows you to connect MAX to Bitrix24 and process incoming messages, assign them to agents, and respond directly from the CRM system.
Benefits of MAX integration with Bitrix24 through Umnico:
✅ Receive new inquiries from MAX in Open Lines in Bitrix24.
✅ Respond to customer messages directly from the CRM interface.
✅ Automate business processes: tags and statuses, chat assignment among agents.
✅ Initiate a dialogue with a customer from Bitrix24.
✅ Analytics: monitor response time and inquiry sources.
How to set up MAX integration with Bitrix24
Please note: to set up the integration, first connect all necessary MAX accounts to the Umnico platform.
1. In the Bitrix24 interface, select "Applications — Marketplace" in the left menu.
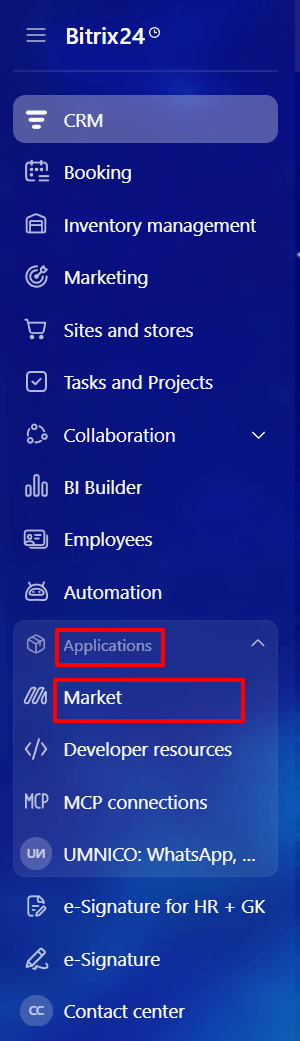
2. In the search bar, enter "Umnico".

3. Click "Install".

4. Check the boxes to agree with the "Rules for Using the Solution Catalog", "License Agreement" and "Privacy Policy" and click "Install".

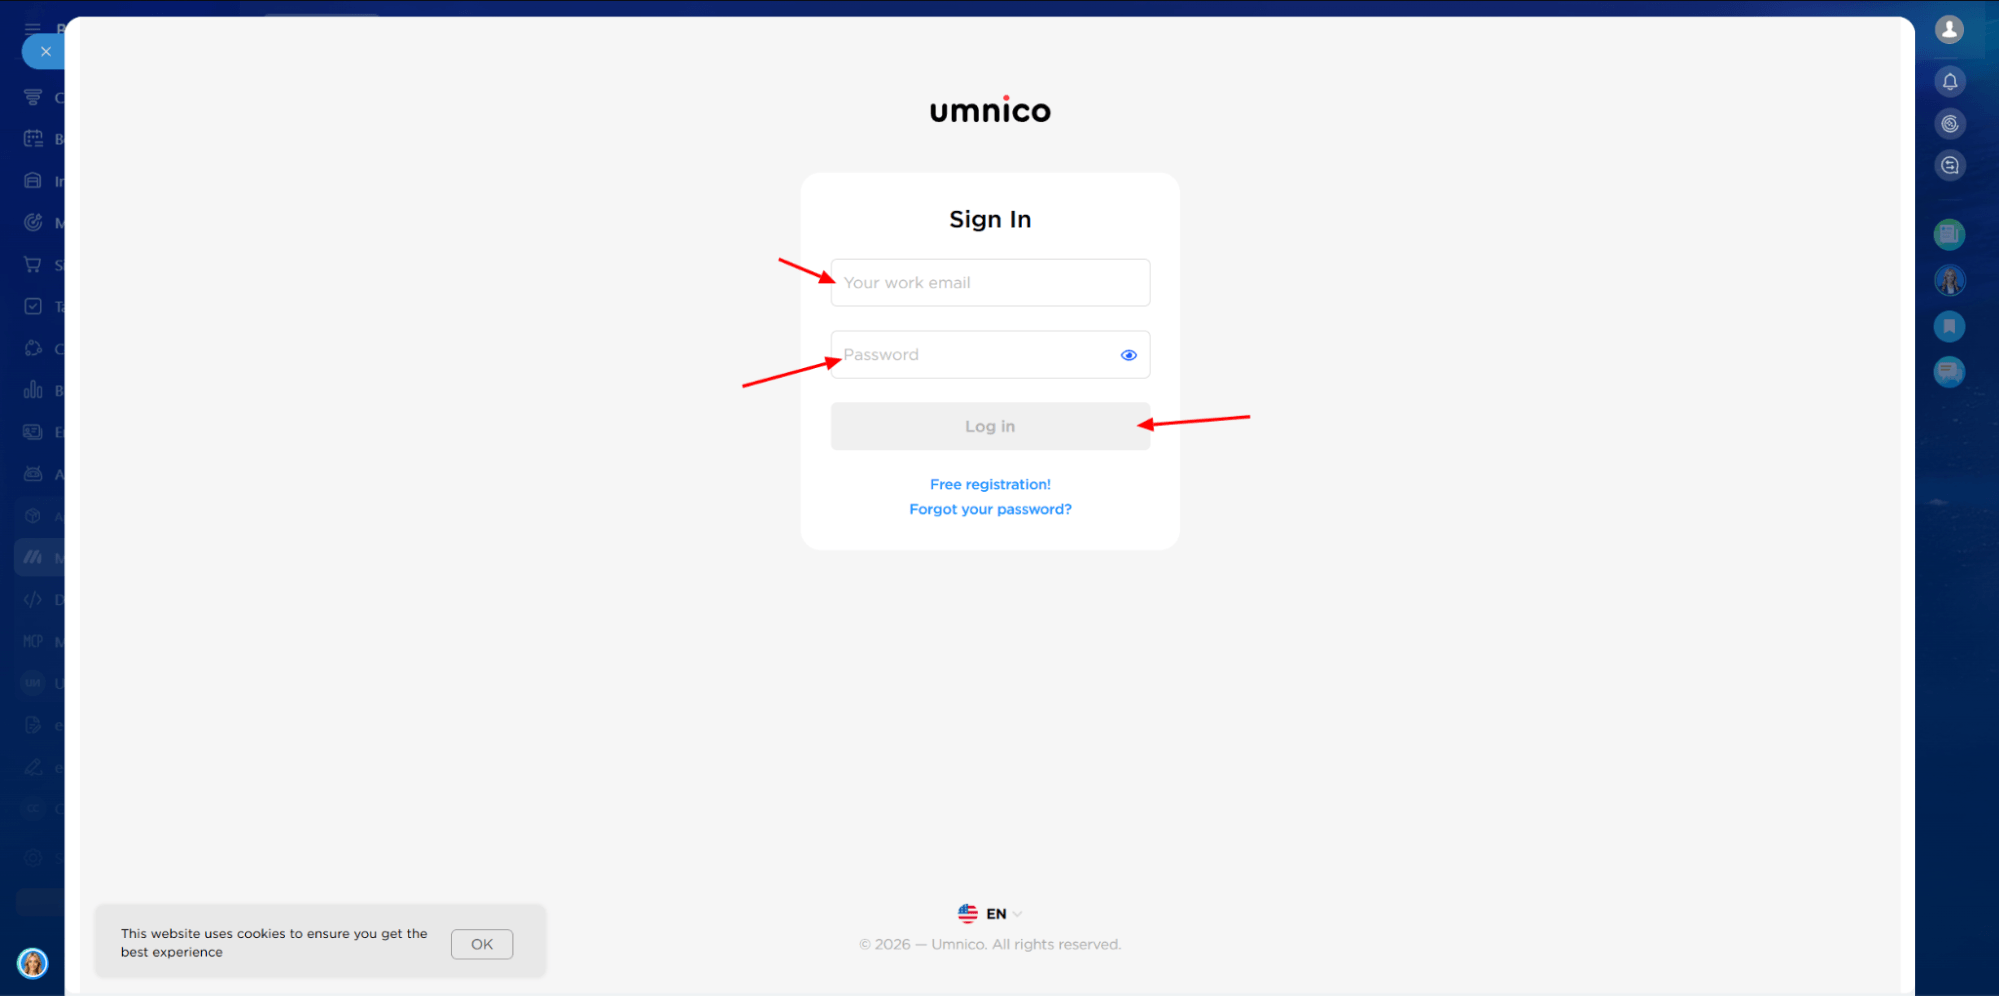
5. In the window that opens, enter the email address and password of your Umnico account and click "Log in".
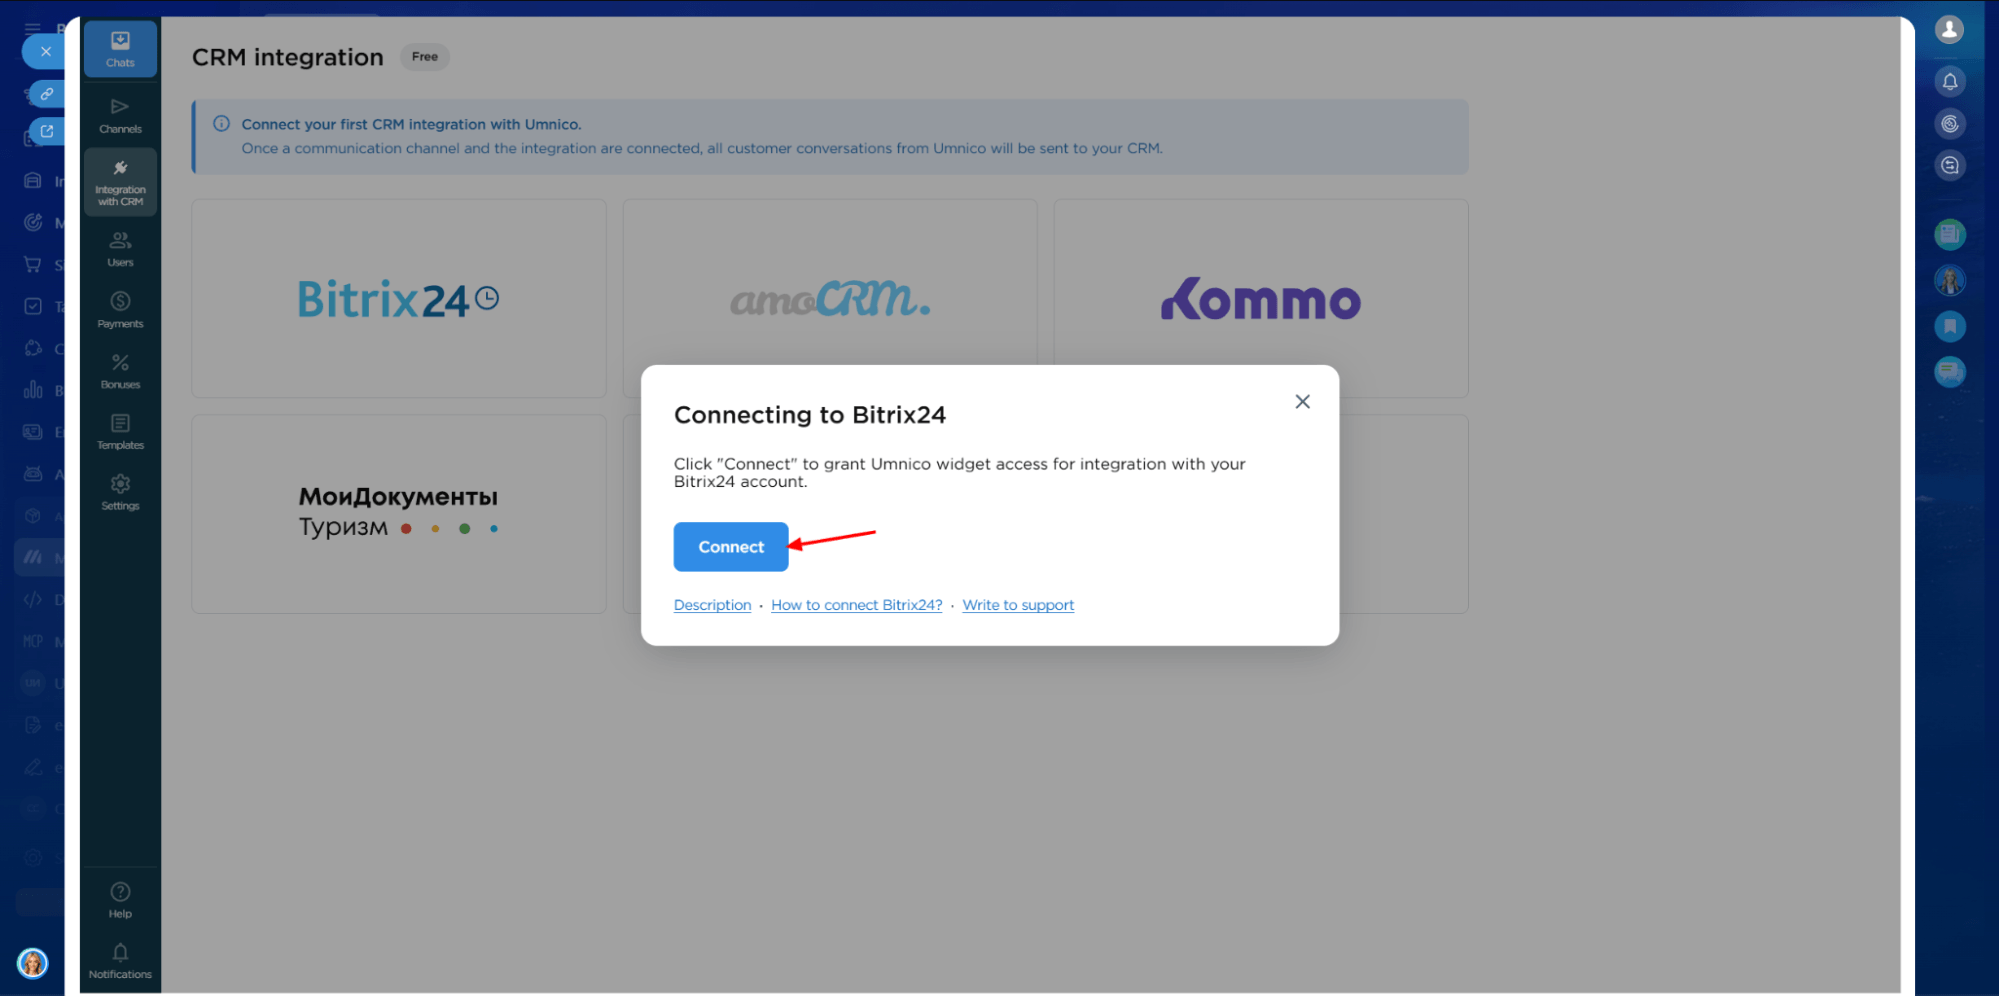
6. Click "Connect".
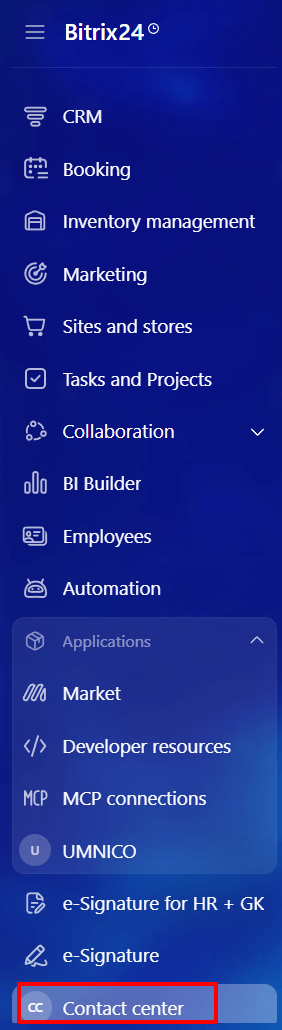
7. In the left menu of Bitrix24, select "Contact center". If the section is not displayed in the menu, enter "Contact center" in the search bar.
8. In the "Contact center" section, the complete list of available Umnico integrations is displayed as connectors. To connect, select the MAX connector.
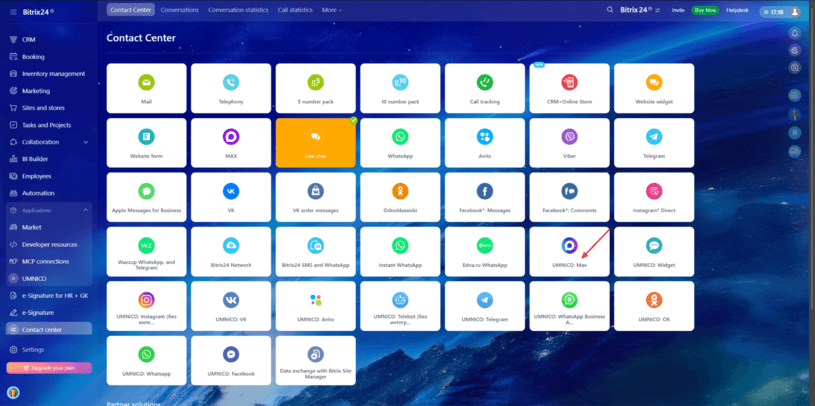
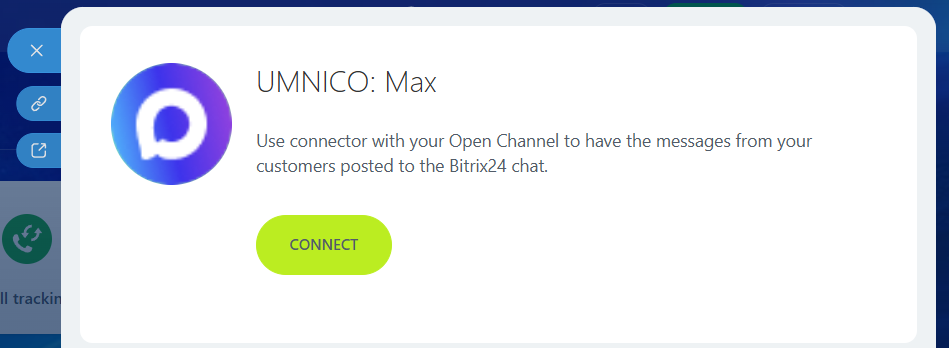
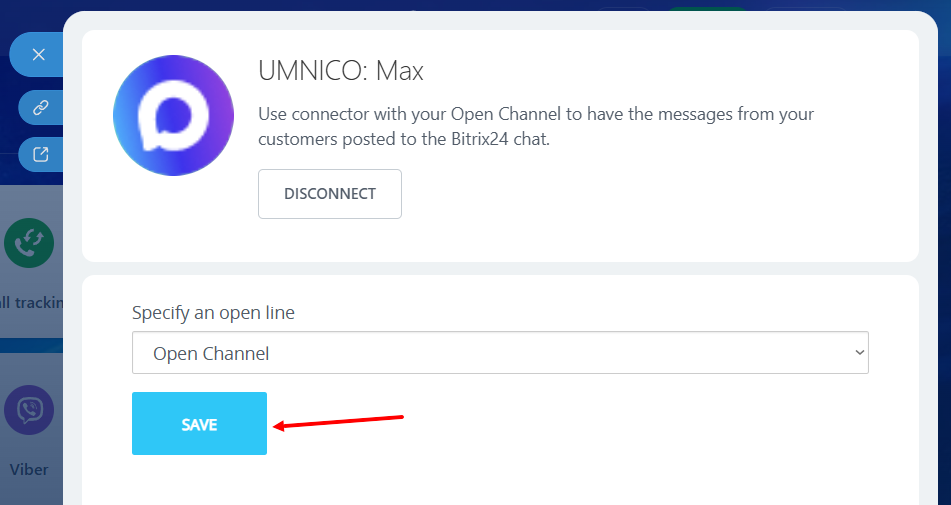
9. In the menu that opens, click "Connect" (fig. 1) and select the necessary "Open Line" (fig. 2), click "Save". A notification "Channel successfully configured" will appear. After this, the active connector will be highlighted in light green (fig. 3).

10. The integration is configured. From this moment on, all messages will arrive in Bitrix24 "Open Lines". Connecting other integrations is performed in the same way.
Please note: if you have added new integrations to the Umnico platform, you need to click "Update connectors" in the Umnico application settings. Without this, new connectors will not be displayed in the "Contact Center".
If you have any questions, contact us in the "Help — Chat with operator" section, and we will be happy to help.
Learn more about MAX messenger capabilities for customer support in our blog.
You might also be interested in
Customer Communication Management Guide
How to Set Up an Instagram Shop
 3-days free trial period