How to Connect Instagram to Umnico
Instagram is a powerful social media tool for driving sales, building your brand, and engaging with customers. With its visual format and highly engaged audience, it’s an essential tool for businesses looking to connect and convert.
Umnico is an omnichannel communication platform that brings all your customer conversations into one smart, streamlined interface. With thoughtful features and a clean, modern design, it helps your team respond faster, stay organized, and work more efficiently.
Integrating Instagram with Umnico allows you to:
✅ Reply to both comments and Direct messages — and easily switch between them in a single chat view without losing context.
✅ Handle all incoming messages through the Umnico Inbox or your integrated CRM.
✅ Manage multiple Instagram accounts in one window.
The integration uses Instagram’s official connection method and remains fully secure when following the recommended setup.
Before you start
⚡ Important: To successfully integrate Instagram with Umnico, you must:
- Have access to Facebook Business Manager with full admin (owner) rights.
- Link your Instagram Professional account to a Facebook Business Page.
- Enable message access in Instagram settings.
Switch your Instagram account to a Professional account
First, you need to switch your Instagram account from Personal to Professional.
To do this:
- Open the Instagram mobile app.
- Go to «Settings → Account → Switch account type»
- Select «Switch to Professional Account»
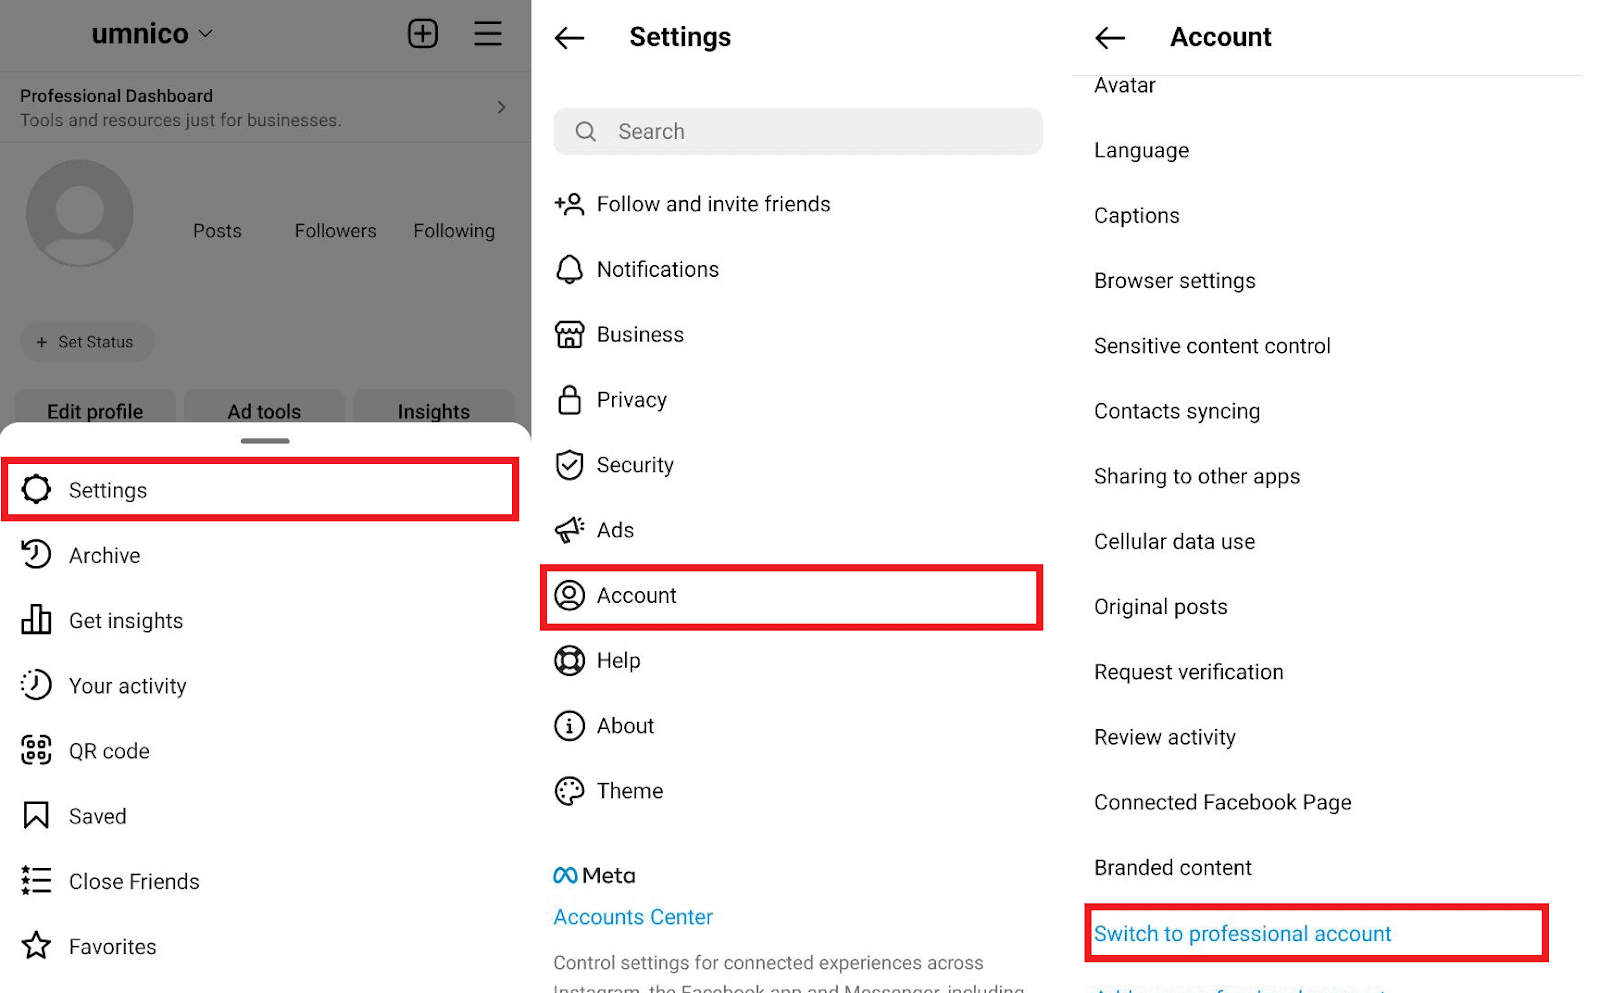
This step is necessary to link your Instagram profile to a Facebook Page and gain access to the messaging API.
Enable message access
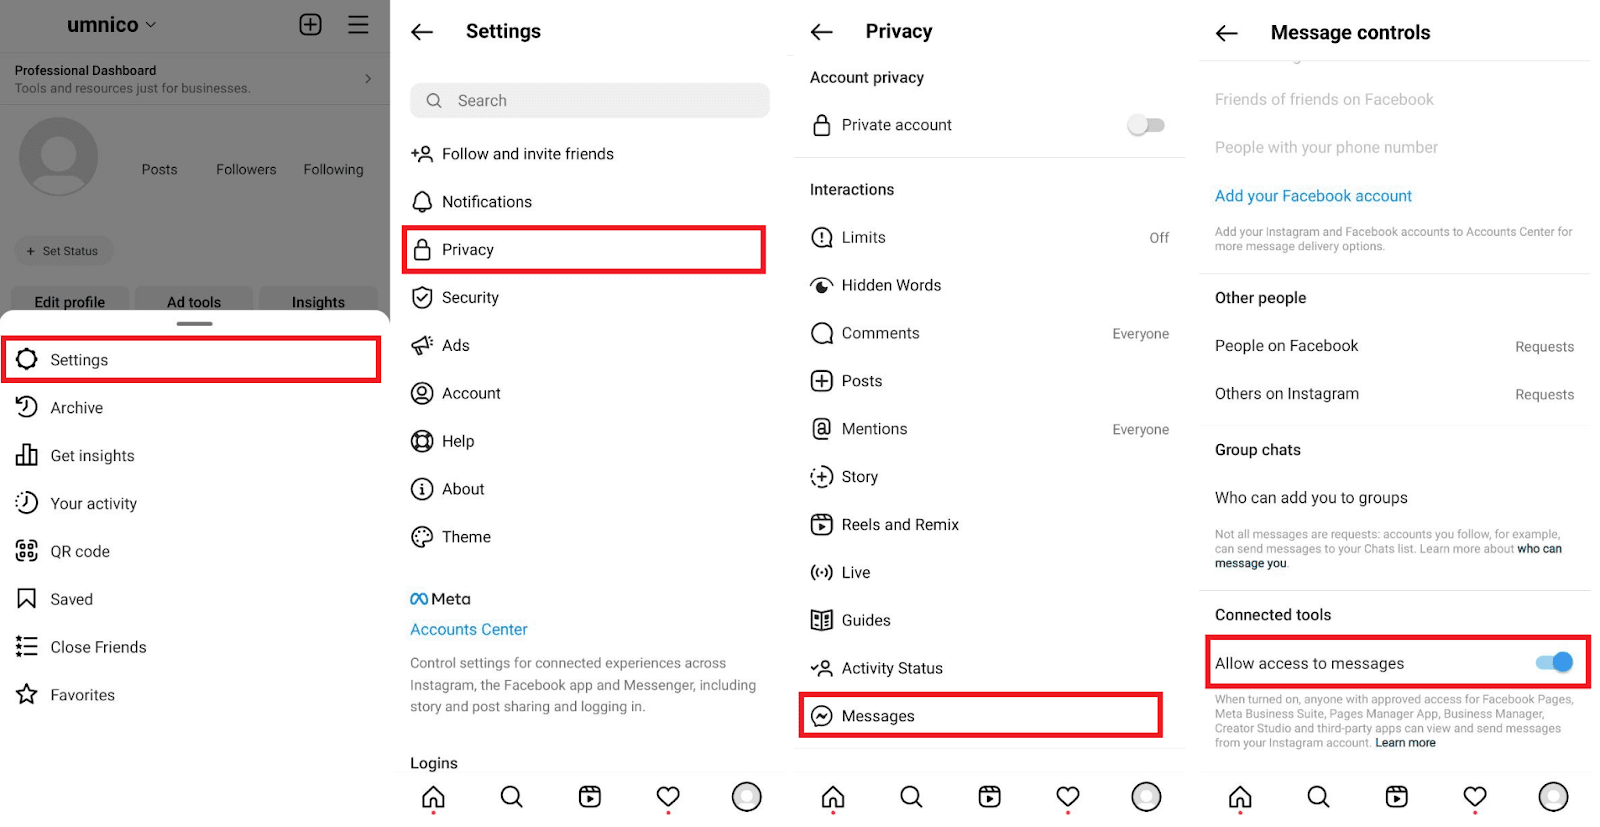
After switching to a Professional account, you must enable access to messages:
- Go to «Settings → Privacy → Messages»
- In the «Connected Tools» section, enable «Allow access to messages»
This is a mandatory requirement for the integration to function correctly.
Link your Instagram account to a Facebook Page
If you do not yet have a Facebook Business Page, you will need to create one:
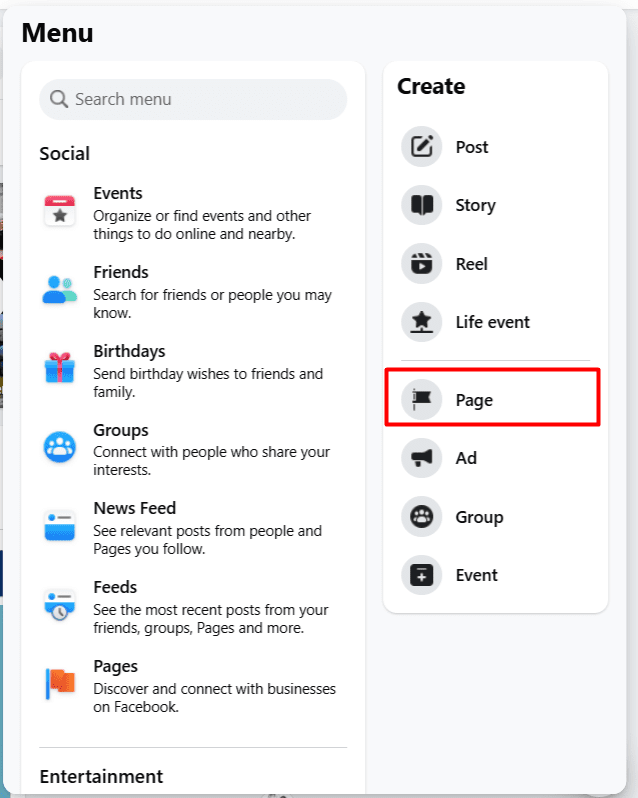
- Log in to Facebook.
- Click «Menu → Create Page» in the top right corner.
- Fill in the required fields such as the page name and basic information.
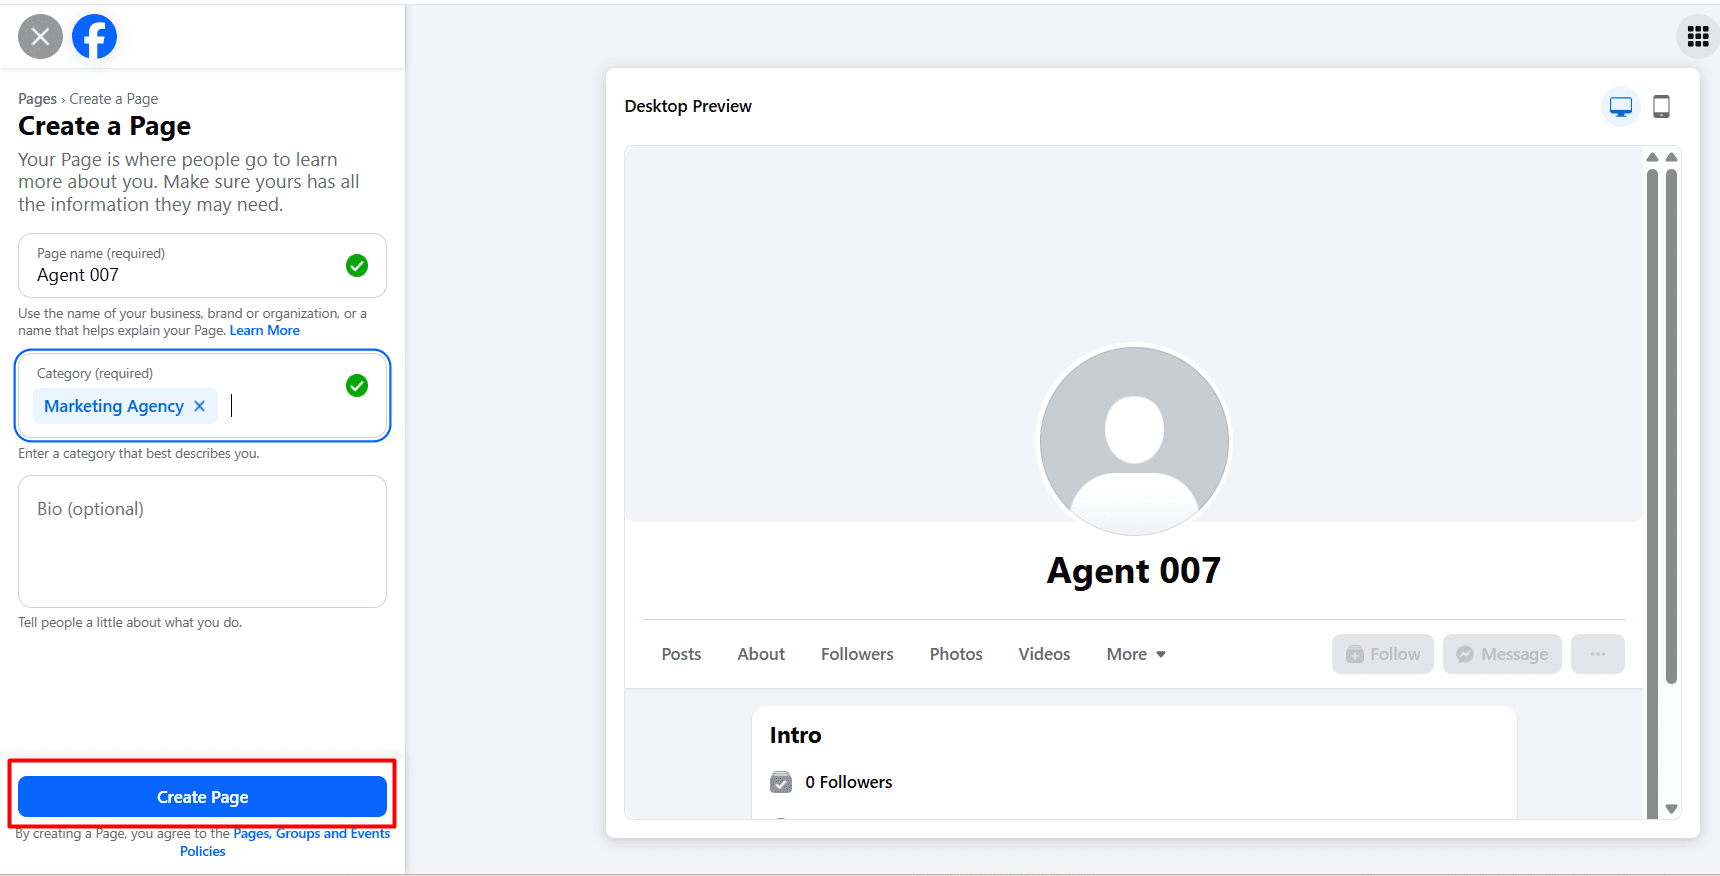
Once your page is created, you need to link it to your Instagram profile. There are two ways to do this:
Option 1. Via Instagram:
- Open your Instagram profile.
- Tap «Edit Profile».
- Under «Public Business Information» select «Page».
- Tap «Connect or Create Facebook Page» and follow the instructions.
Option 2. Via Facebook:
- Switch from your personal profile to your Business Page on Facebook.
- Go to «Page Settings → Linked Accounts → Instagram».
- Tab «Connect Account» and log in to Instagram
- Make sure to grant access to messages.
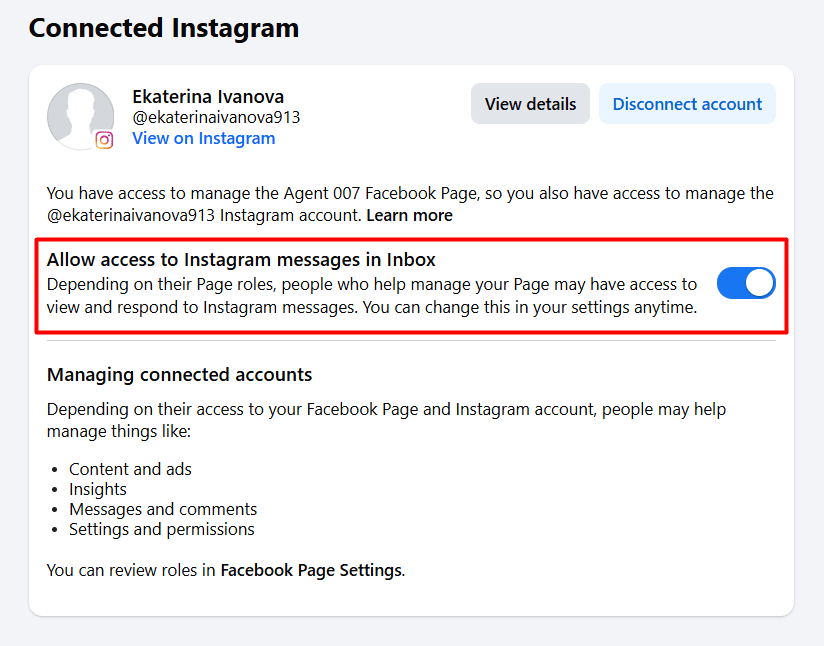
Learn more about linking Instagram and Facebook accounts here.
Once all the preparation steps are completed, you can proceed to connect Instagram to Umnico.
Connecting Instagram Business to Umnico
To start using Instagram in Umnico, follow a few simple steps. The connection process only takes a few minutes.
Tutorial video
If video works better for you, check out the tutorial below to connect the channel.
Step-by-step connection guide
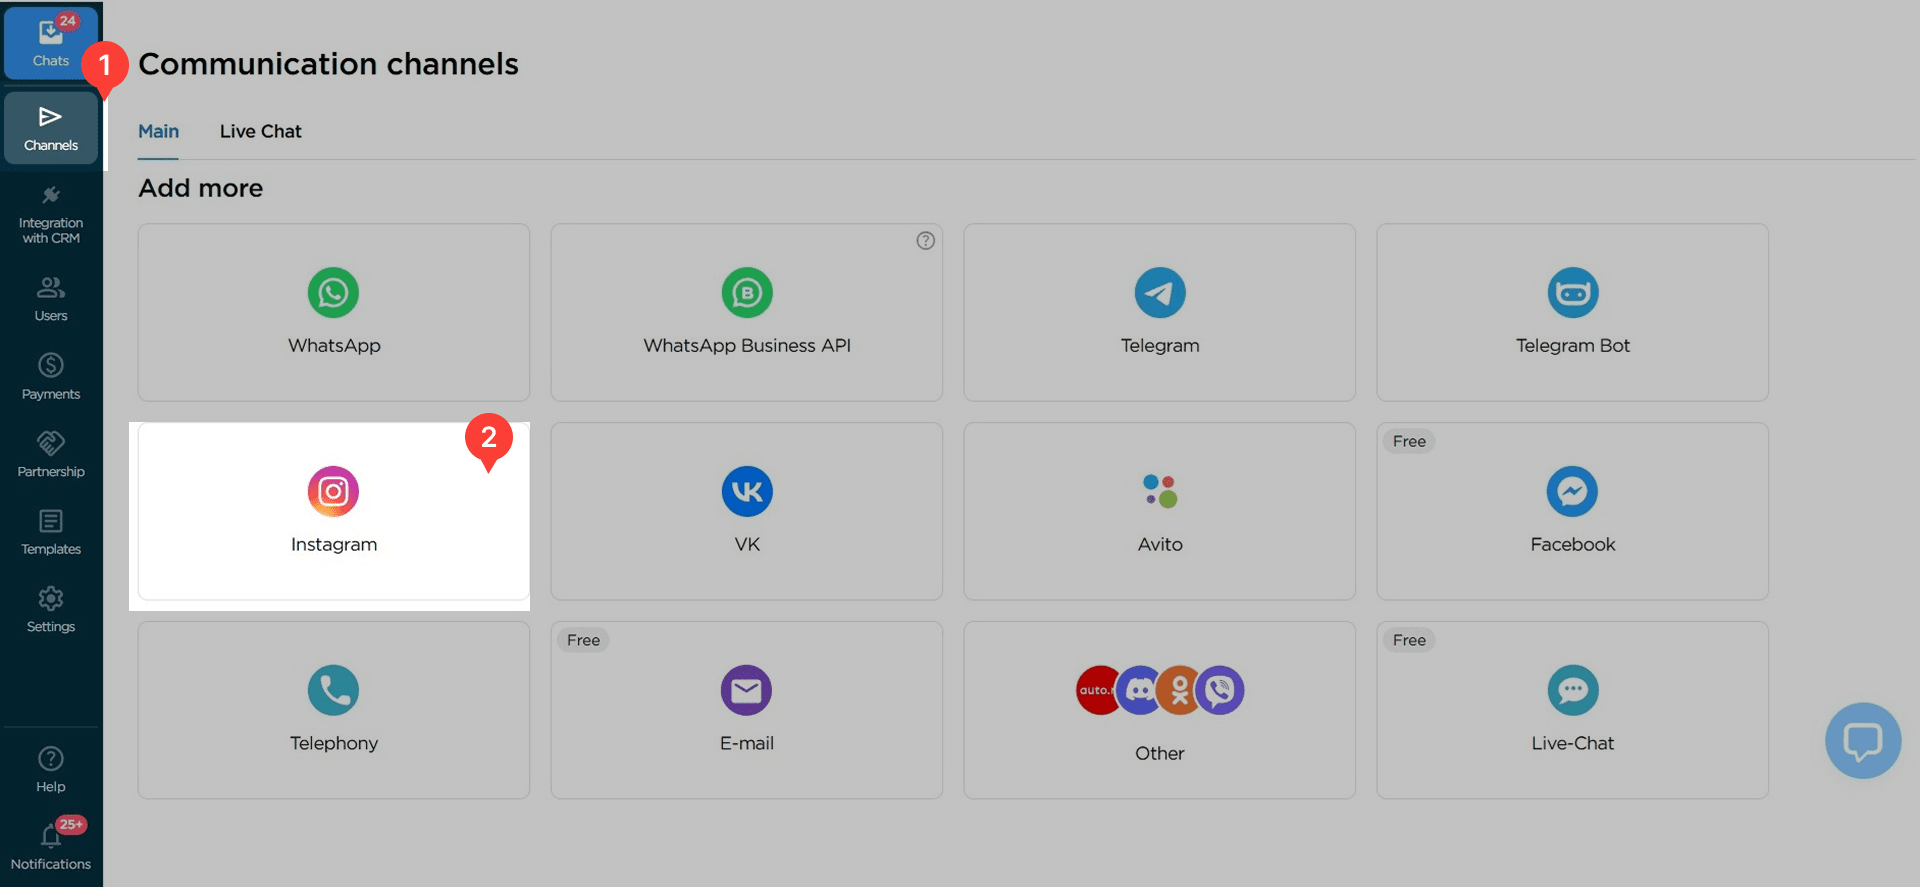
1. In your Umnico dashboard, open the menu: «Channels → Instagram».
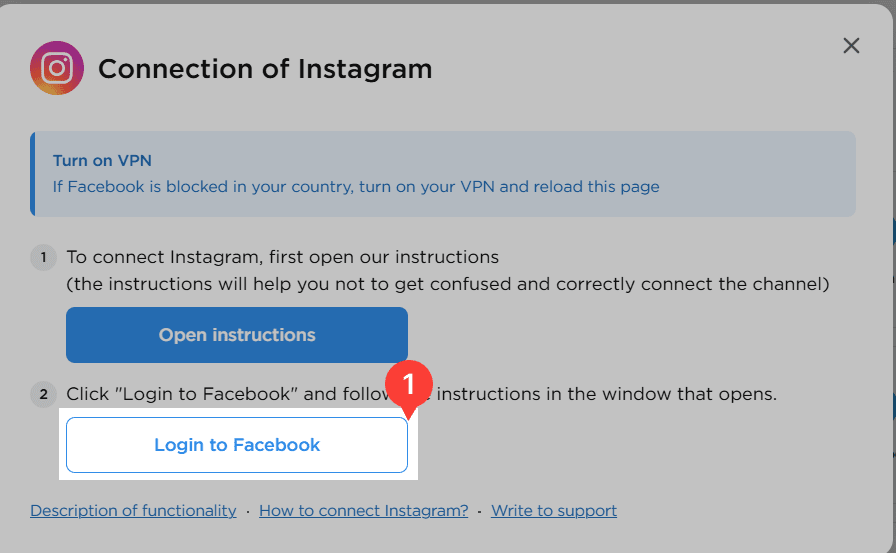
2. In the window that opens, click «Login with Facebook».
3. Log in to your Facebook account where you have owner rights for the Business Page.
4. If you are already logged in, make sure all permissions for the Umnico app are enabled. Click «Continue as [your name]».
5. After successful authorization, click «ОК» to complete the Facebook integration stage.
⚠️ Important: If you see the message «No available groups», after authorization, it means that no Business Page has been created or linked to Instagram.
Go back to the Before you start section and make sure all requirements are fulfilled.
6. After authorization, you will be redirected back to Umnico. Select the group associated with your Instagram account and click «Save».
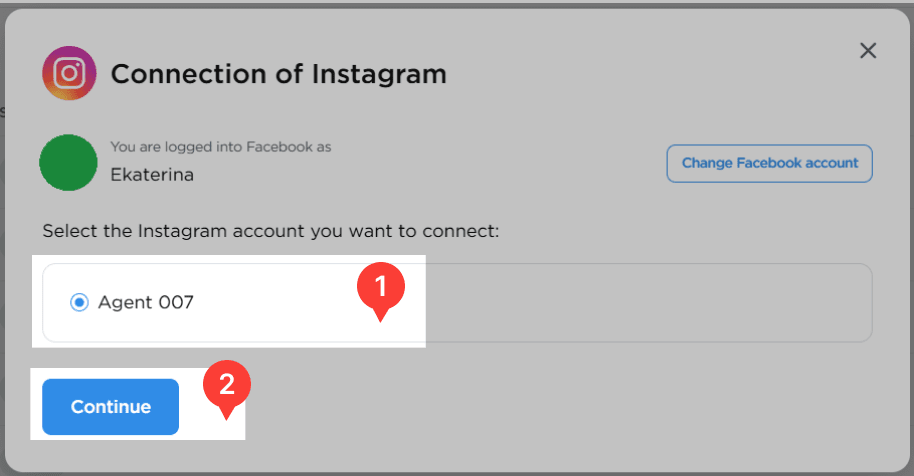
7. Choose at least one method for receiving messages.

8. Done! All incoming Direct Messages and comments from Instagram will now appear directly in Umnico. The connected account will be listed among your active communication channels.

Umnico and Safe Usage
Umnico is not a bulk messaging service and is not responsible for account blocks resulting from Instagram policy violations.
Our integration is based on Instagram's official web version, and as long as the above recommendations are followed, usage remains safe and compliant.
Where to Find Incoming Messages in Umnico
Once connected, VK messages (including comments and private messages) will appear in the «Chats» section of the 'Inbox' menu.
Learn more about chat views and interface features in the «Chats» guide.
Help & Support
If you have any questions, feel free to contact us — we're happy to assist.
To reach Umnico support, click the «Chat with support» bubble in the bottom-right corner of your screen. Or go to the «Help → Chat with support» section in your Personal account.
Related Guides & Articles
We recommend exploring
Instagram connection to Bitrix24
Instagram connection to amoCRM
You might be interested
Setting Up an Instagram Shop: the Ultimate Guide
Instagram Notes: What They Are and How to Use Them

 3-days free trial period