How to connect Discord to Umnico
Discord is a social media platform that is especially popular among gamers and students. It has also become a relatively new but widely recognized channel for customer communication and support.
By integrating Discord with Umnico, you can effectively track and manage all customer interactions with the connected Discord page.
Umnico employs an official and reliable integration to aggregate messages from Discord, which means you can exchange text messages and share files with your customers without any delays.
Connecting Discord to Umnico
To set up Discord integration with Umnico, follow these steps:
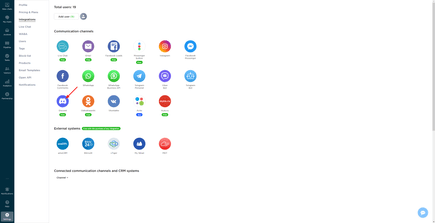
1. In Umnico, navigate to “Settings — Integrations — Discord.”
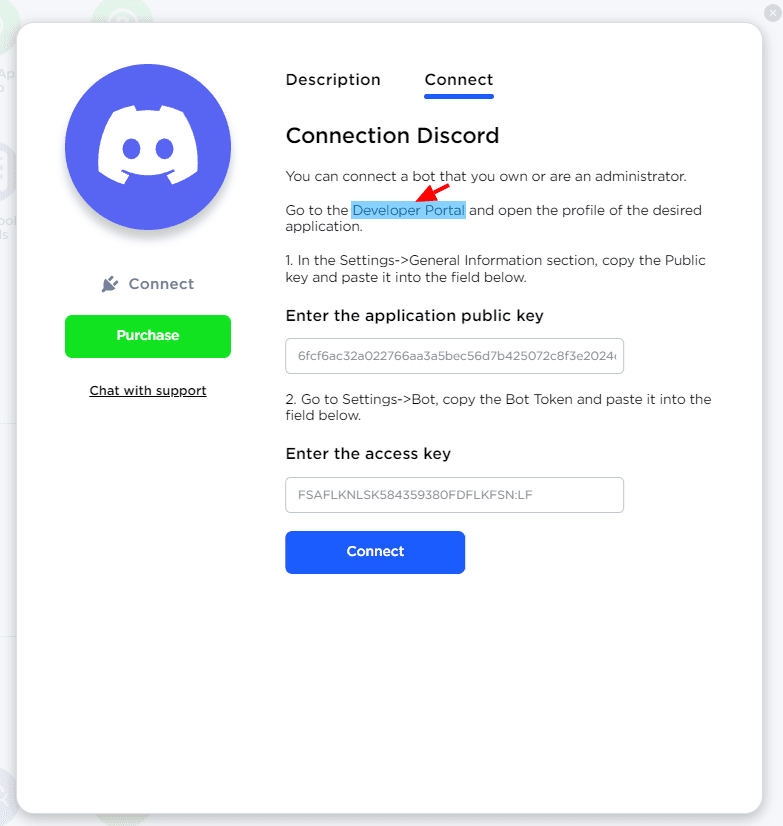
2. In a pop-up window, under the “Connection” tab, click on the “Developer Portal” link.
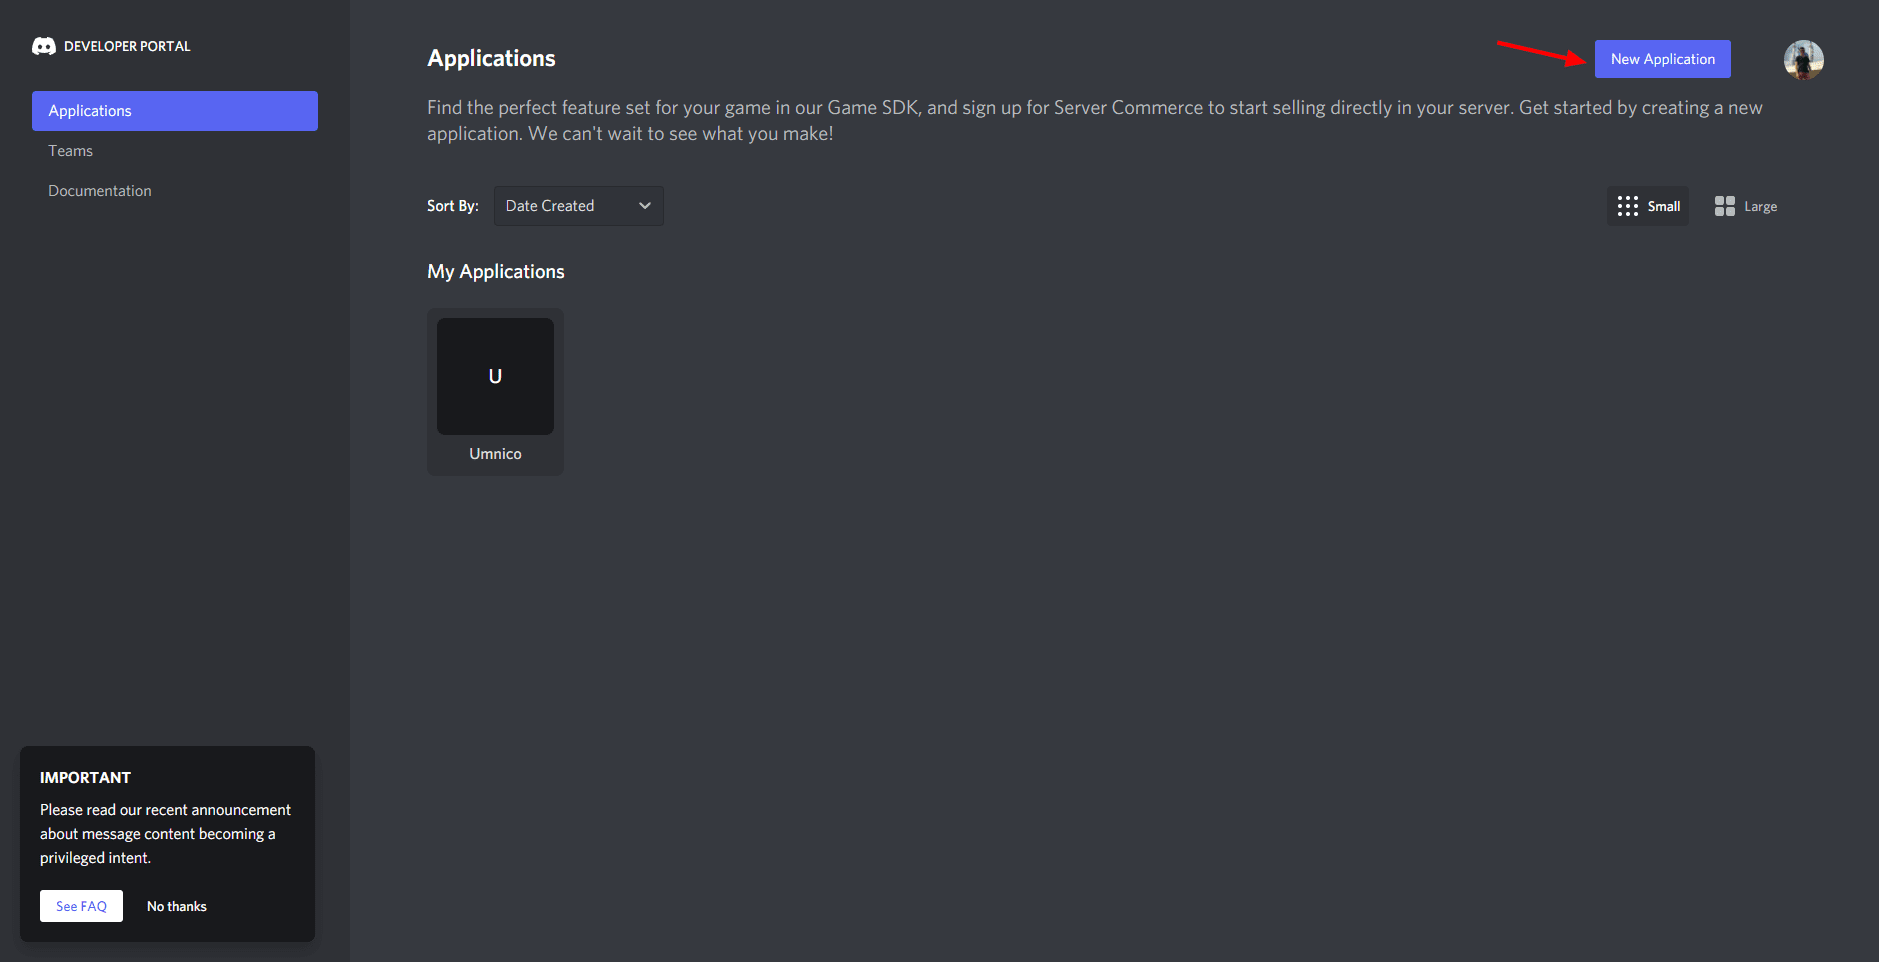
3. Create a new application by clicking the “New Application” button.
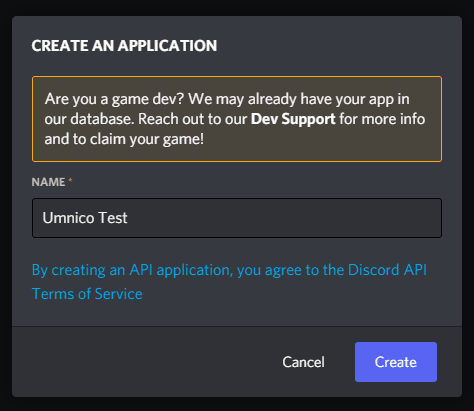
4. Provide a name for your application, and then click the “Create” button.
5. Go to the Bot section and create a bot.

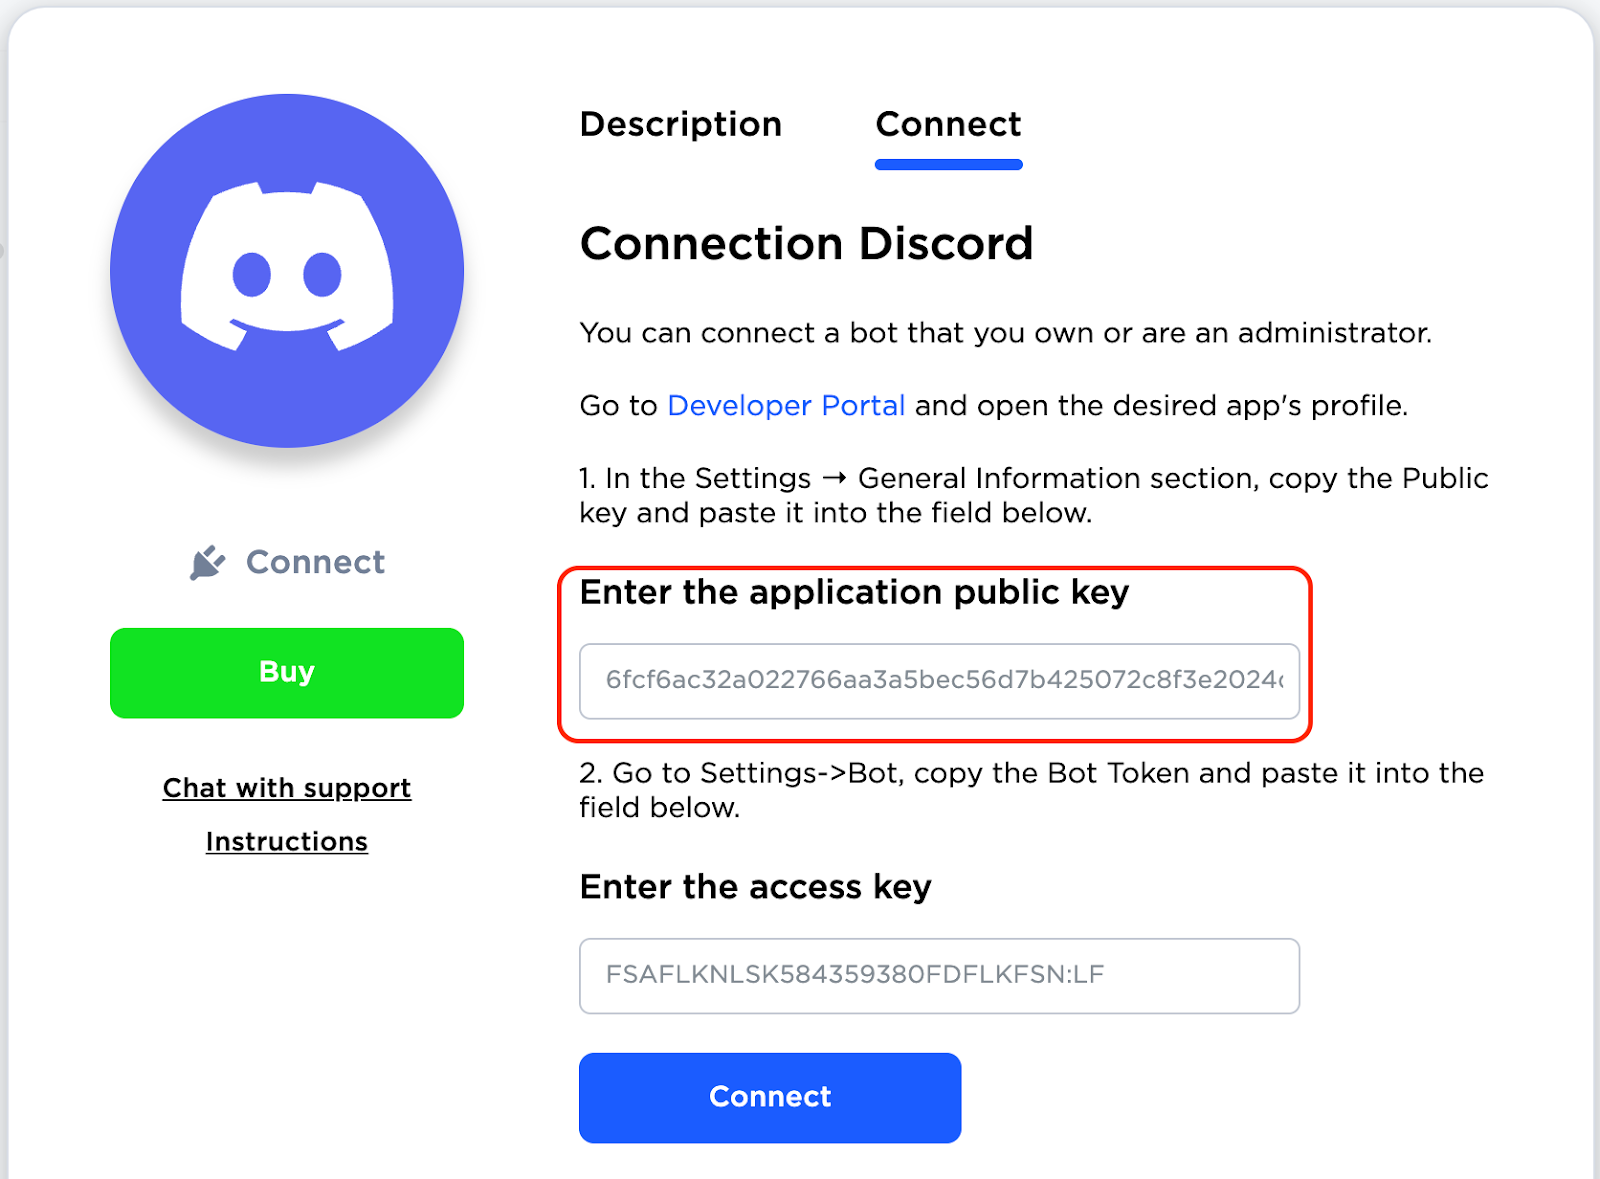
6. After creating the bot, locate the Public Key (Access Key), copy it, and return to Umnico. Paste the key into the first field.

7. Paste the copied Public Key into the “Enter access key” field of the integration connection form in Umnico:
8. In the Discord portal, navigate to the “Bot” section and click on “Reset Token” to generate a new token.
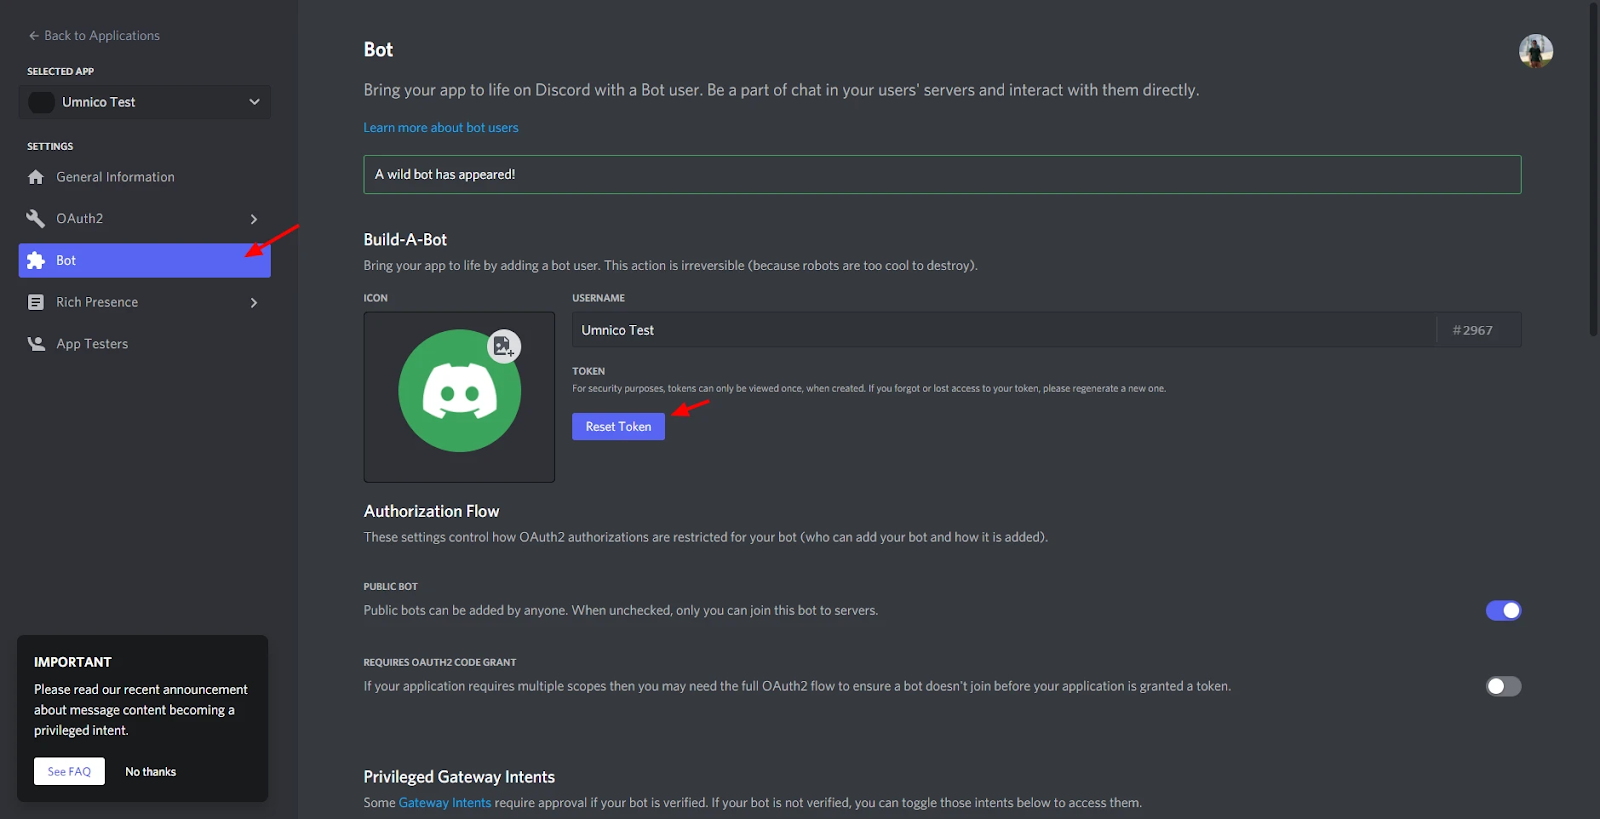
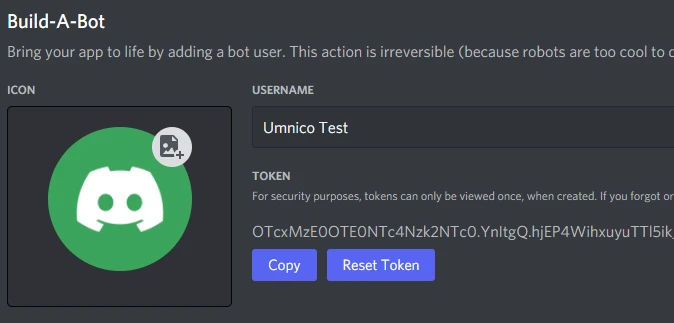
Copy the token.
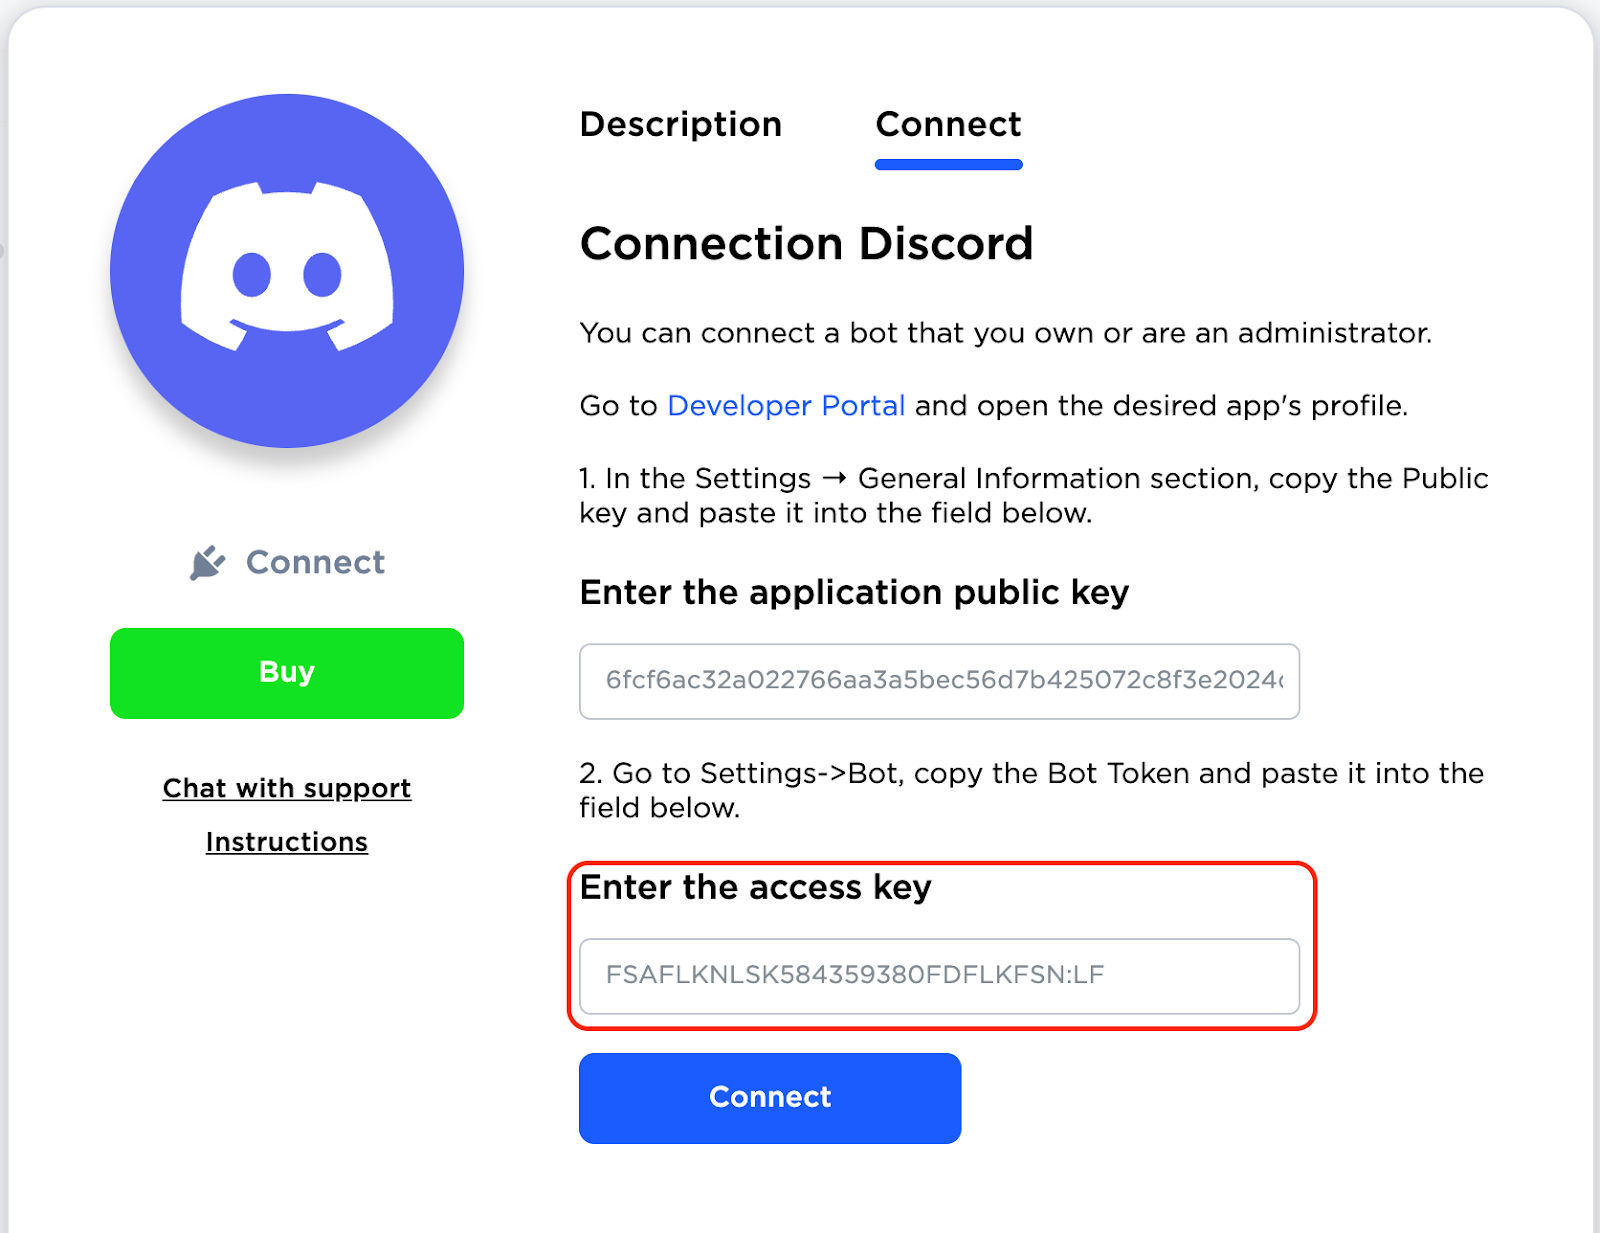
9. Paste the token into the second field in Umnico, and then click the “Connect” button.
Additional settings are required on the messenger server side to let Discord Bot work correctly with Umnico.
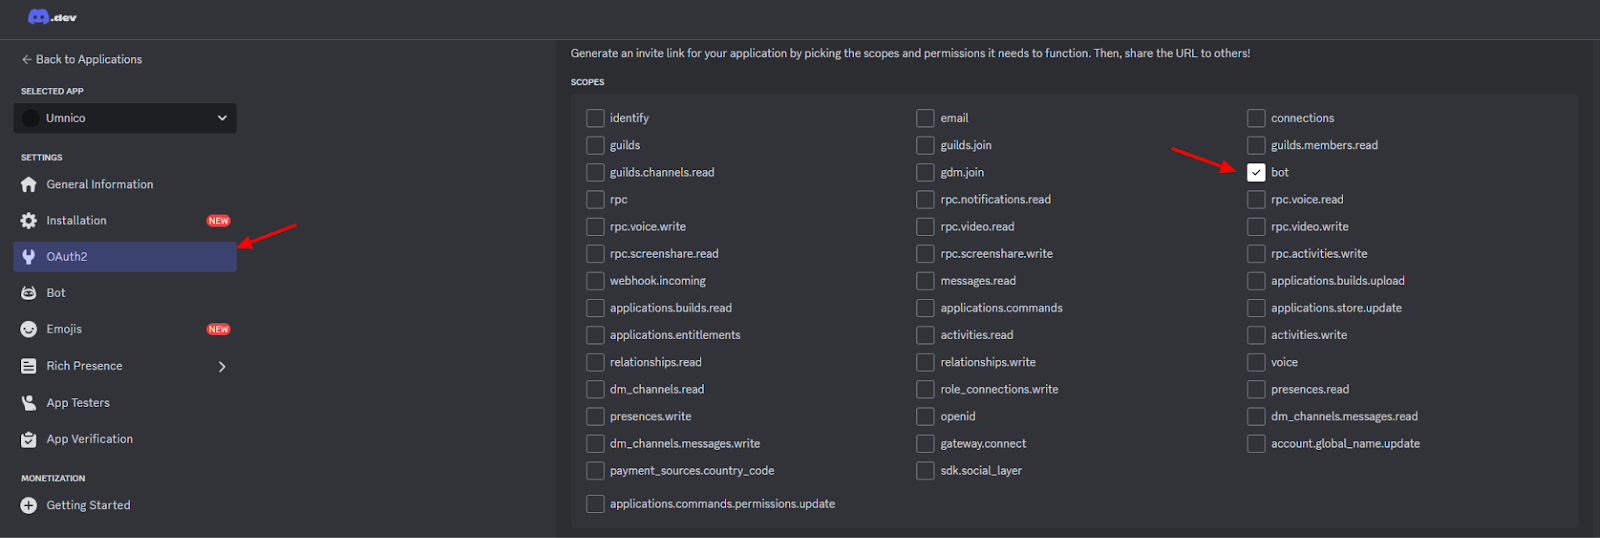
10. Get back to the Discord portal, go to the OAuth2 tab (Discord Developer Portal — API Docs for Bots and Developers) and select “bot” item.
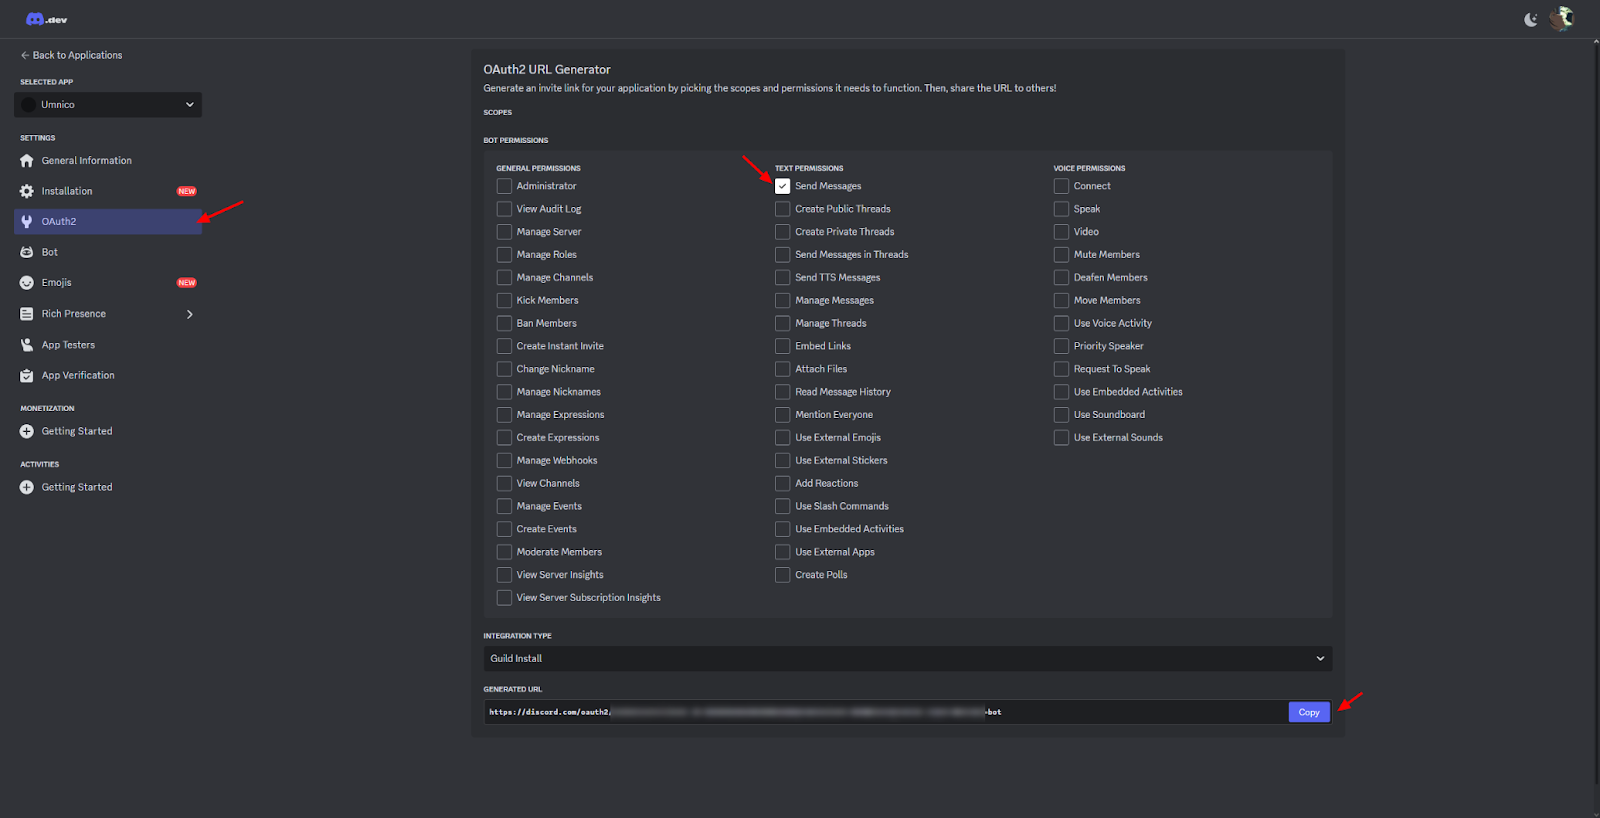
11. Grant the bot with the “Send messages” permission and copy the link.
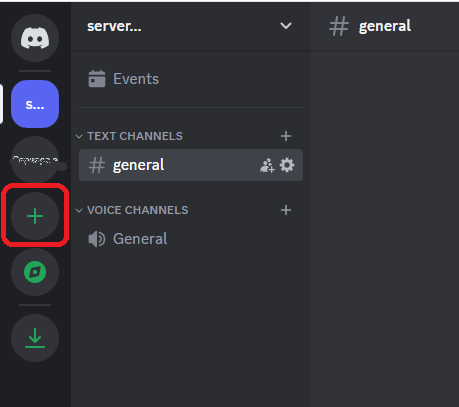
12. Create a server in Discord by clicking on the (+).
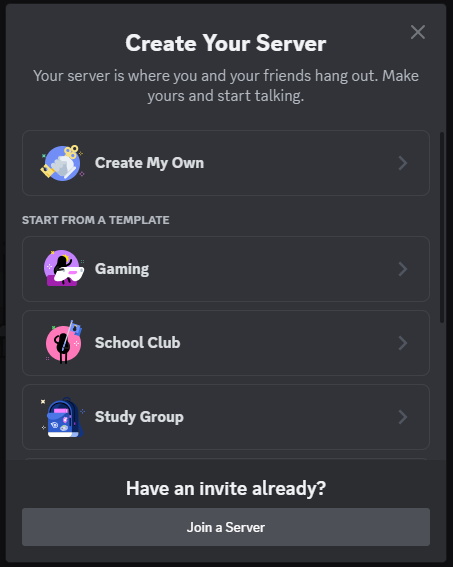
13. In the window that opens, select a server template or create your own one.
14. Select server audience.
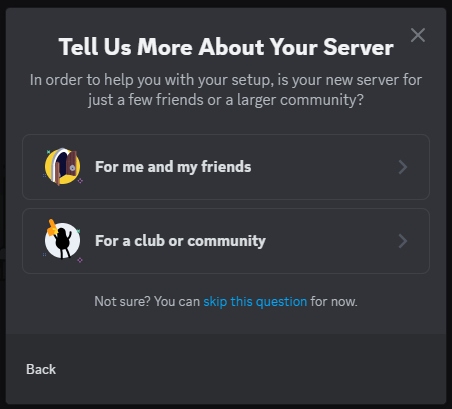
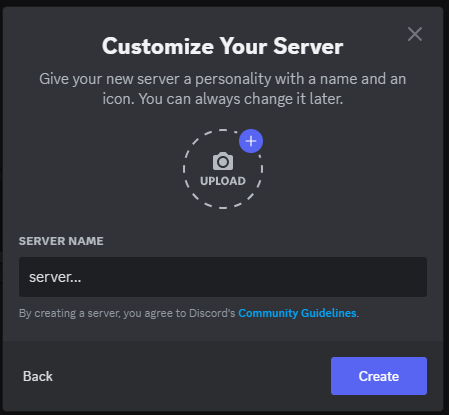
15. Enter the server name and click Create.
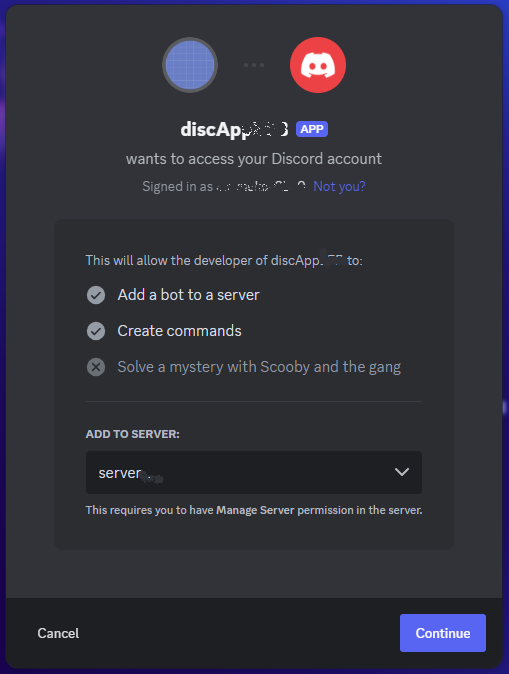
16. Open the link from step 11, in your browser tab in which you are authorized in Discord, add the bot to the server just created.
17. Open Umnico and write a first message in the Discord channel. A message from the bot you created earlier will appear in Discord.
18. Send a reply message to the bot in Discord, the message will be displayed in the Umnico chat.
The integration setup is complete. From now on, all messages sent by users on Discord will be directed to Umnico.

If you encounter any issues while connecting this integration, please reach out to Umnico support via the “Help — Chat with a support” section. We’ll be glad to help.
Also, check our article that uncovers the advantages and disadvantages of chatbots and human customer support.
 Return to list of articles
 3-days free trial period