Installing the Live Chat Plugin on a WordPress Site
WordPress is one of the most popular platforms for building websites, especially for companies. Its ease of use and flexibility make it an ideal solution for creating websites and online stores for small and medium-sized businesses.
Additionally, the popularity of live chat widgets is growing as a convenient communication channel between customers and company reps, facilitating prompt support and effective sales. In this guide, we will explain how to install free Umnico Live Chat on a WordPress site.
How to Install the Umnico Live Chat widget for a WordPress site
The process of setting up a live chat widget by Umnico on a WordPress site consists of a few simple steps.
1. In the WordPress admin panel, go to the Plugins section and click "Add New".
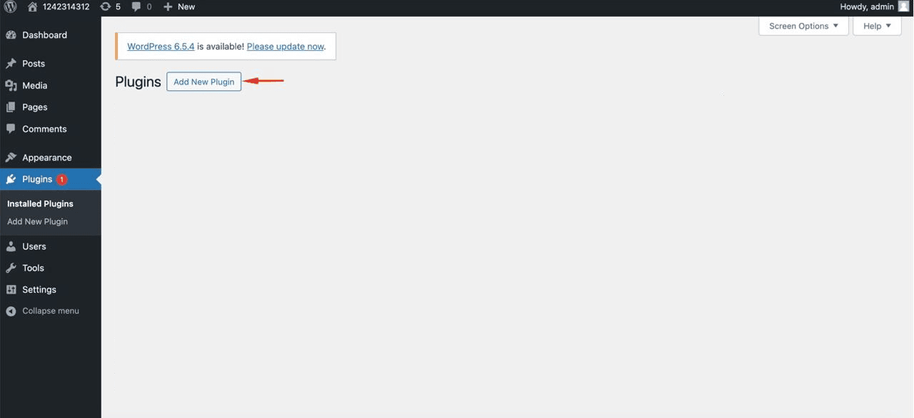
2. Use the keyword search to find the "Umnico" plugin and click "Install".
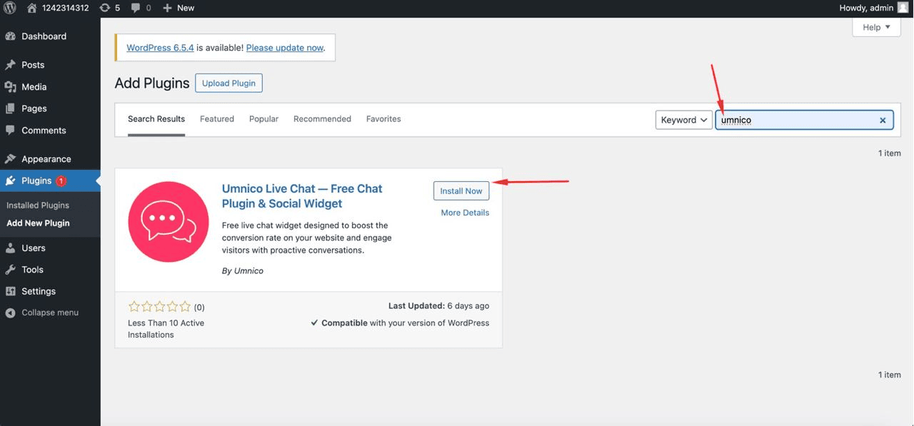
3. Click "Activate".
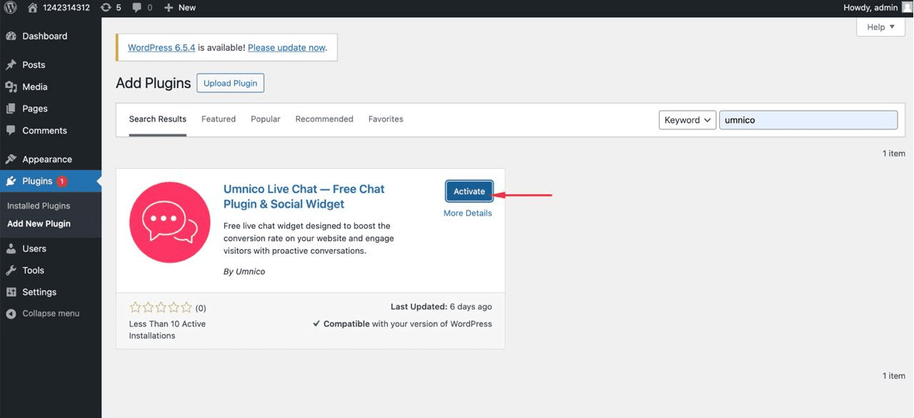
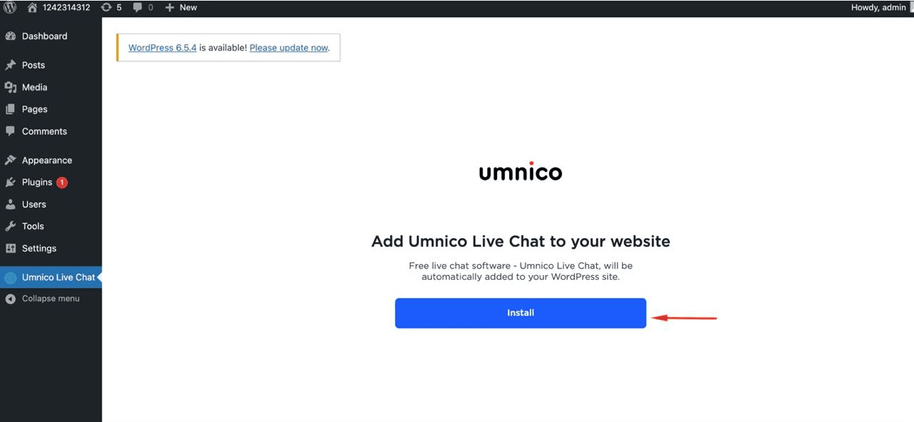
4. A "Umnico Live Chat" tab will appear in the menu on the left, go to it.
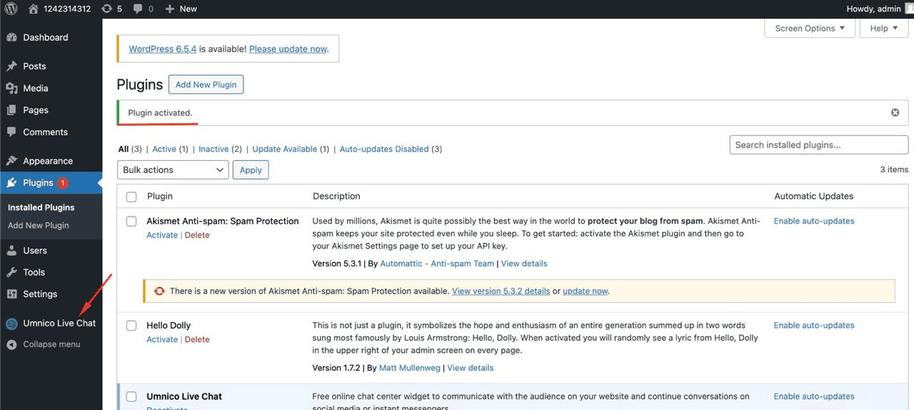
5. Click "Install".
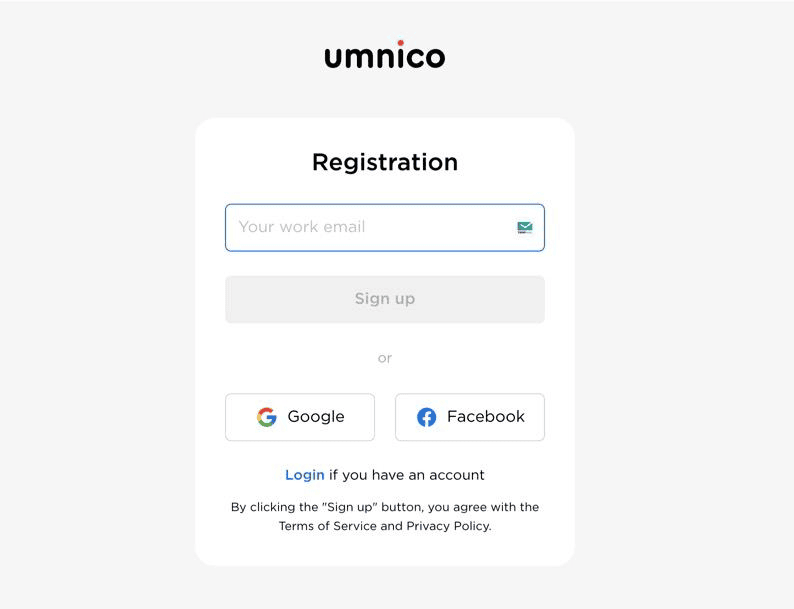
6. Enter your work email and click “Sign up”.
7. Next, click on the “Set up” button.

8. After that, the Umnico personal account will open, where you can configure the live chat widget for your WordPress website.
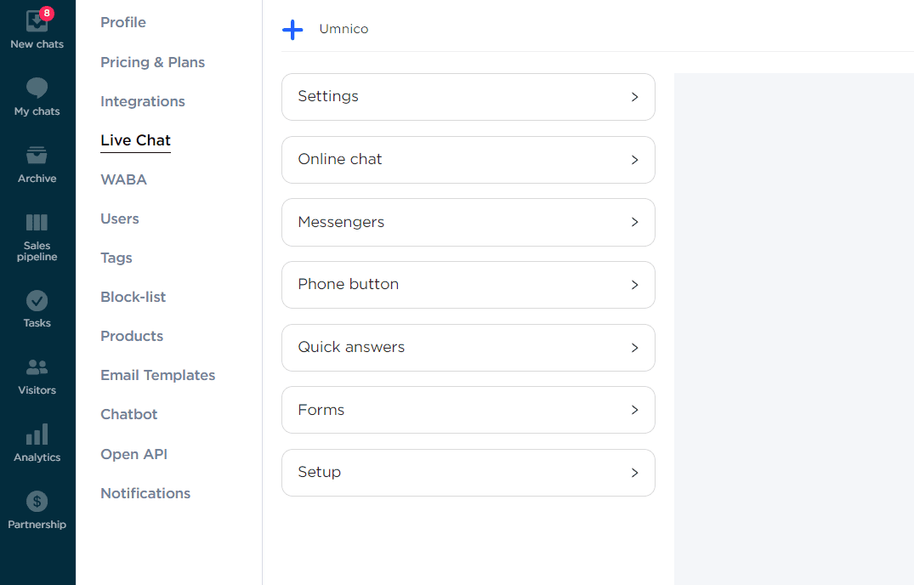
Umnico's multifunctional chat widget allows agents to quickly respond to inquiries from website visitors, reach out to them first, connect chatbots to automate communication, and integrate messengers and social media to easily continue a dialogue in a channel preferred by customers. Learn more about live chat widget functionality in our dedicated article.

 3-days free trial period