How to Connect Email to Umnico
Email has always been a highly efficient means of communication with customers, and it continues to be widely used for selling products and addressing customer inquiries.
By integrating your company's email with Umnico, you can manage all customer emails through our platform. Not a single inquiry from a client will ever be lost or left unanswered, thanks to the advanced features of the Umnico omnichannel messaging platform, including customizable reminders.
Umnico’s email integration feature is completely free, making it suitable for all Umnico users, whether they use our system for business or personal purposes. Umnico utilizes official protocols to process emails from various providers, ensuring security and stability.
Connecting Gmail to Umnico
To connect your Gmail account to Umnico, you need to enable IMAP access and configure SMTP settings. IMAP access allows you to receive Gmail emails on multiple devices simultaneously, with real-time synchronization. Alternatively, you can use the POP protocol.
Note: to avoid losing access to your account, make sure you stay within the IMAP protocol's traffic limits: 2500 MB per day for downloads and 500 MB per day for uploads. If you plan to set up IMAP access on multiple computers for the same account, take breaks after configuring it on each device.
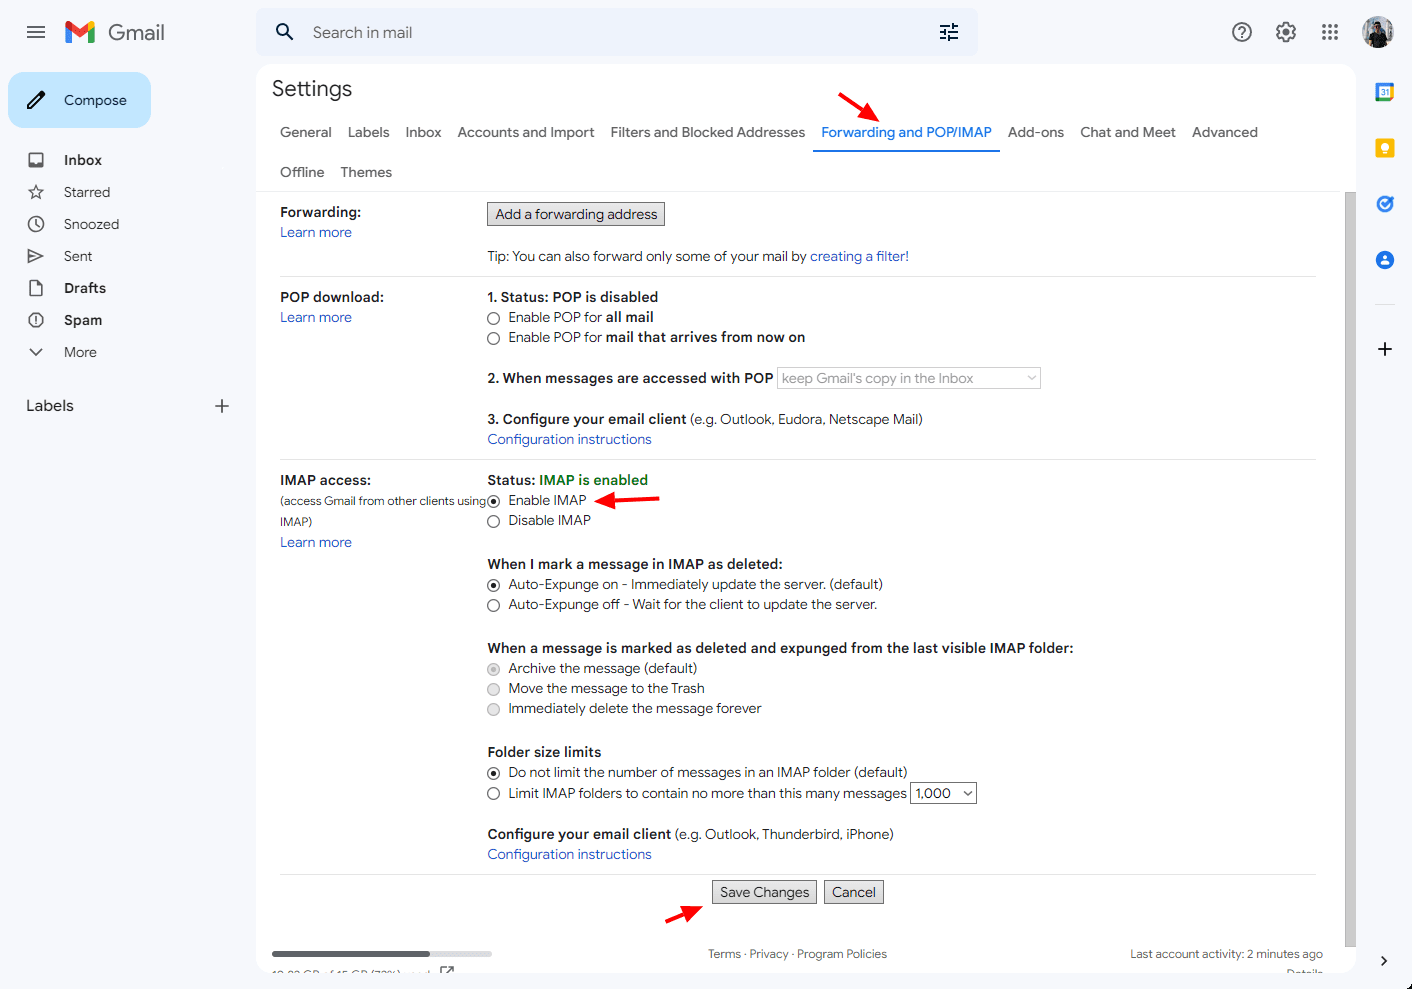
How to enable IMAP access1. Open Gmail on your computer.
2. Click on the "Settings" icon (gear icon) in the upper right corner and select "All settings".
3. Go to the "Forwarding and POP/IMAP" tab.
4. In the "IMAP Access" section, select "Enable IMAP".
5. Click "Save Changes".
How to configure IMAP and SMTP settings
Enter the data from this table in the appropriate fields:
Setting up incoming mail (IMAP):
- Server: imap.gmail.com
- Port: 993
- Enable SSL for correct operation.
Configuring outgoing mail (SMTP):
- Server: smtp.gmail.com
- Port: 465 (for SSL) or 587 (for TLS/STARTTLS)
- Enable SSL. If available, also enable TLS. Authentication is required.
For more detailed instructions, please refer to the Gmail Help Center.
How to enable Insecure Applications feature (required)
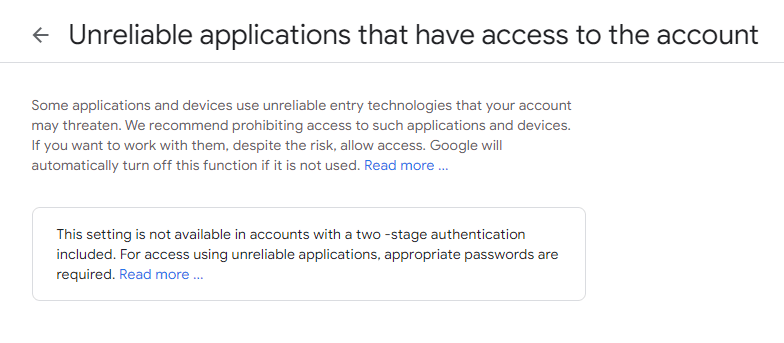
In order to ensure proper functionality of Gmail, you need to enable the Insecure Applications feature.
Go to the "Untrusted applications that have access to your account" section and change the setting from "blocked" to "allowed". Before enabling this feature, sign in to your Google account.
How to add a password for external Gmail apps (required)
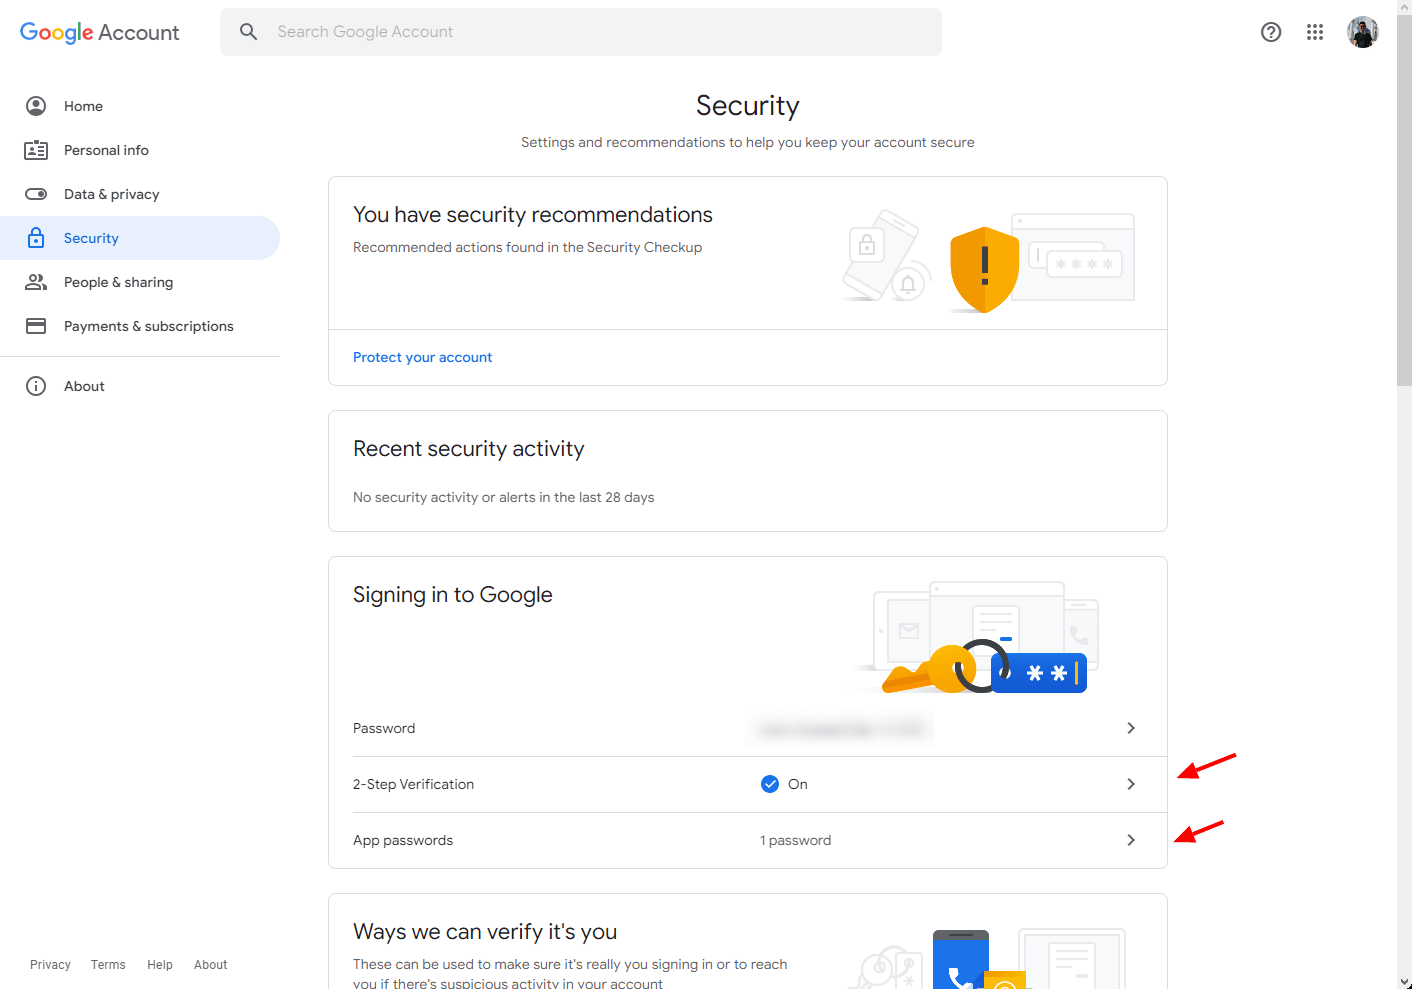
1. Enable 2-Step Verification to add a password.
2. After enabling 2-Step Verification, you may see an "Incorrect password" message when signing in to certain apps. Resolve this issue by creating an app password.
3. Open the Google Account page and click on "Security".
4. Under "Google Sign In", select "App passwords". Sign in if necessary. Note: This option may not be available if:
- 2-Step Verification is not set up for your account
- 2-Step Verification is only configured for electronic keys
- you're signed in to a work, school, or corporate account
- your account has Advanced Protection enabled.
5. At the bottom of the page, click on "Application" and select the desired option. Click "Device" and choose the model.
6. Follow the instructions to enter the application password (a 16-character code on the yellow line). Click "Done".
For more information, see the Gmail Help Center.
By following these steps, you will be able to connect your Gmail account with Umnico.
Connecting Mail.ru to Umnico
To connect your Mail.ru account to Umnico, you need to create a password for an external application:
1. Go to Mail ID settings and navigate to “Security” and then “Passwords for external applications”.
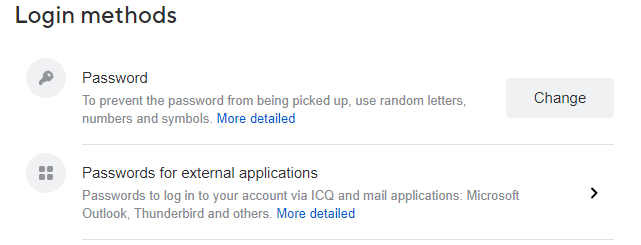
2. Click the "Add" button.
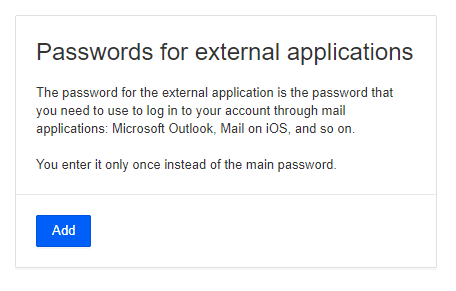
3. Enter a name for the application to remember the password.
4. Copy the generated code and click “Complete”.
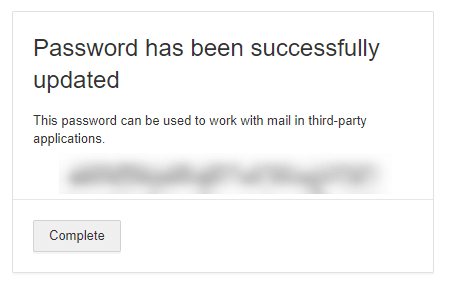
5. Use this code instead of your password when first entering the app.
Configuring IMAP and SMTP Settings for Mail.ru
Enter the data from the table below in the IMAP and SMTP settings:
Setting up incoming mail (IMAP):
- Server: imap.mail.ru
- Port: 993
- Enable SSL for correct operation.
Configuring outgoing mail (SMTP):
- Server: smtp.mail.com
- Port: 465 (for SSL) or 587 (for TLS/STARTTLS)
- Enable SSL. If available, enable TLS as well.
For further assistance, please refer to the Mail.ru Help Center.
Connecting Yandex Mail to Umnico
To connect Yandex Mail to Umnico, follow these steps:
Mailbox Setup
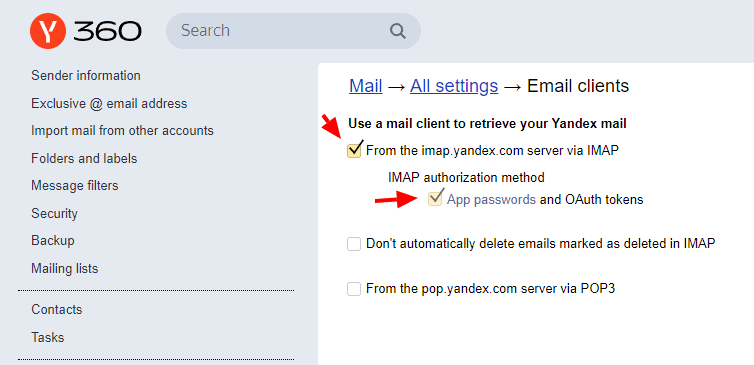
1. Open Yandex.Mail settings and go to the "Mail programs" section.
2. Tick boxes for the options to use the imap.yandex.ru server with the IMAP protocol, along with "App passwords and OAuth tokens".
3. Save changes.
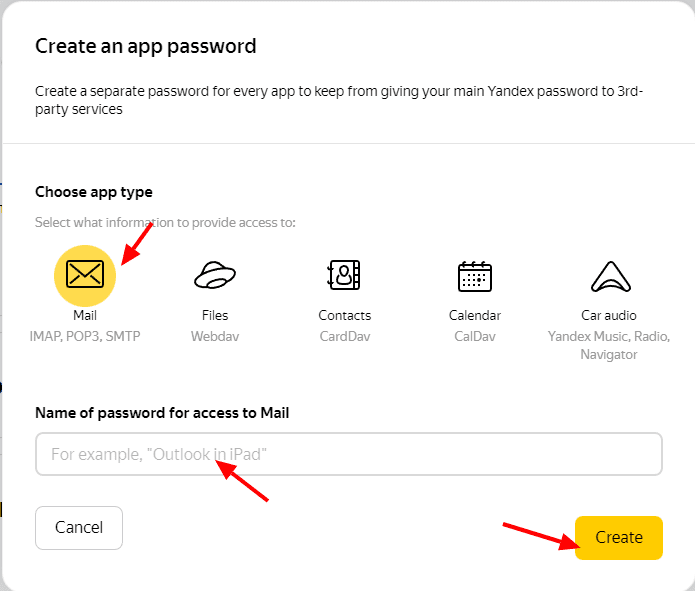
Creating application passwords
1. Open the Account Management page.

2. In the "Passwords and Authorization" section, enable application passwords. Confirm the action and click "Create a new password". If you have two-factor authentication enabled, simply click "Create App Password".
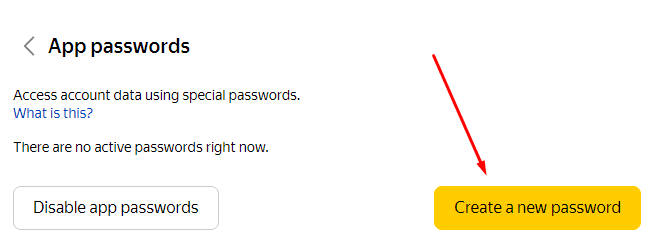
3. Choose the “Mail” app type.
4. Assign a name to the password, such as the app’s name you are creating it for. This name will be displayed in the list.
5. Click "Create", and a pop-up window will display the application password.
How to configure IMAP and SMTP settings for Yandex Mail
Enter the data from the table below in the IMAP and SMTP settings:
Setting up incoming mail (IMAP):
- Server: imap.yandex.ru
- Port: 993
- Enable SSL for proper functioning.
Configuring outgoing mail (SMTP):
- Server: smtp.yandex.ru
- Port: 465 (for SSL) or 587 (for TLS/STARTTLS)
- Enable SSL. Authentication is required.
For additional information, please consult the Yandex Help Center.
Learn more about effective text-based communication with customers in our comprehensive guide.

 3-days free trial period