How to build a chatbot for WhatsApp
Customer support via messengers is one of the key ways for brands in various industries to interact with customers. Given its user base of over two billion, WhatsApp is a crucial communication channel for businesses.
However, the sheer volume of inquiries coming through the platform can be challenging for employees to manage manually. Chatbots offer a solution to automate routine tasks, and with the advent of modern visual designers, setting them up has become a streamlined process. This guide will demonstrate how businesses can leverage the Umnico builder to swiftly and effectively create chatbots for WhatsApp.
What is WhatsApp chatbot
A chatbot for WhatsApp is a digital solution that enables a company to automate interactions with users via the WhatsApp platform. Pre-programmed scripts and algorithms of large language models (LLMs) enable such bots to comprehend the user's input, respond to queries, furnish information, accept instructions, or redirect users to the appropriate specialists.
WhatsApp chatbots are widely used in customer service, marketing, and sales, enabling companies to manage high volumes of inquiries and provide 24/7 support effectively. They can also be integrated with other systems to streamline the user journey, including making a reservation or creating an order.
How to create WhatsApp chatbot for free
As with all sophisticated technological solutions that utilize AI technologies, the tools for creating chatbots for WhatsApp are available on a subscription or other paid basis. After purchasing access to the tool, any user can easily customize the bot without the need for programmers.
How to create a chatbot for WhatsApp yourself
Let's take a step-by-step look at how to create and set up a chatbot for WhatsApp in Umnico.
1. Connecting WhatsApp via WEB protocol
1. We recommend that you first terminate WhatsApp sessions on other devices. To do this, in the WhatsApp app, tap the three vertical dots in the top right corner, then “Linked devices”, select the other devices in turn, and tap “Log out”.
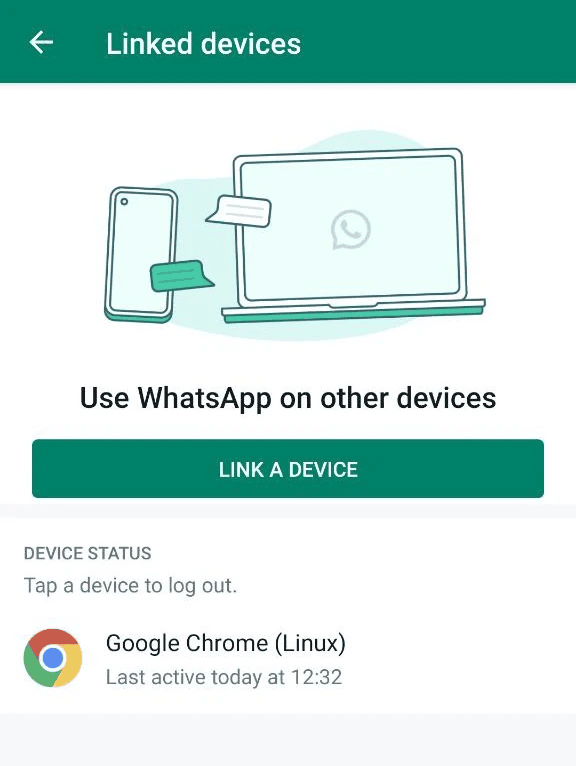
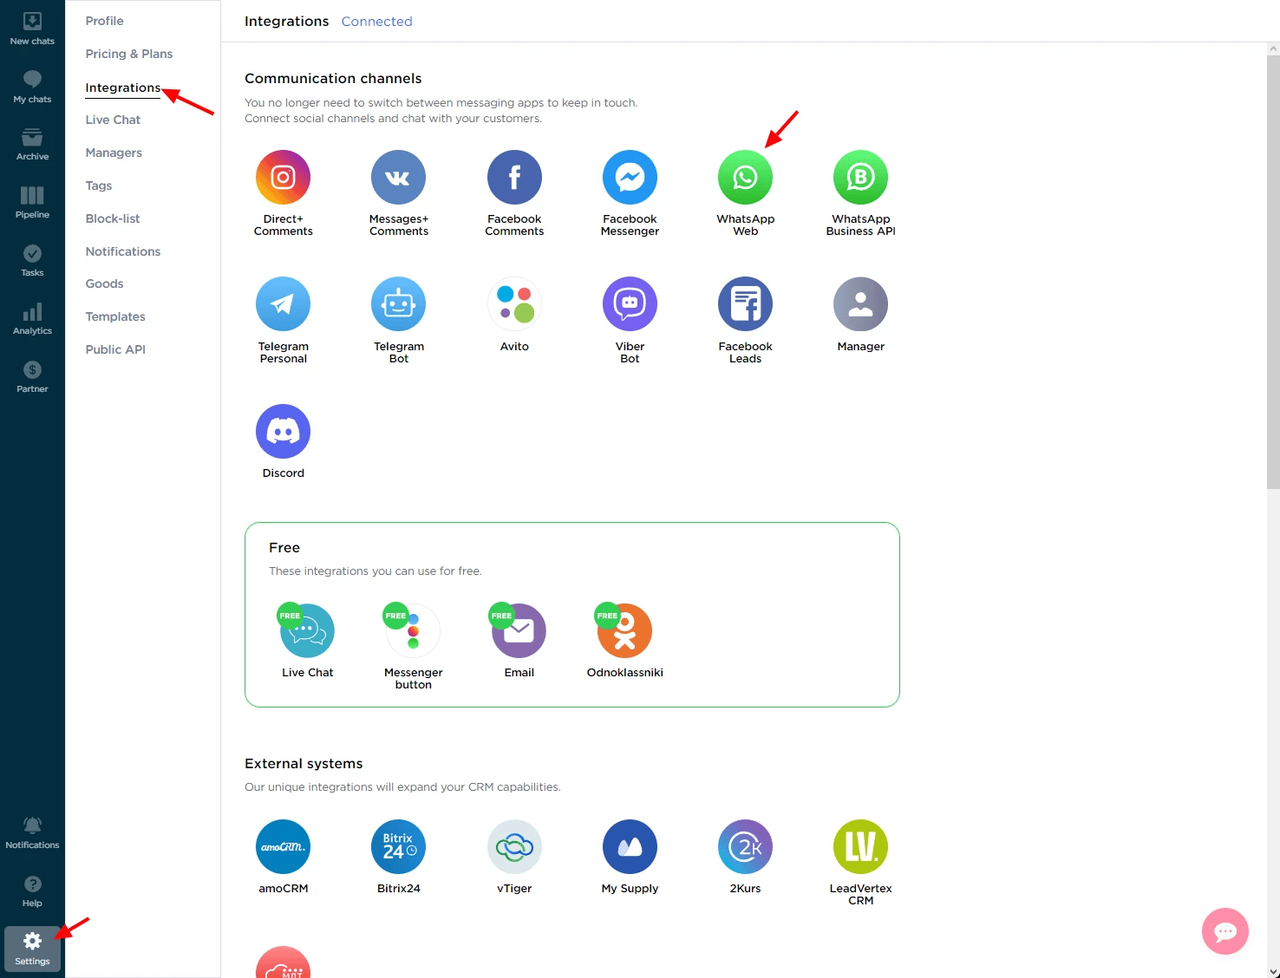
2. In the Umnico personal account, select “Settings - Integrations - WhatsApp Web”.
3. The QR code connection window will appear.
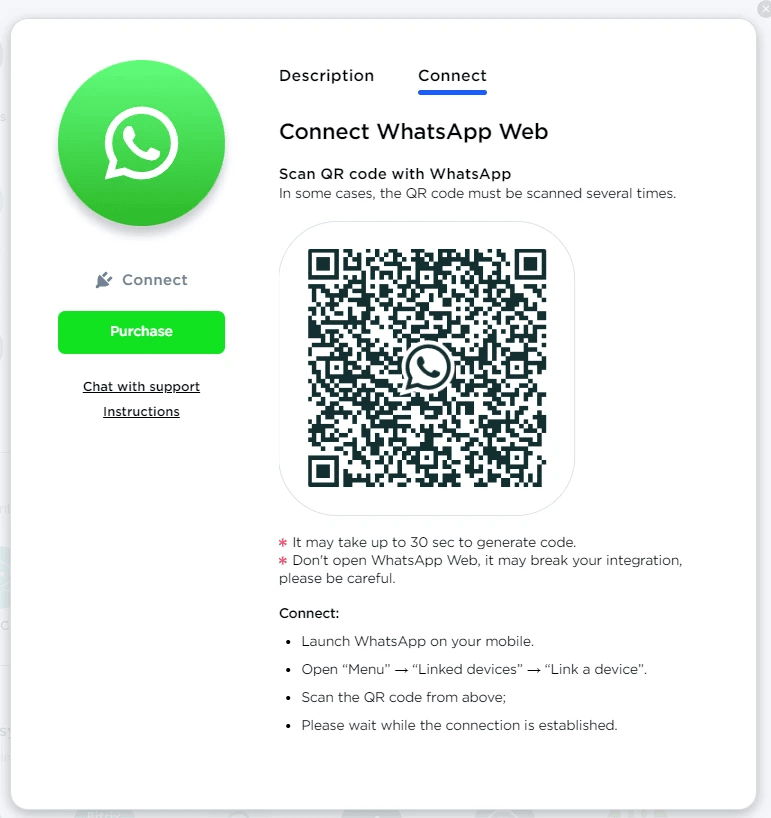
4. Open WhatsApp and tap the three vertical dots in the top right corner. Select “Linked Devices” to open the QR code scanner. Scan the QR code from Umnico with your phone.
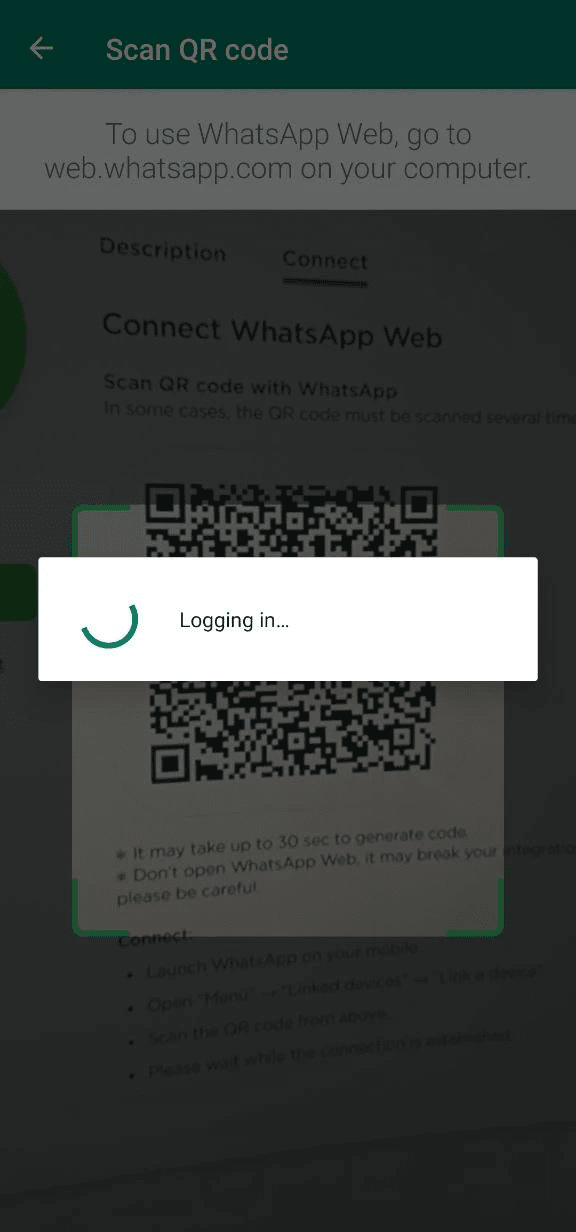
5. The connection window will close, and the WhatsApp Web integration with the number will appear in the “Connected” section. From now on, all messages from WhatsApp will be delivered to Umnico.

Please note that you can use WhatsApp on up to four linked devices simultaneously without leaving your primary phone connected. However, to maintain the functionality of your linked devices, you must log in to your WhatsApp account on your primary phone every 14 days.
2. Creating a chatbot
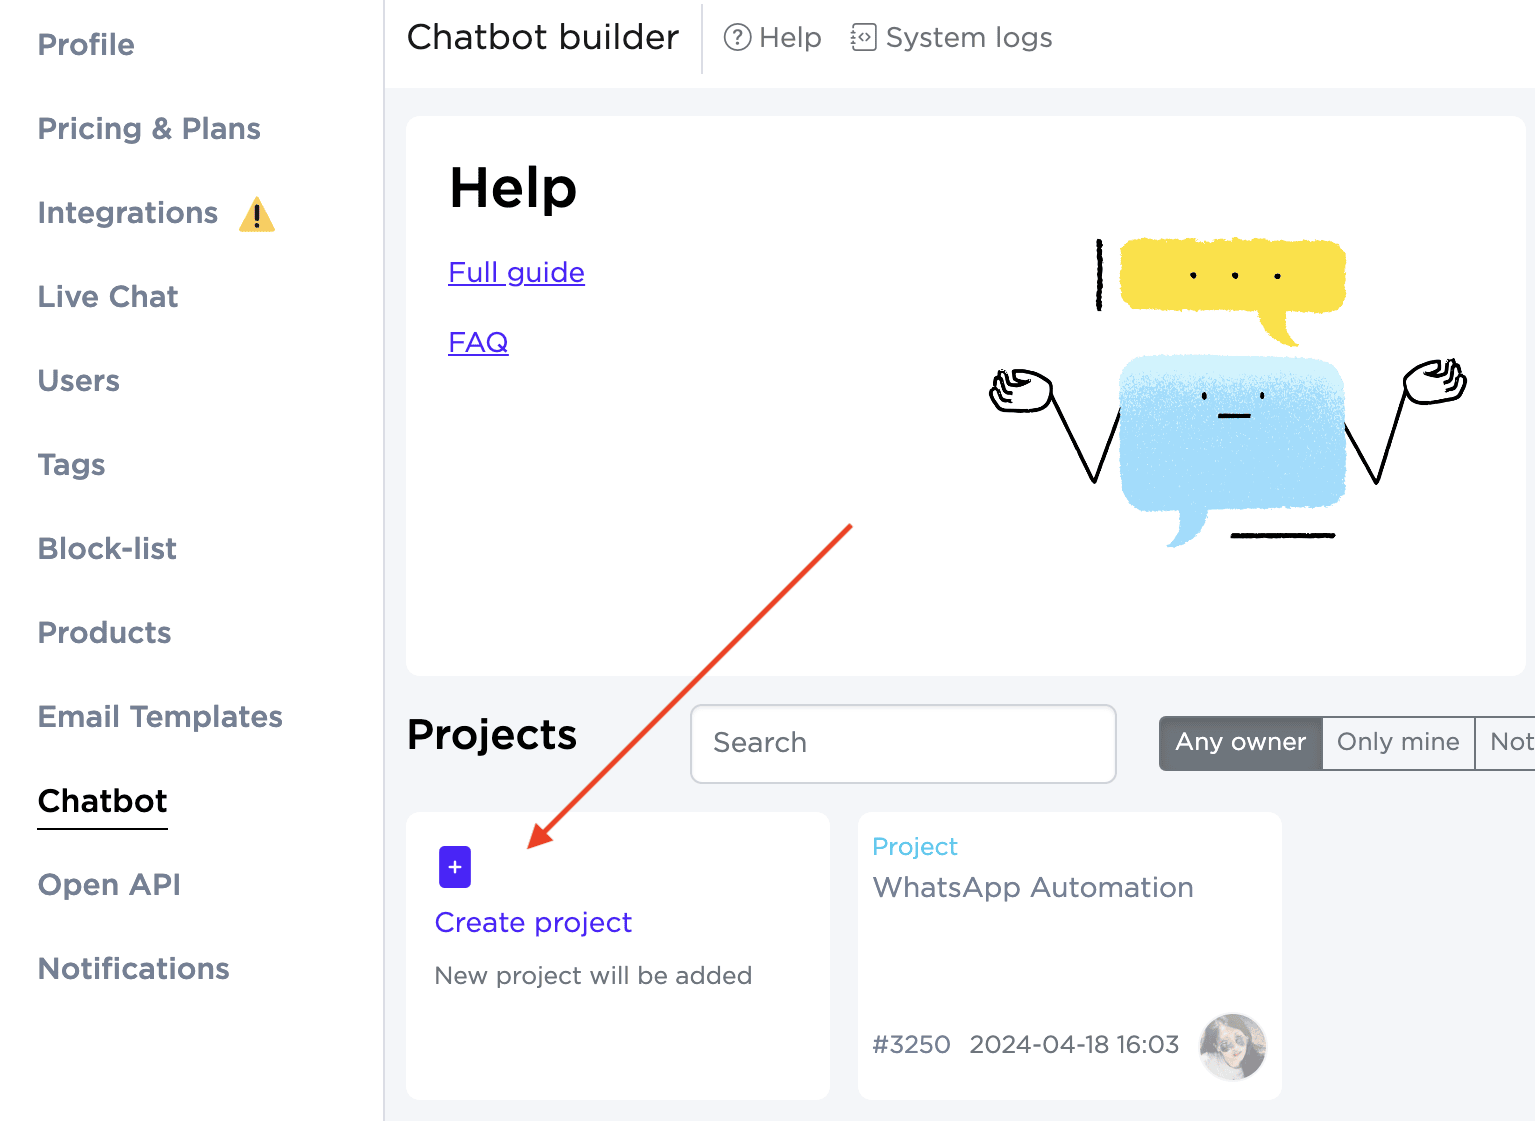
1. Before setting up a chatbot for WhatsApp, you will need to create one. In the left menu, open the “Chatbot” section and click “Create project”.
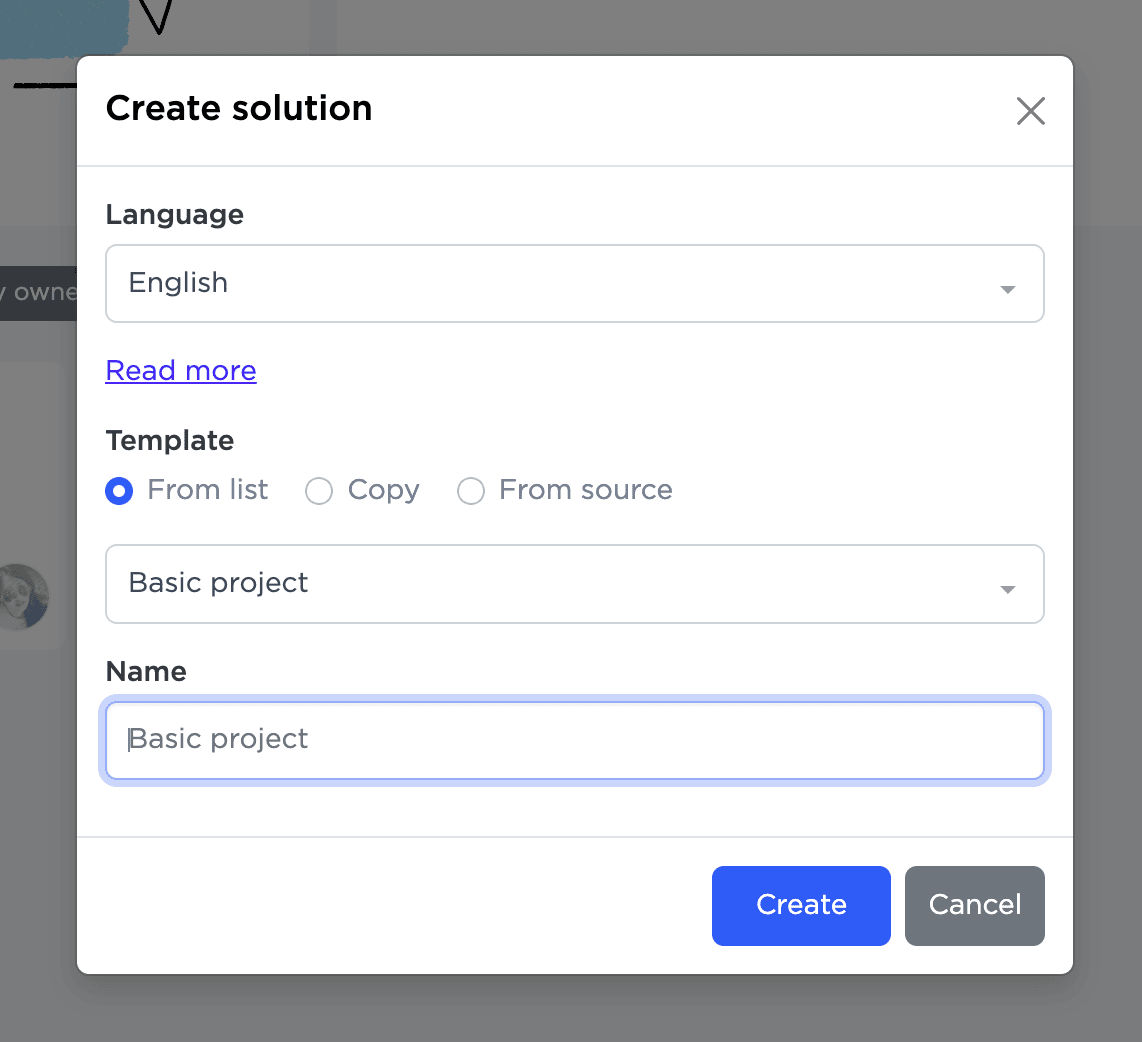
2. To create a new template, select “From list” and set the desired bot name. To copy an existing chatbot, select “Copy”, to work with source code - “From source”.
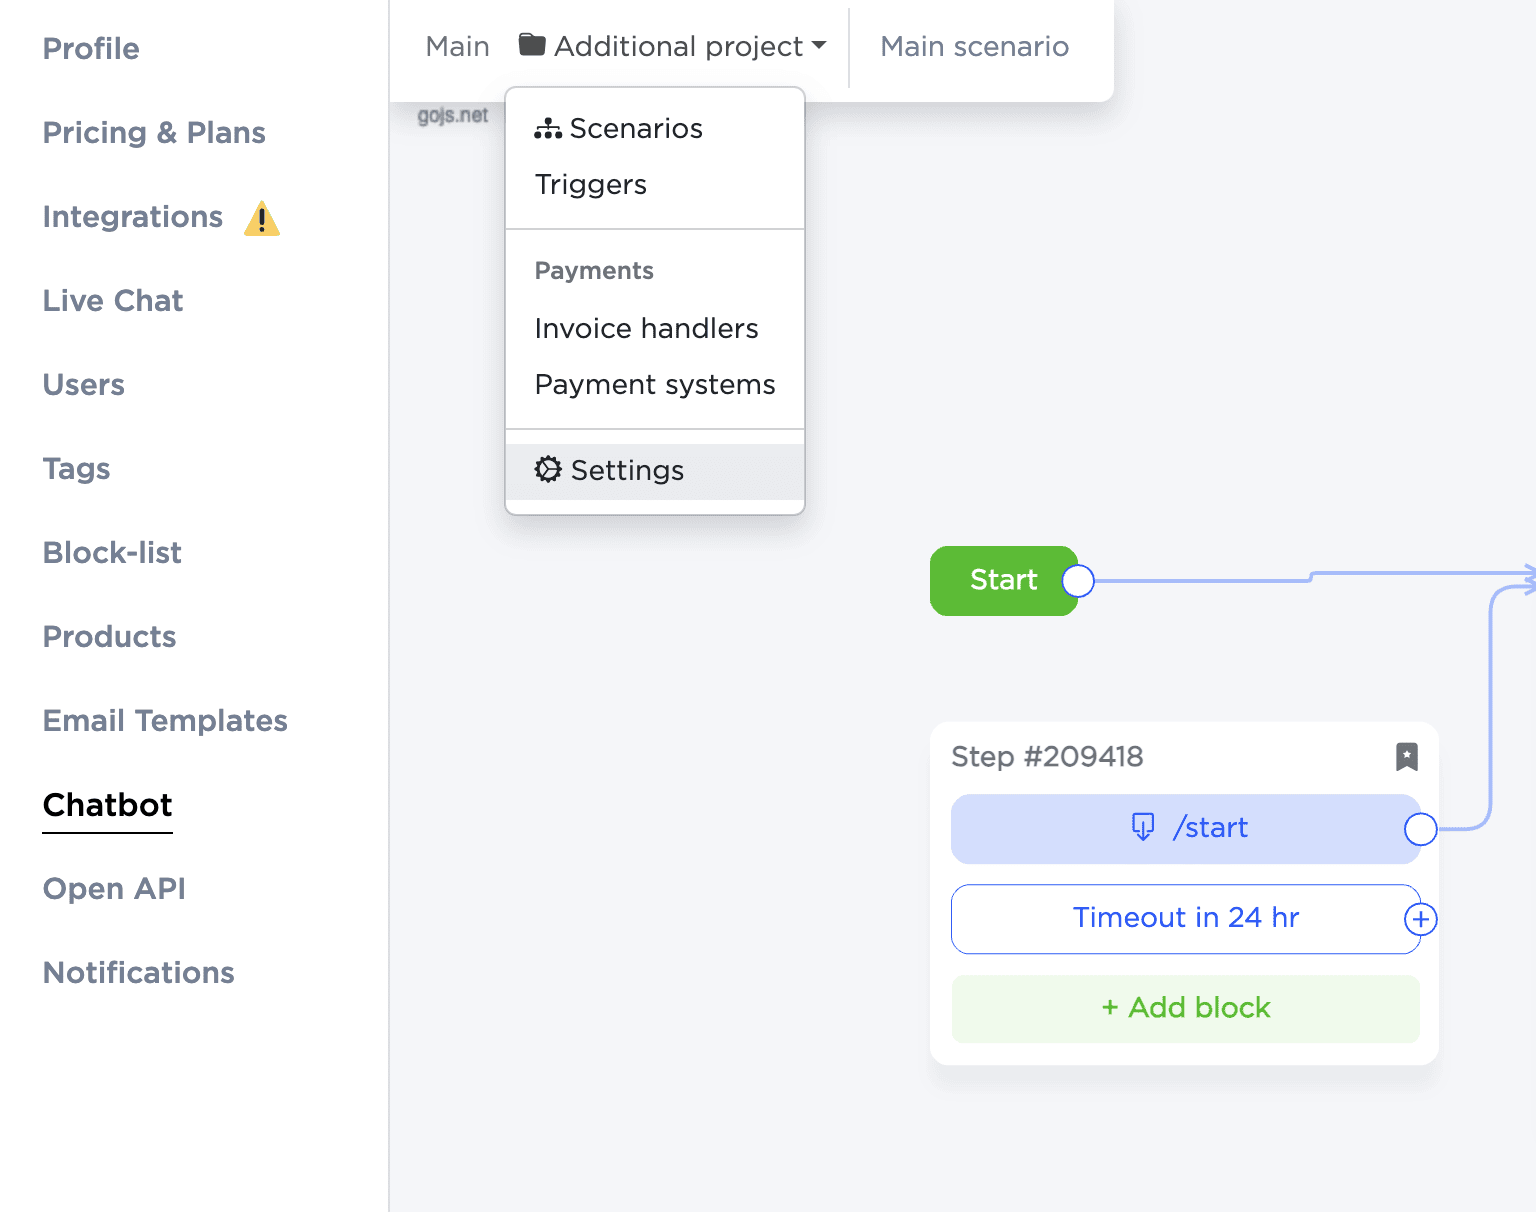
3. In the settings of the created chatbot, select WhatsApp to send messages. To do this, click “Settings”.
4. Select the configured WhatsApp integration in Umnico in the “Messengers” tab.
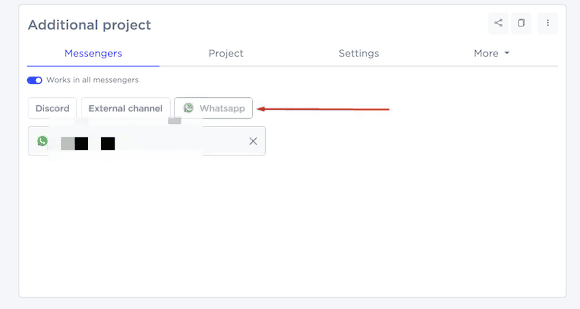
5. Click the “Refresh” button to save the connection parameters and proceed to the creation of the chatbot scenario.
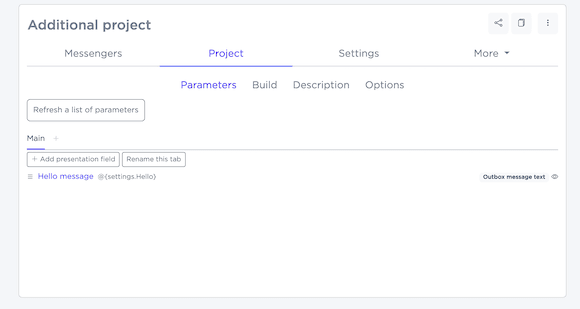
3. Structure of a chatbot script
Once a chatbot project has been created, the chatbot builder will open. It is a flowchart where the user can create message chains for dialogs with customers by adding blocks with text, conditional responses, triggers, and actions.
A chatbot script is a flowchart consisting of sequential steps connected by arrows. Each step can perform different functions, and a project can include several such scenarios.
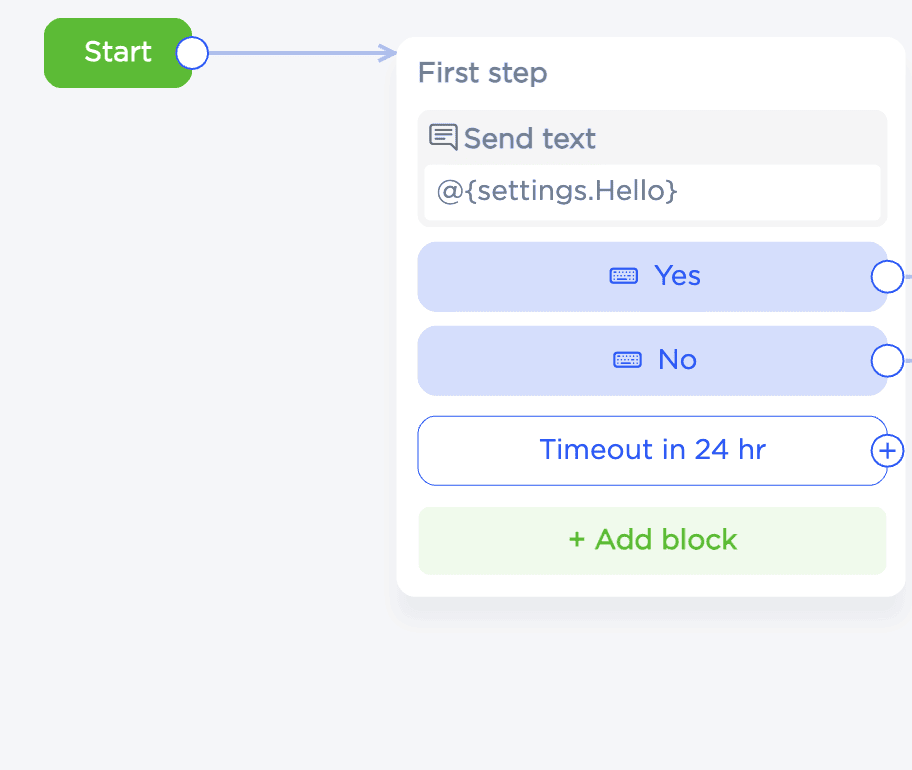
In the workspace, you see the steps and the links between them. To create a new step linked to the previous step, click on the “+” sign. Then, without releasing the mouse button, place the step anywhere in the workspace. To add an unlinked step, use the right mouse button and select “Add Step”. To name a step, double-click on it.
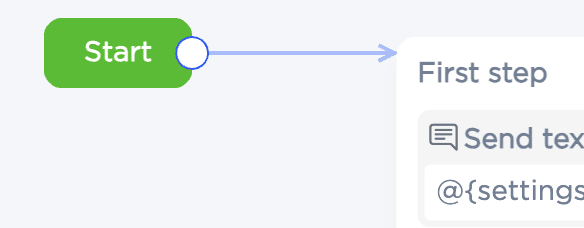
To change the location of an arrow, first select it, then hold the cursor at its end and drag it to the new step.
To remove an arrow, you must select it and then press the Del key.
Double-click an arrow to focus on the step it points to.
When you move to a new step, the actions specified for that step are performed first, and then the scenario moves to the next step. When the steps are complete, the script ends.
4. Delay before transition
To set the time delay between steps, select the desired step and change the corresponding field in its settings.

5. Performing actions in a step
For each step, you can define certain actions that are performed when the script moves to that step. For example, this could be sending a specific message response.
Any step can contain multiple actions. The actions are executed sequentially. You can add a new action via the “add block” button.
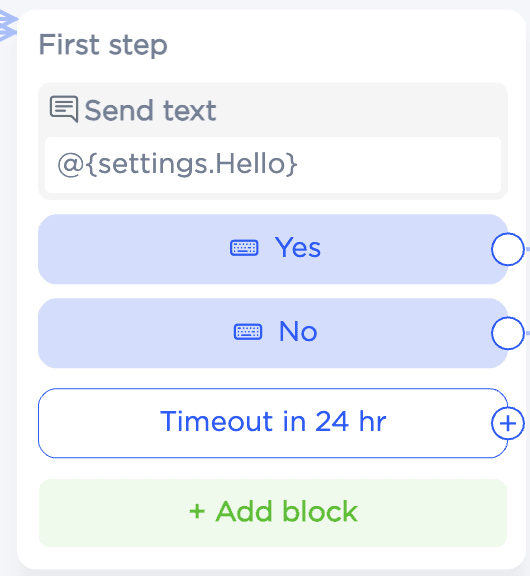
You can change the order of the steps by dragging them with the mouse. Moving is also possible between different steps.
6. Conditions for actions
To redirect the client to different parts of the chatbot scenario or skip actions depending on certain values, you can add a condition. To do this, open the Add Block menu and select the “Condition” option. When the scenario reaches a step with a condition, the system checks the conditions sequentially, starting with the first one. The transition is made by the first true condition. If none of the conditions is met, the path specified in the “Otherwise” block is used.
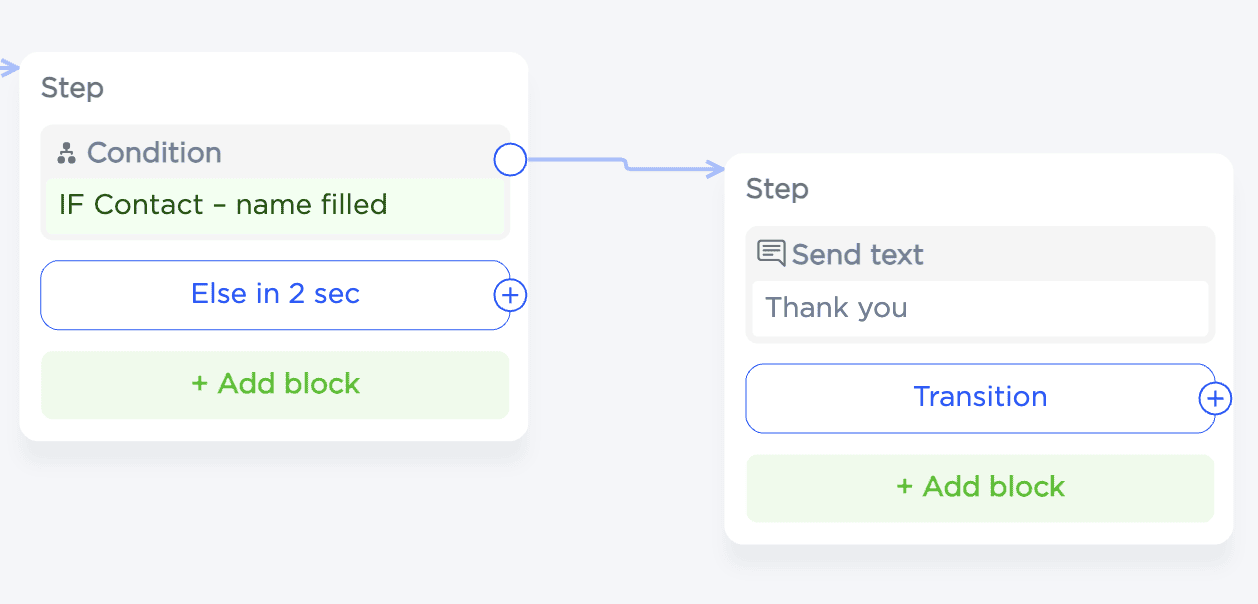
To edit the conditions, you need to expand the details of the action:
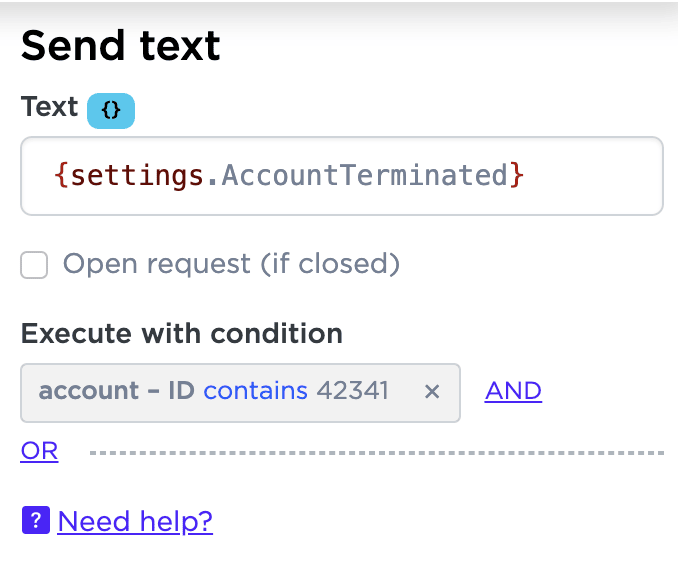
7. Displaying conditions
Conditions are organized in blocks. Each block can contain one or more conditions, which are linked with a logical AND and the blocks themselves with a logical OR.
This is what two blocks with one condition in each look like:
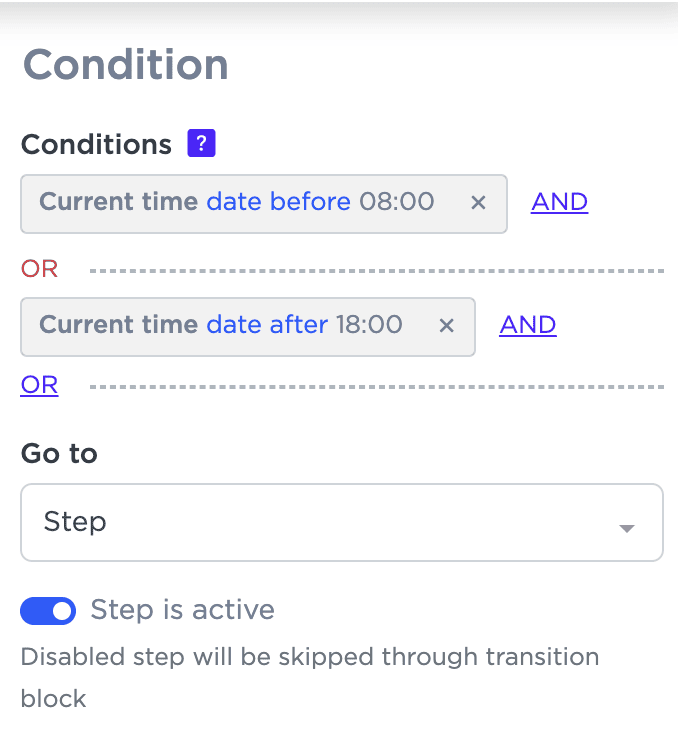
In the first example, the condition is true if the current time is not between 8:00 AM and 6:00 PM.
And here, if the current time is within that time period.
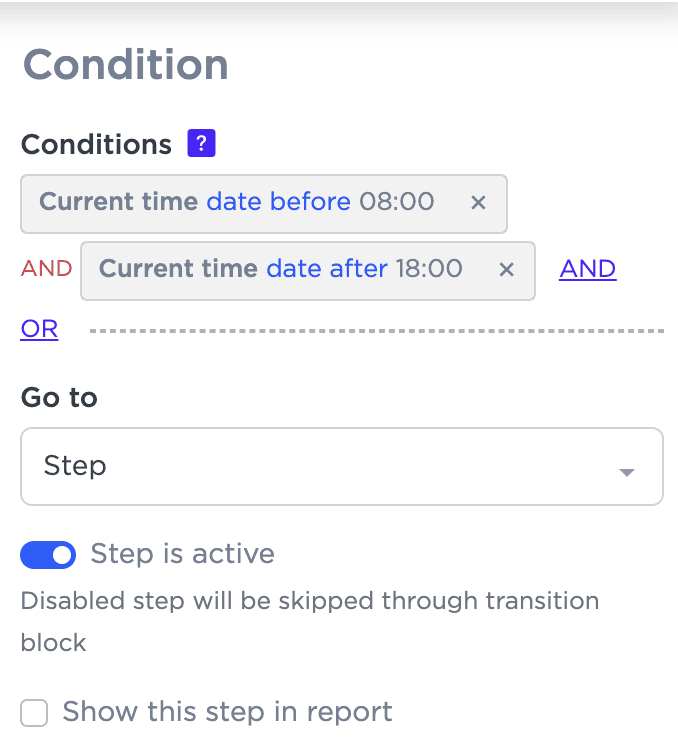
At least one block must be true for a condition to be met, and within a block, all conditions must be met.
8. Creating conditions
To add the first condition, press “+”. To add a condition to an existing block use the “AND” button, to create a new block use the “OR” button.
A condition includes:
- Variable (list of all variables);
- Internal index of a variable (if the variable is an array);
- Operator (comparison method);
- Operand (value to be compared).
The type of each variable determines the available list of operators and operand type.
Any condition can be inverted by setting the “No” flag in the settings. This reverses the value of the condition.
9. Event blocks
Event blocks are activated when a specific event occurs (blue/yellow color). The script waits for the event to occur and jumps to the appropriate block. If the event does not occur within the timeout period (24 hours), the script proceeds to the next step.
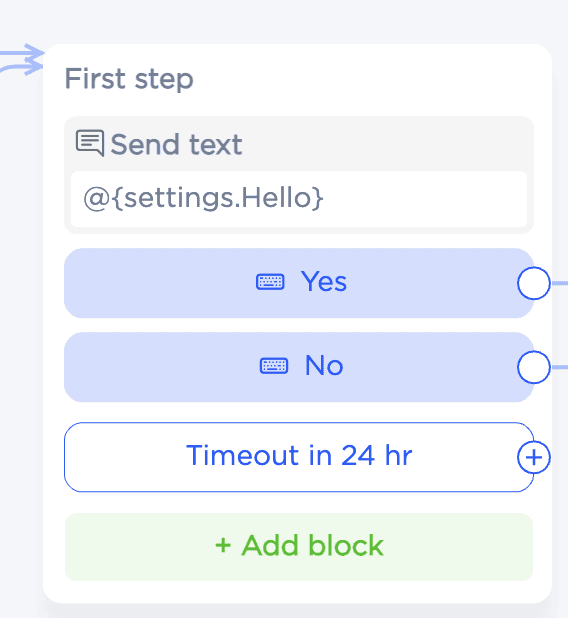
Unlike conditions, which are checked once at the step transition, events are checked at the time of waiting on a step.
Most events process all waiting scripts.
Blue events (incoming messages) are processed one at a time: the script that sent the last message, or the script that was created earlier, has priority.
If no script has processed the message, it is passed to the global branch.
Event types:
- Message from user: Handled by a single script (priority is given to the last person who sent the message).
- Conditions: full match, keywords (with all, with any, except), email, number, phone, image, any reply.
- Email: message.email
- Number: message.text
- Phone number: message.phone
- Picture: message.attachment
- Any reply: Processes all unprocessed messages.
10. Waiting for a specific event
To respond to specific user actions, the step contains wait blocks. For example, to wait for the word “yes” to be entered, add a Full match block and specify the required phrase. The step waits for the “Message from Customer” event that meets the specified conditions
 | 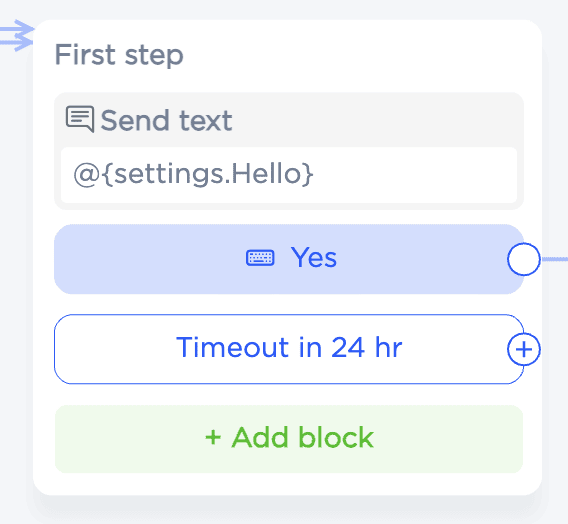 |
The event is triggered when the scenario is at the appropriate step.
The default timeout is 24 hours. To set a custom timeout, you must change it in the Step Settings.
Multiple expected events can be set for a single step. Triggering any of these events will move the scenario forward.
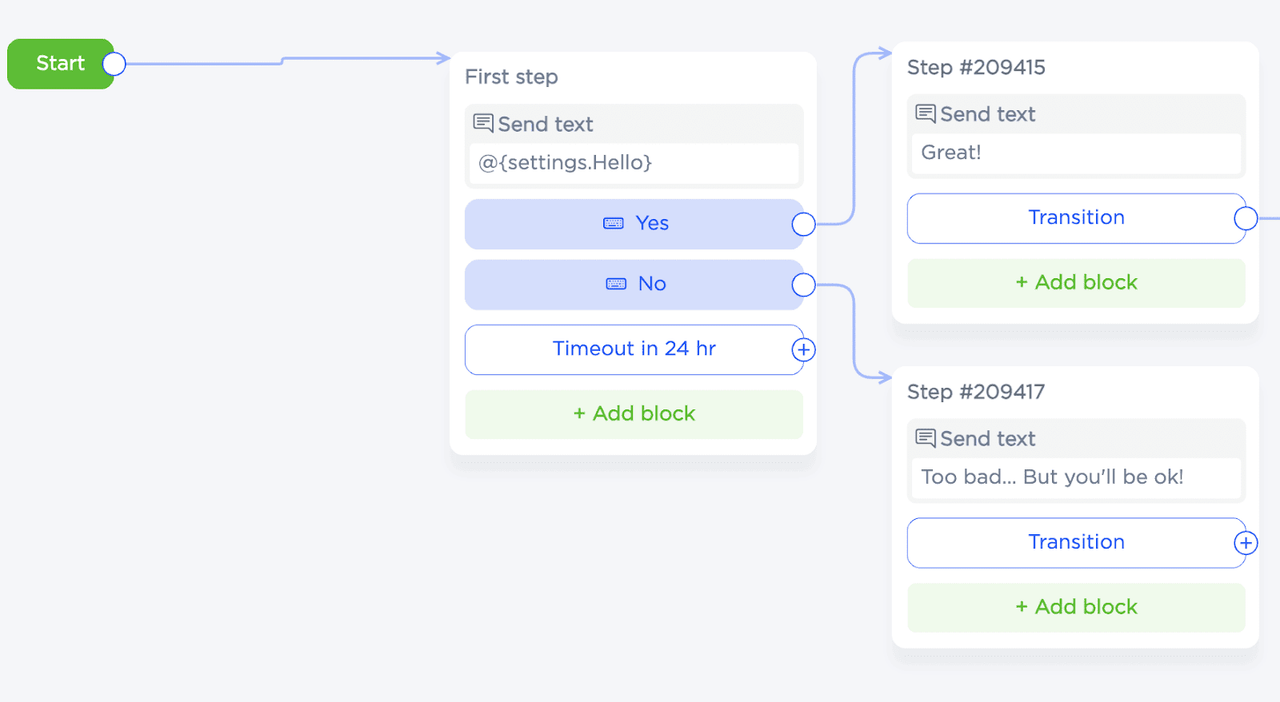
Events can be renamed and moved by double-clicking and dragging with the mouse, respectively.
11. Global branches in scenarios
If you do not know when an event will occur and it is not related to previous scenario steps, a global branch is used. This is a step with special event blocks that have the Global Branch checkbox selected.
When an event added to such a step occurs, a new script session is started (if not already started) and the script starts not from the Start step, but from the block event that occurred.
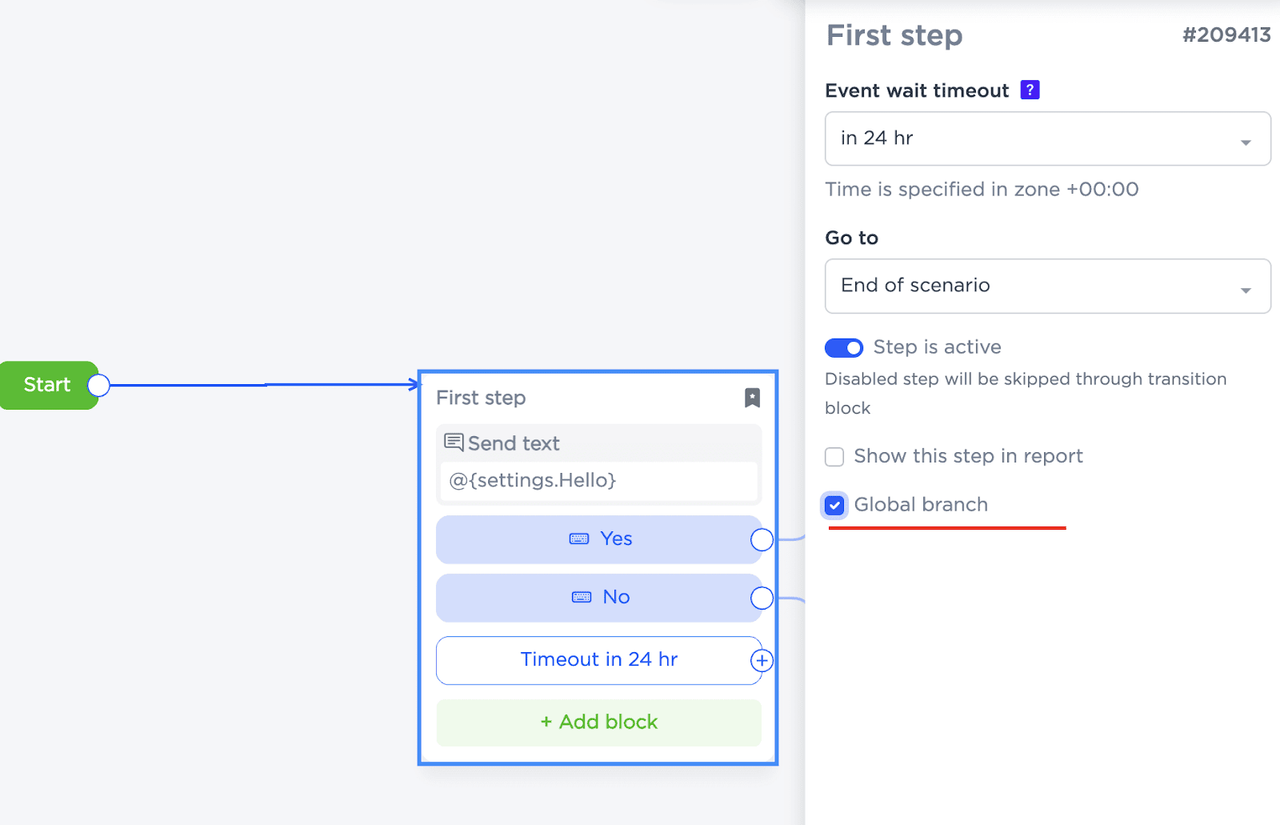
Global branches allow you to run scenarios based on keywords (for example, if the scenario was previously paused due to an inactivity timeout, but the user wants to continue using the menu) and perform background processing of events (record all paid invoices in a table, track operator and customer communications, etc.).
Using global branches you can create scenarios with more complex logic, where events can occur regardless of the current state of the scenario. It is recommended not to use more than one global branch in a project, and to use it only in the main project scenario for easy debugging.
12. Testing chatbot operation
You can test the created chatbot for WhatsApp by opening a dialog with it and sending messages that meet the conditions specified in the scenario. To open the chatbot in WhatsApp, follow the link located in the upper right corner of the designer interface.
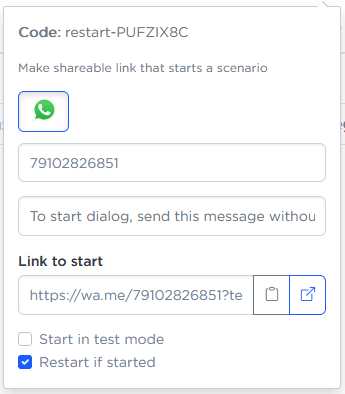
In the opened dialog with the bot in WhatsApp, copy and send the unique code “restart-...”. Then you will be able to check the operation of condition and action blocks and communicate with the bot as if you were a customer.
What to consider before creating a chatbot
When starting to build a chatbot for WhatsApp, we recommend keeping the following aspects in mind to make customer interactions as convenient as possible.
Understandable functionality. A chatbot should be intuitive and easy to use. Customers should understand that they are communicating with the bot, which questions it can help with, and which questions will be routed to a live agent.
Well-thought-out scenarios. For a chatbot to work effectively, it is important to think through what types of questions users might ask and make sure that the forks in the scenarios take into account all popular scenarios.
Personalization. Tailoring chatbot responses to specific categories of users can improve their chatting experience. To do this, add variables such as the user's name, details of their past orders, and so on to the bot's chatbot response scripts.
Performance analysis. Regularly evaluating the performance of the chat bot will help identify areas for improvement. To do this, offer customers the option to complete a short questionnaire after the dialog is complete. Optimizing the bot's logic and scenarios can have a direct impact on customer satisfaction and business performance.
How companies can use WhatsApp chatbot
A WhatsApp chatbot allows a company to automate interactions with users at many different stages of their customer journey.
- Answer frequent questions. A WhatsApp chatbot can handle common customer queries, reducing the burden on the support team. Such queries include questions about the company, hours of operation, service pricing, payment methods, website, addresses, and contacts.
- Product search. Chatbot can help customers find the right cards in the company's catalog by providing links, photos, prices, and other details.
- Promotion of products and services. WhatsApp chatbot can send messages to interested customers using prepared in advance content that includes not only text, but also links and media files.
- Order processing. Chatbot can guide users through the entire ordering and payment process, from selecting products to choosing delivery dates, and promptly process customer orders via WhatsApp at any time of the day or night.
- Booking and appointment management. The process of making an appointment with a doctor or reserving a table at a restaurant can be almost completely automated with the help of a chatbot for WhatsApp. The bot verifies the data entered and sends the data to the database to register for an event or book a slot in the calendar.
Each of the ways you can use chatbots allows you to streamline customer interactions, reduce operational costs, and increase business efficiency.
If you still have questions contact us in the “Help - Chat with operator” section of the dashboard. We will be glad to help you.

 3-days free trial period