How to create a chatbot for Telegram in Umnico
Today, Telegram is among some of the most popular messaging apps, and it is used by nearly a billion people around the globe for both personal and professional communication. The app's rich features and constantly growing audience make it an attractive choice of customer communication tool for brands. Many companies have Telegram channels where they share content and process incoming customer support inquiries via their Telegram account. In this guide, we will show you how to set up a chatbot in Telegram with Umnico chatbot builder to effectively automate your customer communication.
Why use chatbots in Telegram?
Using chatbots in Telegram offers many advantages for companies, making communication with users more efficient and convenient:
- Automation. A Telegram chatbot can handle routine tasks like answering typical questions, allowing support and sales teams to focus on more complex tasks.
- Round-the-clock support. Chatbots make first-line support available 24/7, which increases customer satisfaction. If a user asks a question outside of business hours, a bot can provide the information they need immediately.
- Personalization. Chatbots can use data from a user's profile about their preferences, order history, and previous interactions in their responses. This approach makes customers feel that the brand truly values them.
- Integration with other services. Chatbots can be integrated with various software, such as CRM systems, to allow seamless information exchange and synchronization across channels and systems used by the company.
Is creating a chatbot for Telegram free?
It is important to clarify that if we are talking about creating a bot inside Telegram, then yes, creating such a bot is free. Telegram provides an option to create a bot through BotFather, a special bot in Telegram that manages the creation and customization of other bots. After creating a bot through BotFather, the user receives an access token that is used to interact with the Telegram API. We'll talk more about this later.
If we talk about integrating a bot in Telegram into a chatbot with AI, it is necessary to buy a subscription to one of the available services, such as Umnico chatbot builder.
How to create your own chatbot in Telegram
Let's create our own chatbot for Telegram in the Umnico chatbot builder. Anyone can cope with the task — no programming skills are required.
You can also check out the video instructions for Telegram chatbot connection and setup.
1. Connecting Telegram bot to Umnico
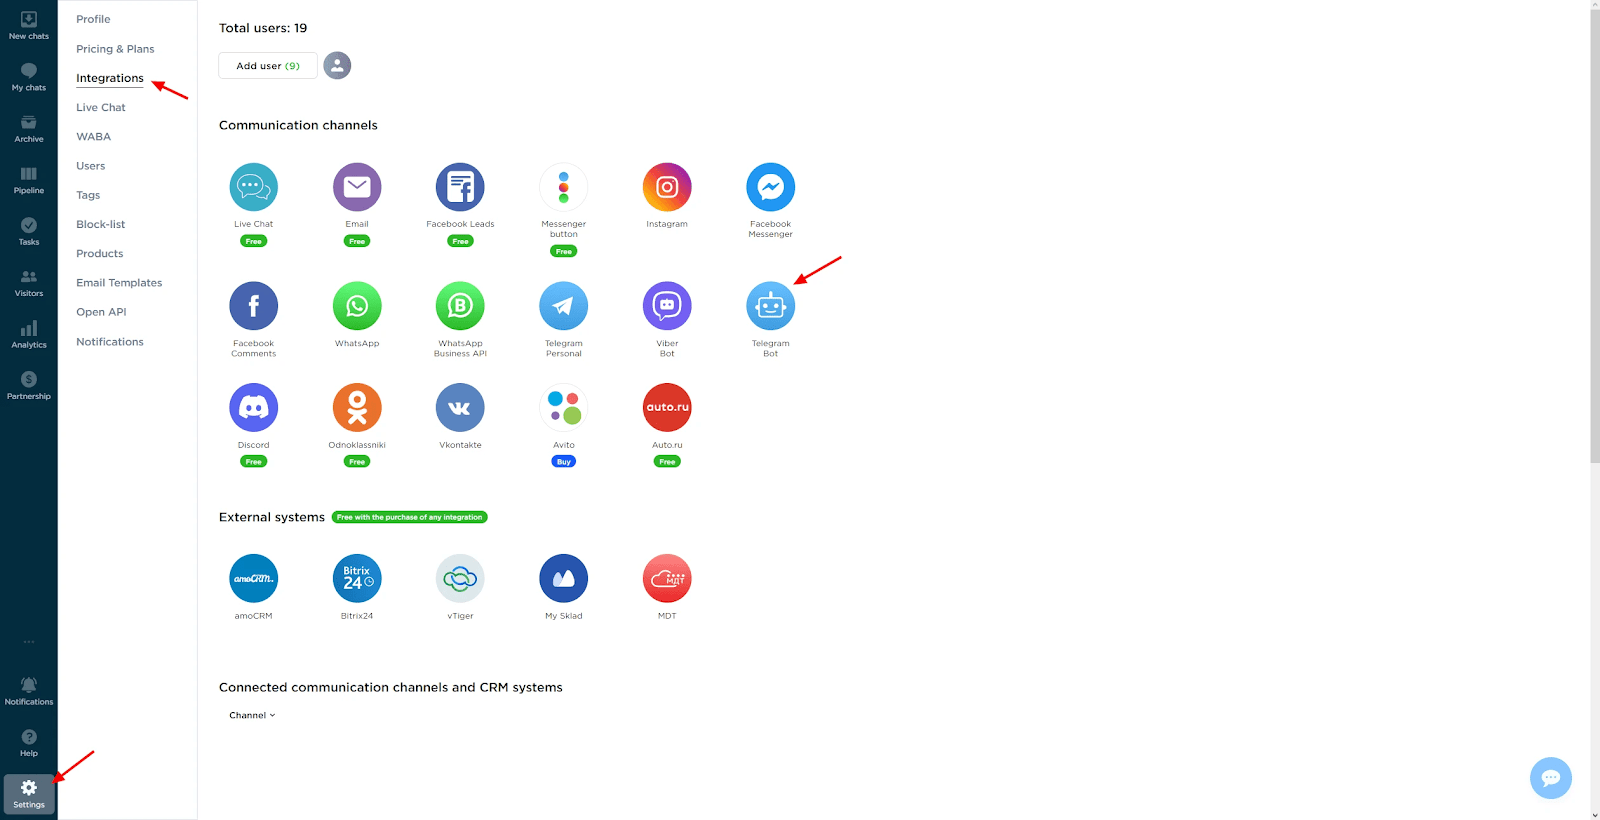
In your Umnico personal account, go to “Settings”, then select “Integrations - Telegram Bot”.
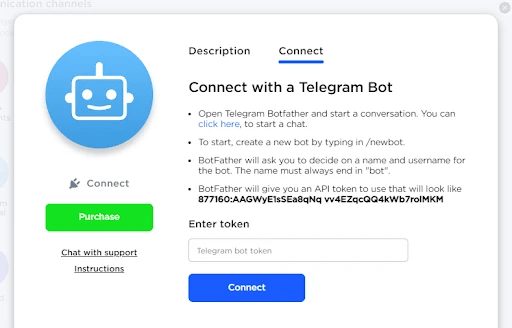
The connection window opens.
Go to the Telegram app and use the search function. Type “@BotFather”, and after making sure it's an official bot (it will be indicated by a white check mark in a blue asterisk), select it.
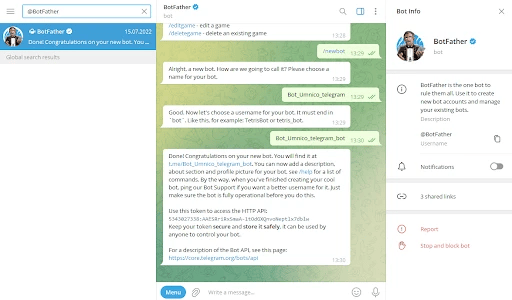
Enter the command “/newbot” and come up with a name for the bot. BotFather will check if the name is available and suggest adding the suffix “_bot” (e.g. Bot_Umnico_telegram_bot). Once confirmed, you will receive an API token to connect. Copy it and return to Umnico.
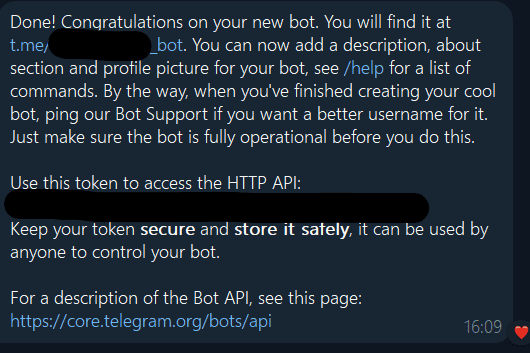
Paste the API token into the corresponding field in Umnico and click “Connect Telegram”.
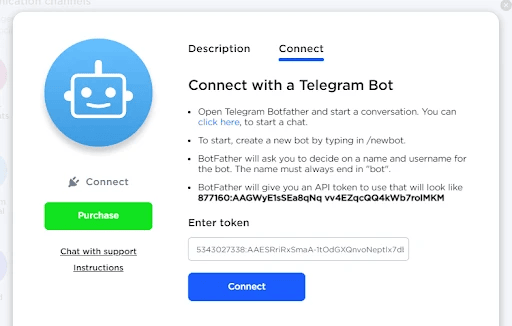
After that, the Telegram integration will appear in the “Connected” section.

2. Creating a chatbot scenario
To set up bot scenarios in Telegram using the Umnico chatbot builder, you need to create a chatbot project. To do this, follow the steps below.
Go to the “Chatbots” section in the left menu of the platform. Click on the “Create project” button to start the process of creating a new bot.
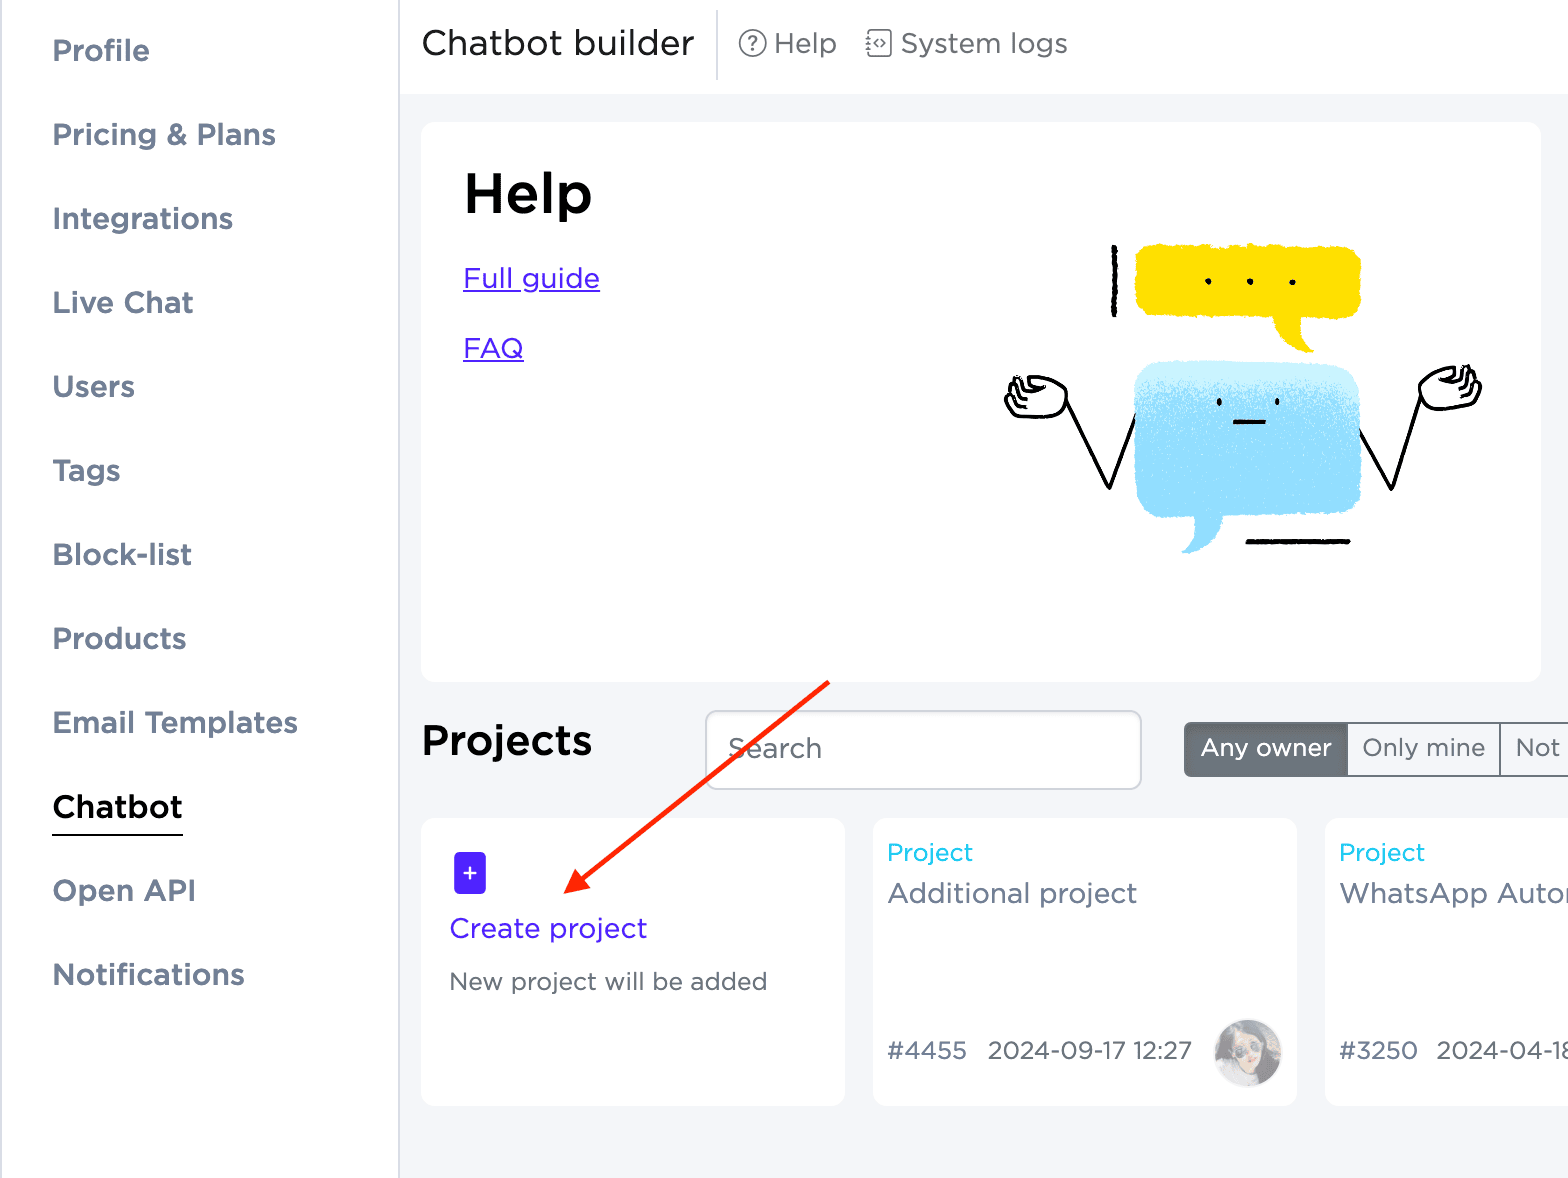
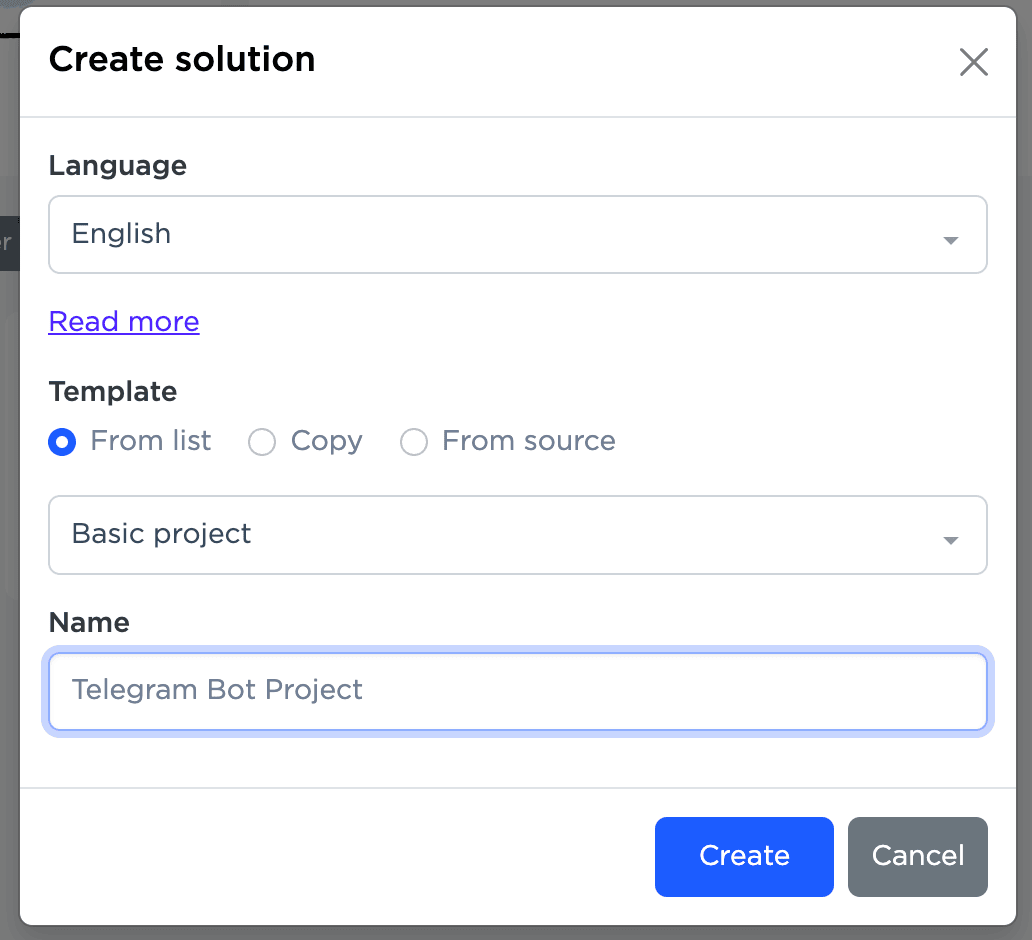
- To create a bot template, select the “From list” option and enter the desired name for your Telegram bot.
- If you want to use an existing template, choose “Copy”.
- To work with the source code, select the “From source” option.
3. Integration of chatbot project with Telegram
In the settings of the created chatbot, select Telegram as the platform for sending messages. To do this, click on the “Settings button to access additional settings.
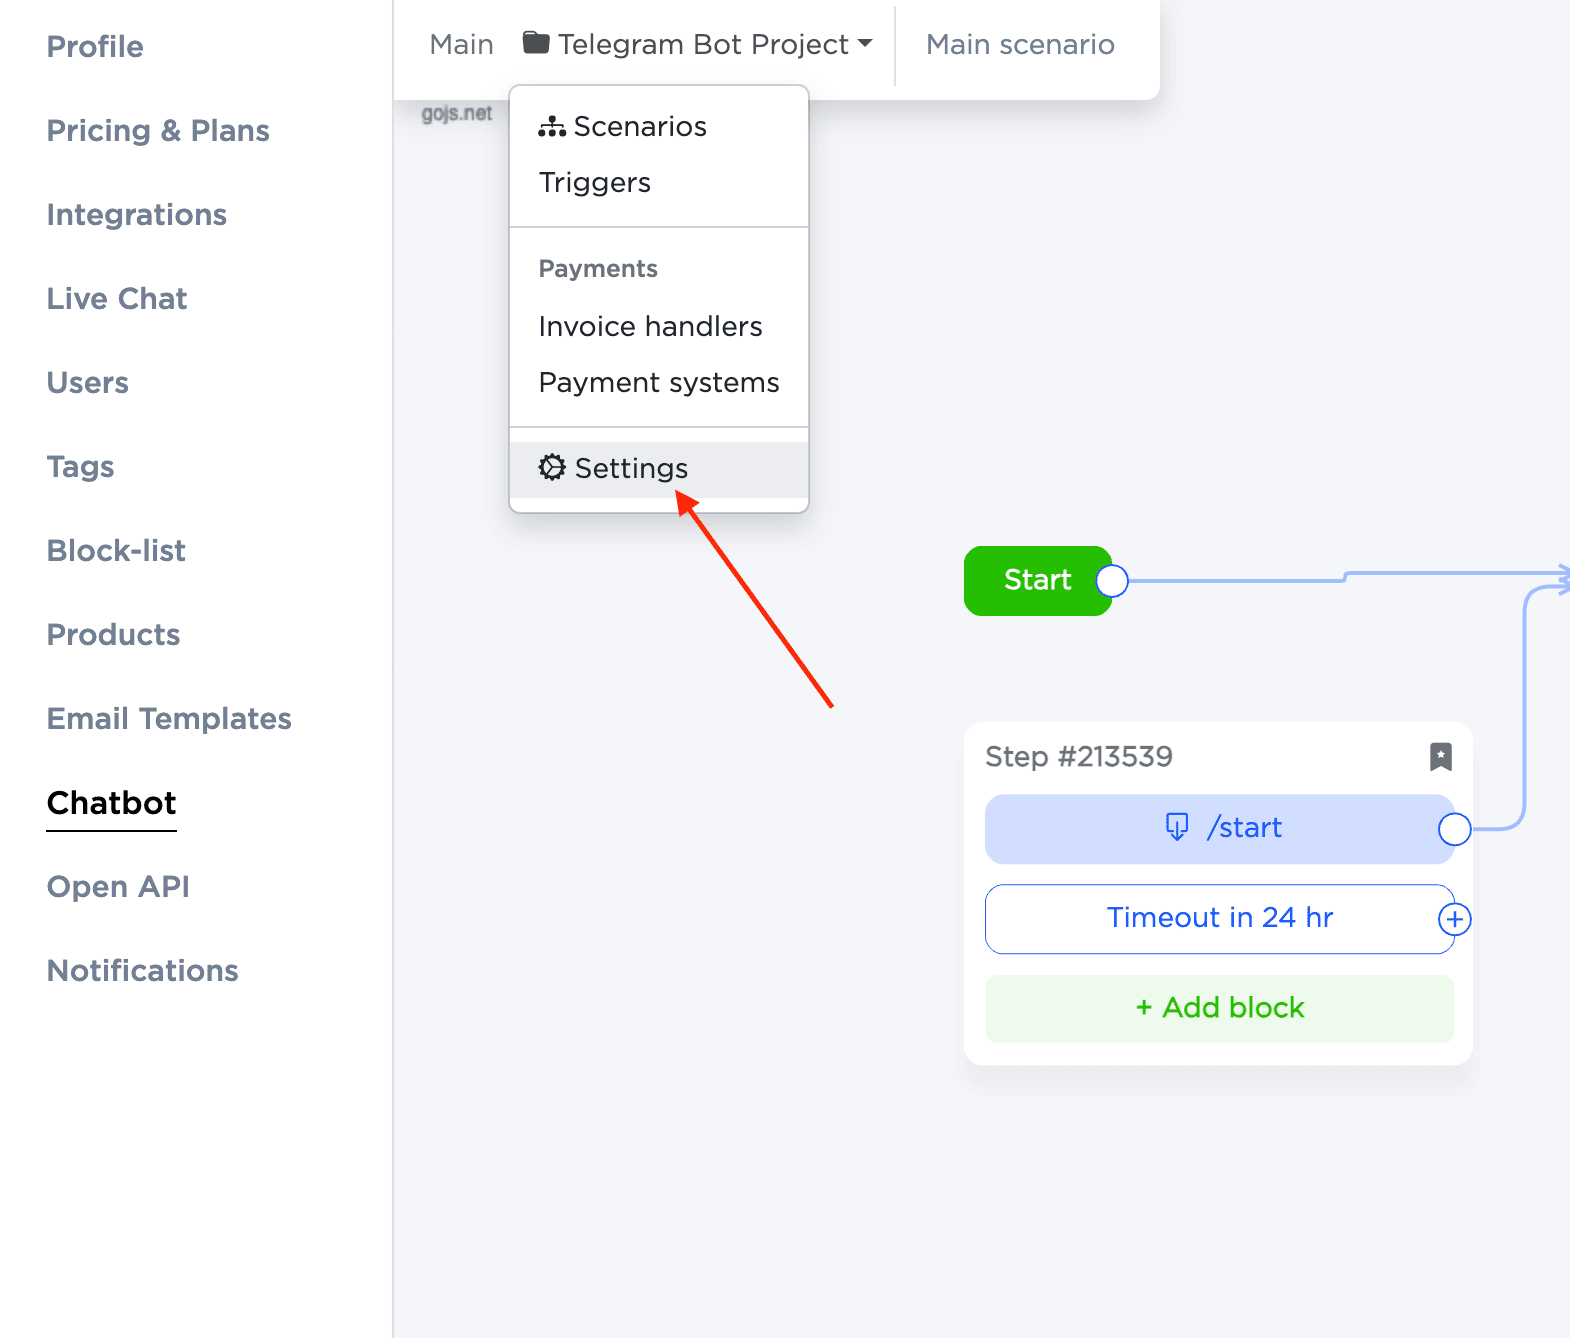
Go to the “Messengers” tab and select the previously configured Telegram integration.
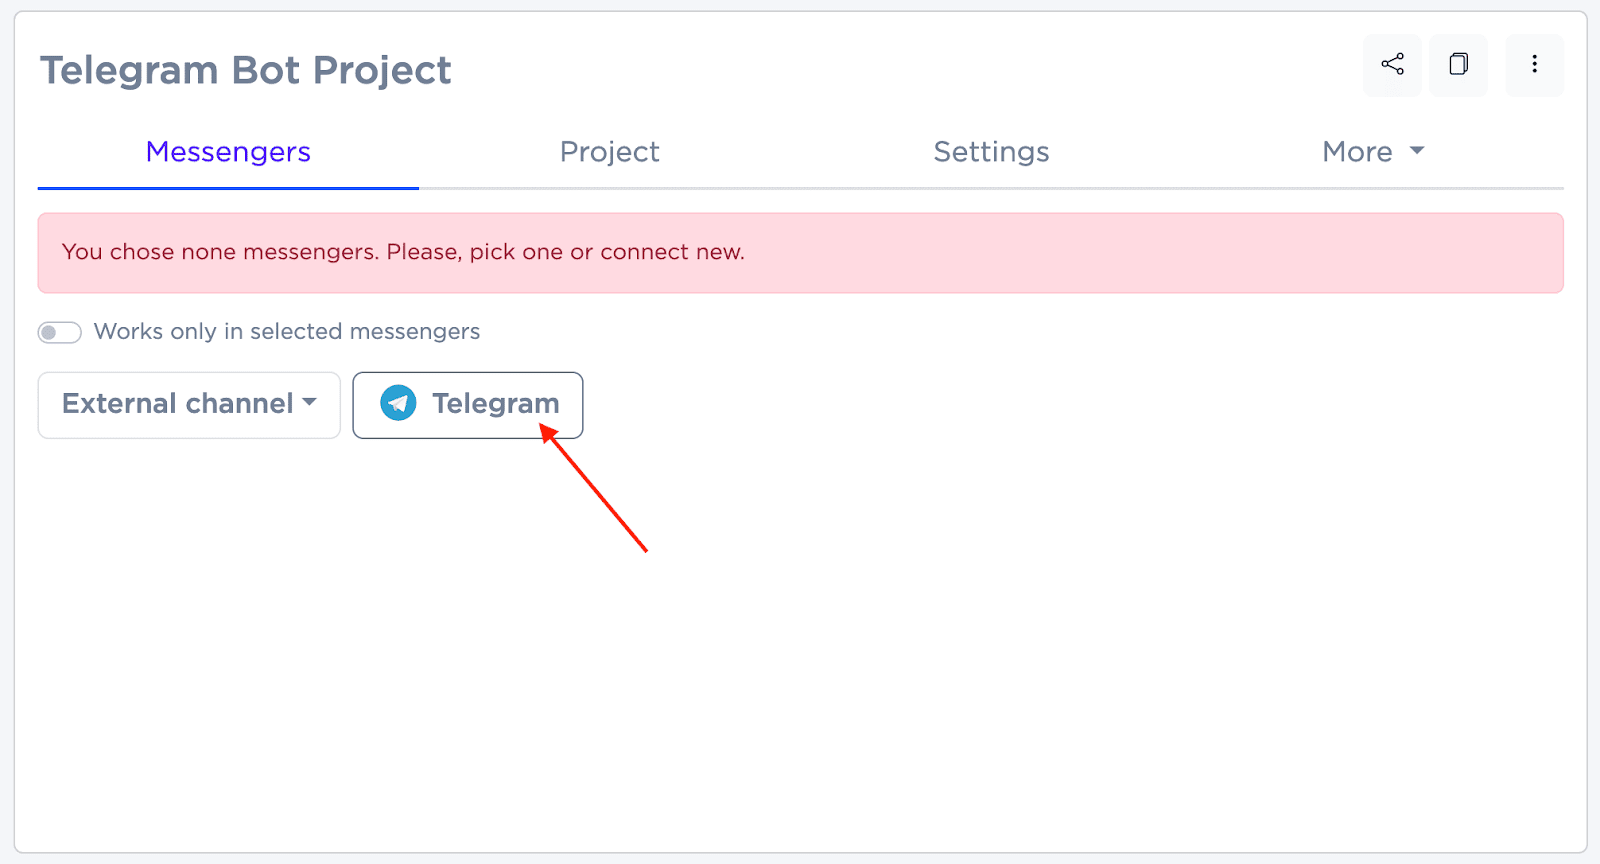
Click the “Refresh” button to save the connection settings.
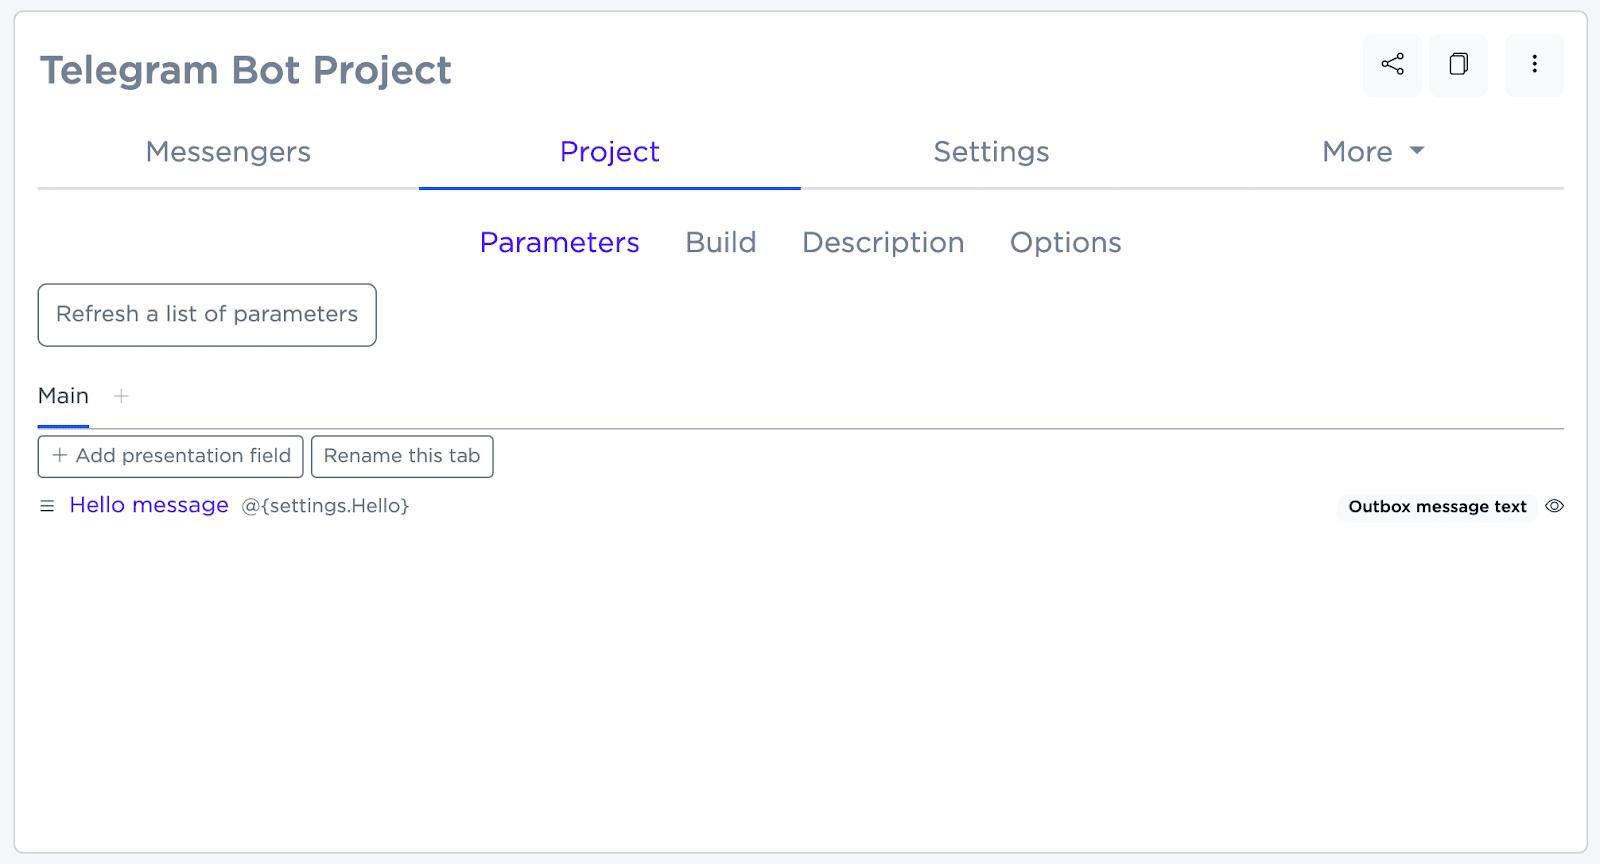
4. Creating a chatbot scenario for Telegram
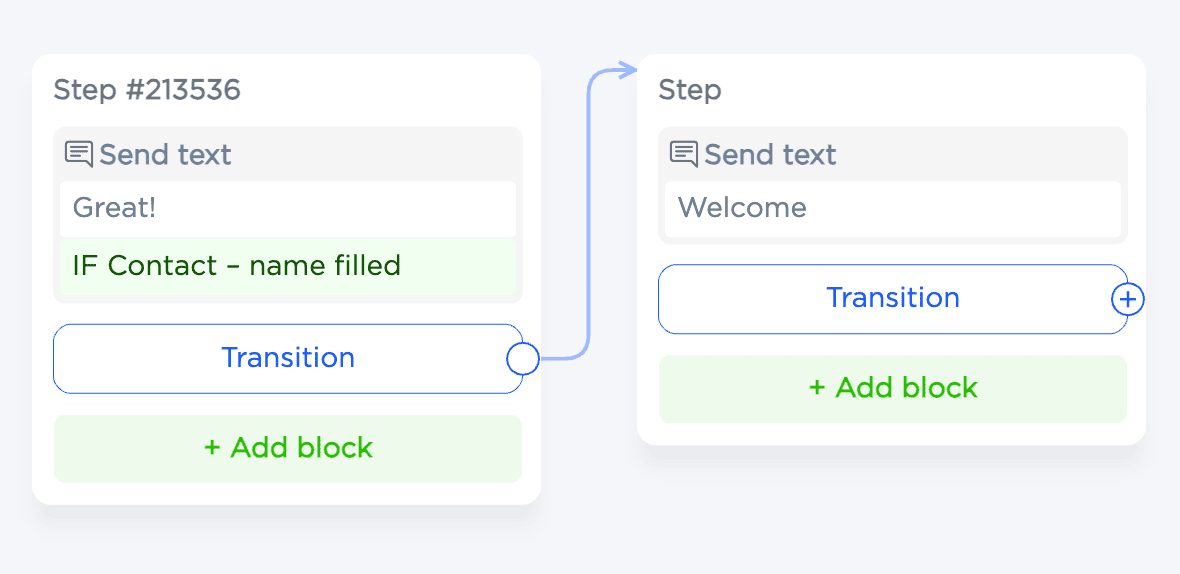
After creating a project, the chatbot builder opens, which is a visual flowchart. Here you can create chains of messages to interact with users by adding blocks with text, conditions, triggers, and actions.
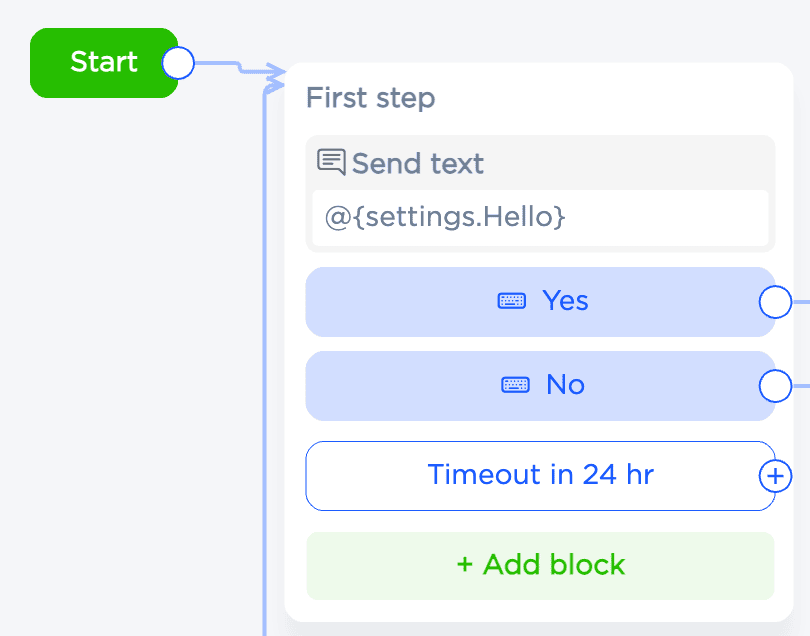
To add a new step linked to a previous step, click on the “+” sign next to the last step and drag it to the desired location.
To add an unlinked step, use the right mouse button and select “Add Step”. Double-click on the step to give it a name.

To change the route of an arrow, select it and drag the end to the new step. Delete an arrow by selecting it and pressing the Delete key. Double-click the arrow to focus on the destination step.
When you move to a new step, the target steps are completed first, then you move to the next step. When all steps have been completed, the scenario ends.
5. Delay before transition
To set the transition pause between steps, highlight the desired step and change the time in the appropriate settings field.

6. Performing actions in a step
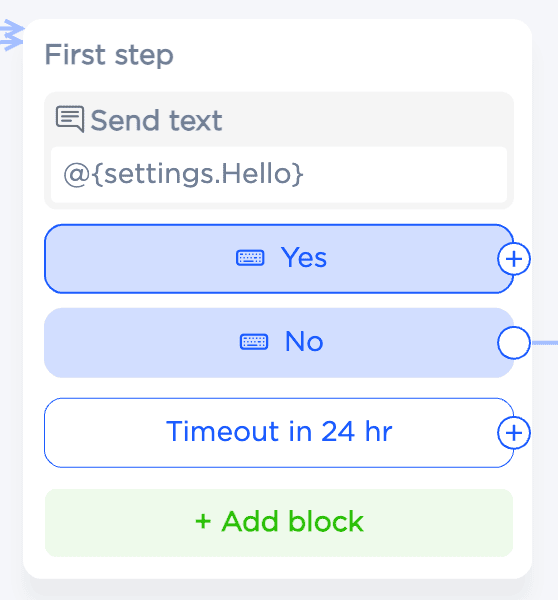
Each step can contain several actions performed in sequence. Add actions via the “Add block” button and change their order by dragging and dropping them. Move actions between different steps as needed.
7. Adding and displaying conditions
The scenario conditions are organized into blocks. Each block may include one or more conditions, which are connected by a logical “AND”, and the blocks themselves by a logical “OR”.
This is what two blocks with one condition in each look like:
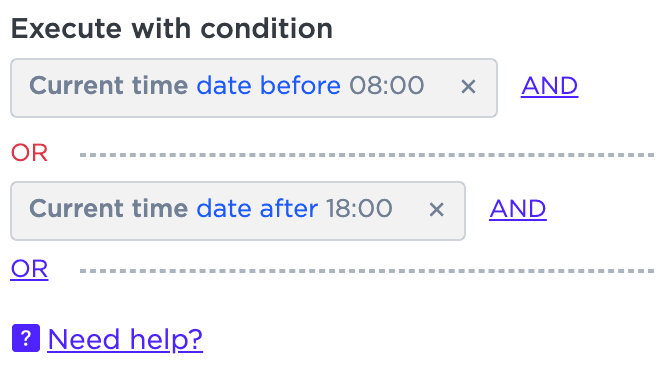
In the first example, the condition will be true if the current time does not fall between 8:00 and 18:00.
And here, if time is within the set period.
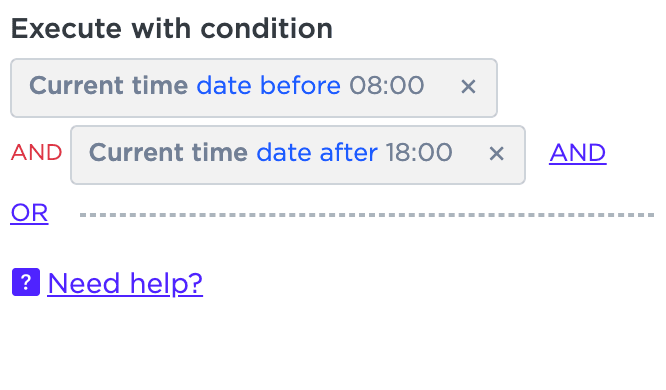
To fulfill a condition, at least one block must be true, and within a block, all conditions must be met.
To add the first condition, press “+”. To add a condition to an existing block use the “AND” button, to create a new block use the “OR” button.
Conditions include:
- Variable (list of all variables);
- The internal index of the variable (if the variable is an array);
- Operator (method of comparison);
- Operand (the value to be compared).
Each variable has its type, on which the available list of operators and operand type depends.
Any condition can be inverted by setting the “NOT” flag in the settings. This reverses the value of the condition.
8. Event blocks
Event blocks are activated when certain actions occur (indicated in blue or yellow). The script waits for the event and proceeds to the corresponding block or next step after a timeout (24 hours by default).
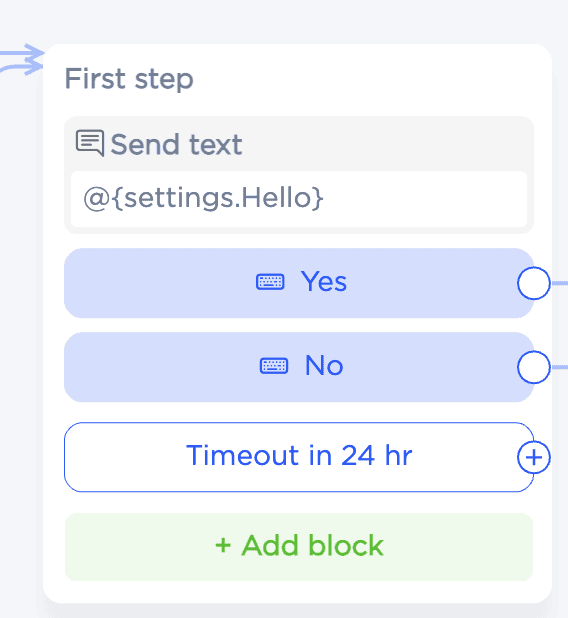
Unlike conditions, which are checked once a step transitions, events are checked while waiting on a step.
Most events process all waiting scenarios.
Blue events (incoming messages) are processed one by one: the scenario that sent the last message or the one created earlier has priority.
If no scenario has processed the message, it is passed to the global branch.
9. Event types
- Message from user: processed by a single script with priority to the last person who sent the message.
- Conditions: full match, keywords, email, number, phone, image, any reply.
- Email: message.email.
- Number: message.text (if a number is entered, it is saved as a number).
- Phone number: message.phone.
- Picture: message.attachment.
- Any reply: handles all unprocessed messages.
10. Waiting for a specific event
Adding a wait block to the steps allows you to customize the response to specific user actions. For example, to wait for the word “yes” to be entered, add a “Full match” block and specify the required phrase. The step will wait for the “Message from Customer” event to occur that meets the specified conditions.
 | 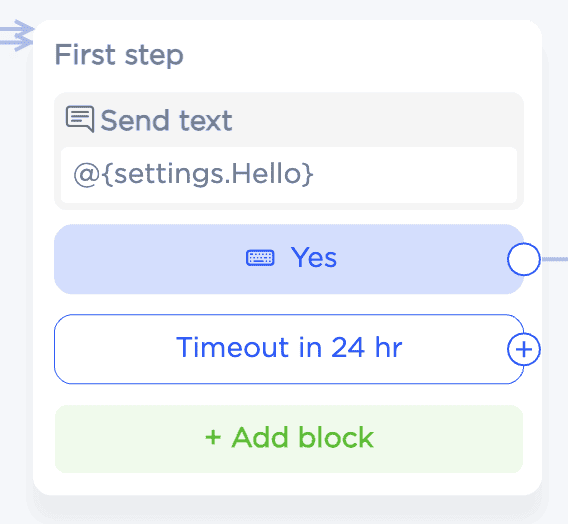 |
Several expected events can be set on one step -- triggering of any of them will continue the scenario.
The event is activated if the scenario is on the corresponding step.
The default timeout for waiting is “24 hours”. To set an individual timeout, you will need to change it in the step settings.
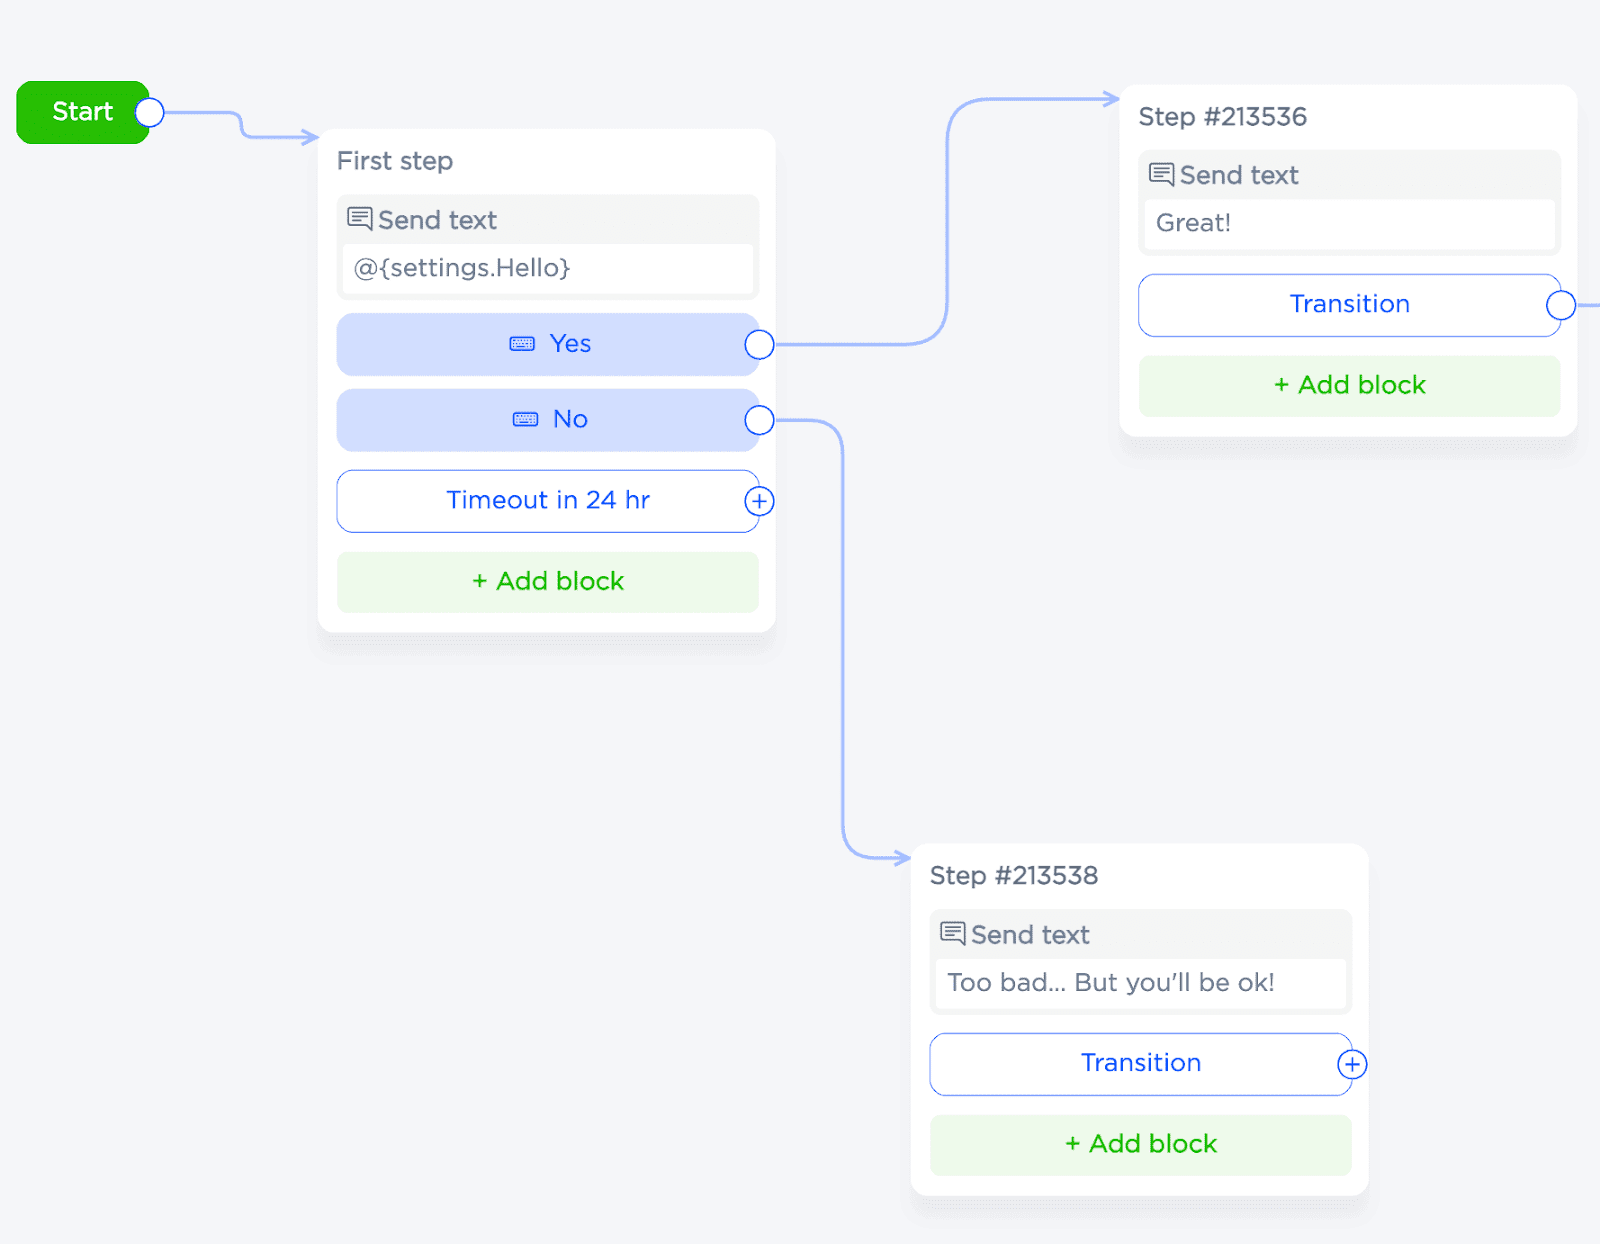
Events can be renamed and moved by double-clicking and dragging with the mouse, respectively.
11. Fast reply buttons
Buttons in a chatbot allow the user to quickly move to the next step of the script without typing a text response.
To attach a button to a message, add a corresponding block in the step with sending a message.

The regular button is displayed below the input bar, and the inline button is attached to the post.
This is what a step with a button looks like.
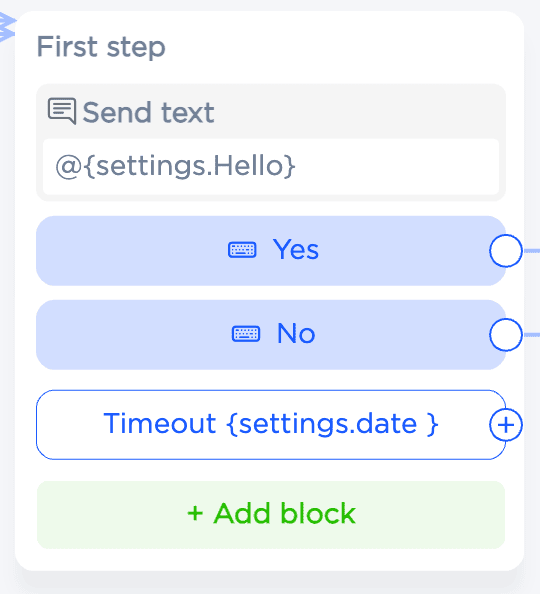
By attaching alternative keywords to a button, the chatbot can handle different answer choices that the button does not support. To do this, specify one or more keywords (each on a separate line or separated by a “|”).
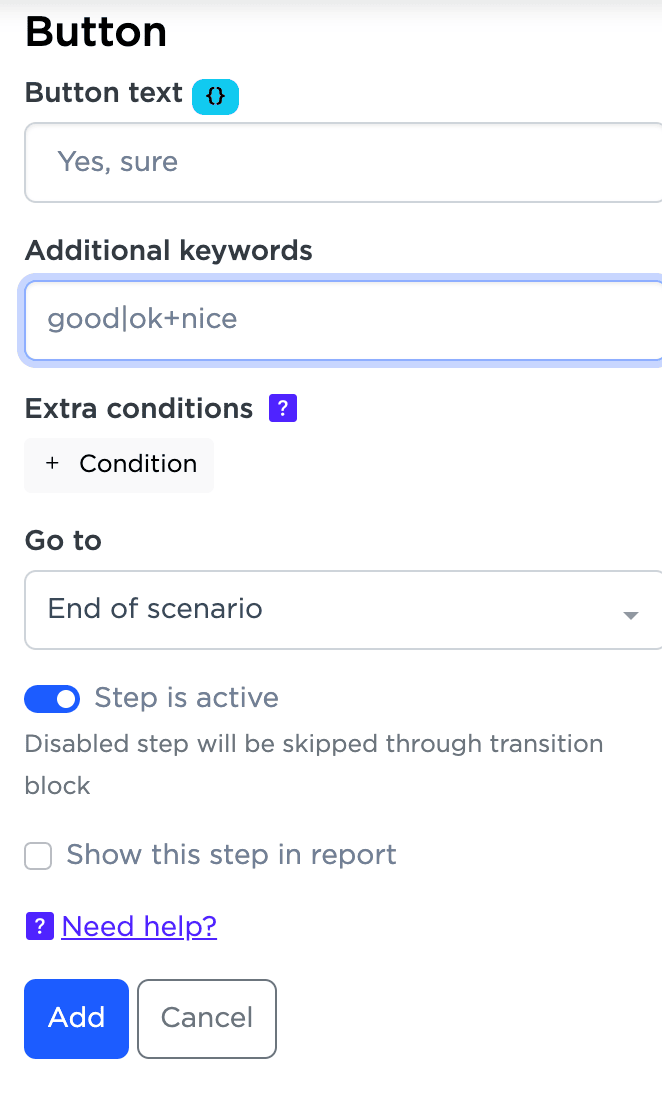
Please note: buttons can only be added to a step with a message. When a message has conditions, if the conditions are not met, the buttons will not be sent.
12. Inline button
The inline button is attached to the message and remains active even when the script has already moved to another step or is completed. Such buttons can return the scenario to the previous steps and even restart the completed scenario session. This is adjustable in the button settings.
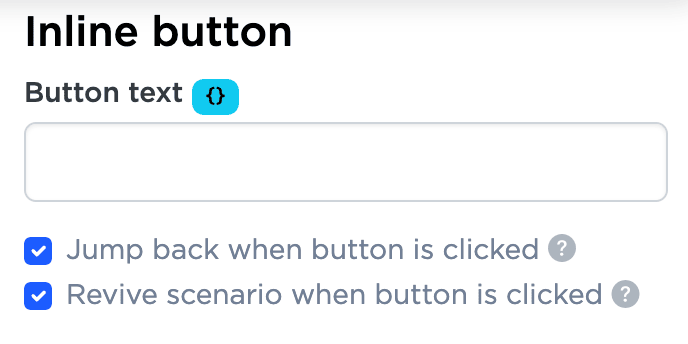
- Transfer on a click: when clicking on such a button, the user is instantly transferred to the selected step of the scenario.
- Restore session: this option allows you to continue an already completed scenario with all saved data - the user continues communicating from where they left off. Please note: session restore will only work if another session of the same scenario is inactive.
13. Inline URL
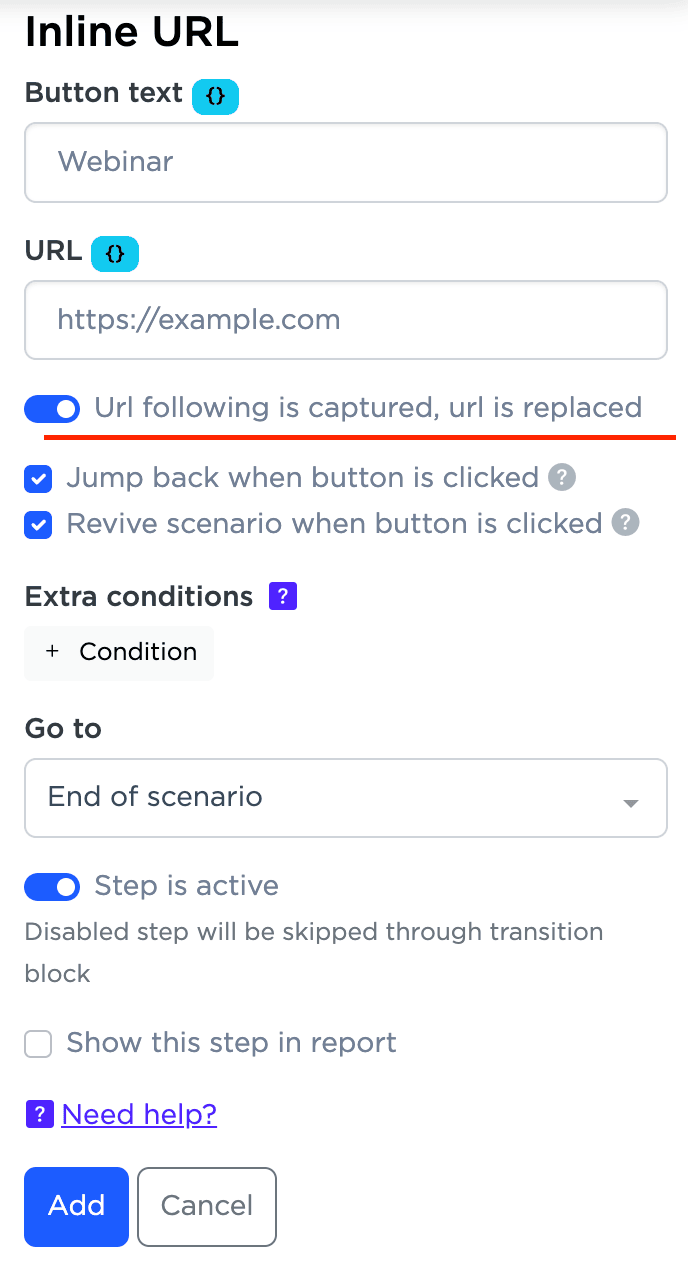
Inline URL is essentially no different from regular buttons if the “URL following is captured, URL is replaced” option is activated. Otherwise, the user will receive a direct link.
14. Global branch in scenario
Global branches allow you to start scripts by keywords and process events regardless of the current state.
If an event added to such a step occurs, a new script session is started (if it is not already running), and the script starts not from the “Start” step, but from the block event that occurred.
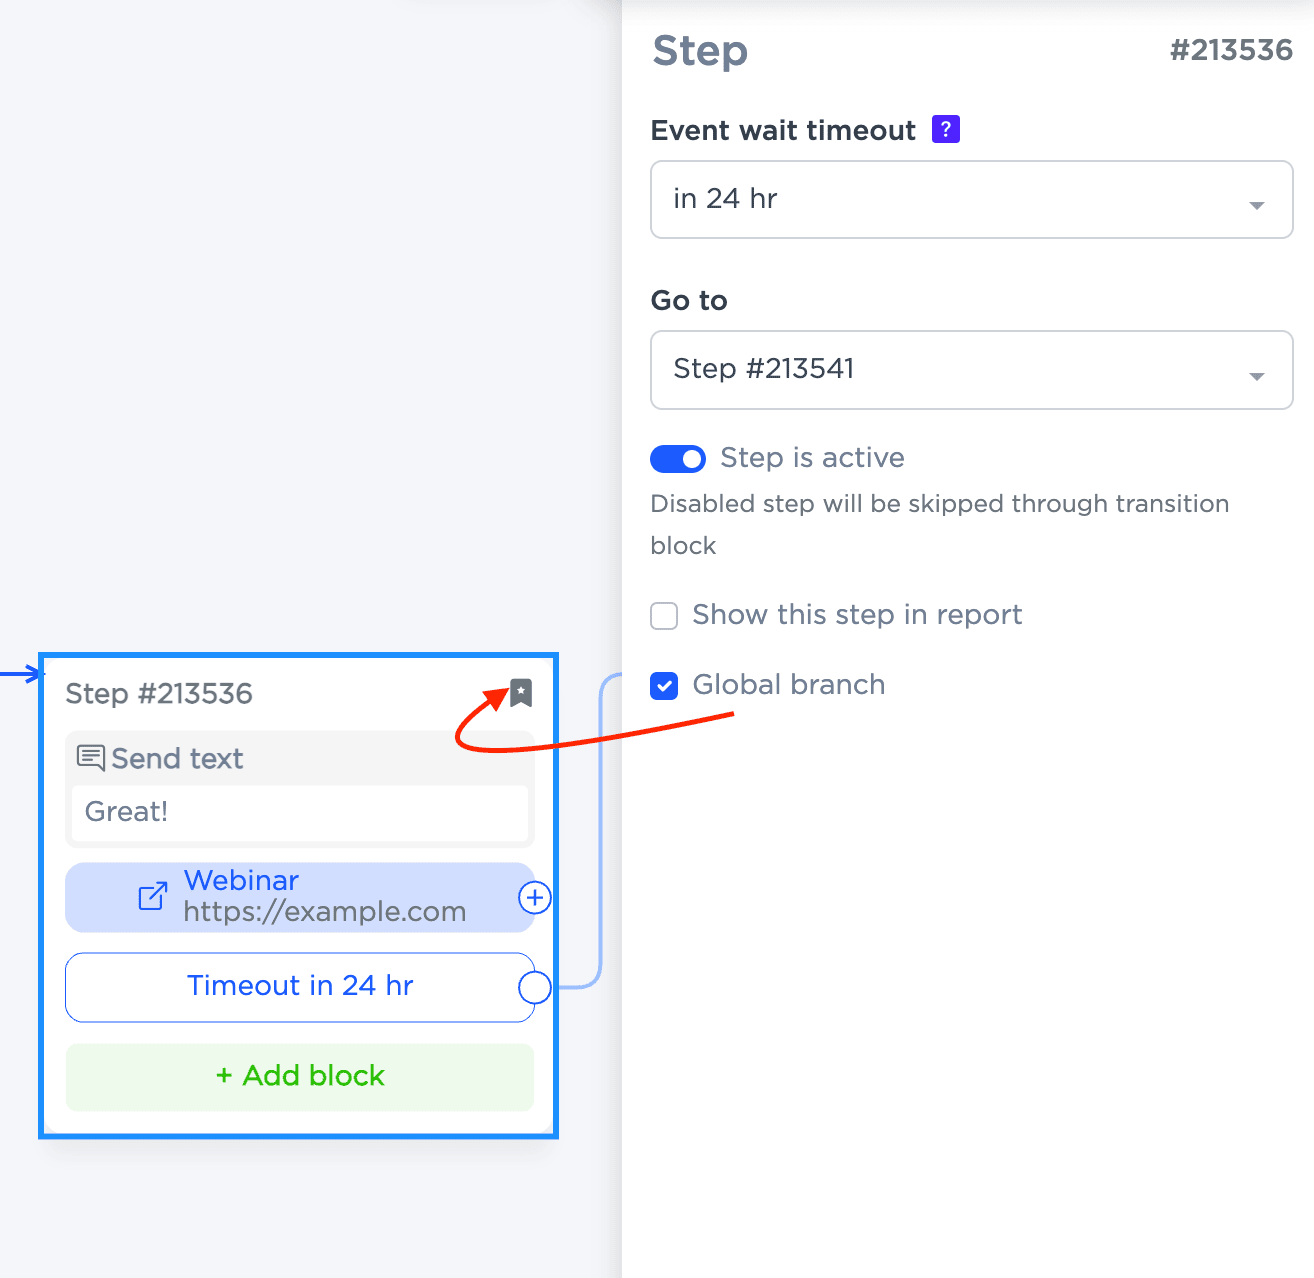
We recommend using no more than one global branch in a project for ease of debugging.
15. Testing how the chatbot works
To test the created chatbot for Telegram, start a dialog and send a message corresponding to the scenario conditions. To access the bot in Telegram, click the link located in the upper right corner of the designer interface.
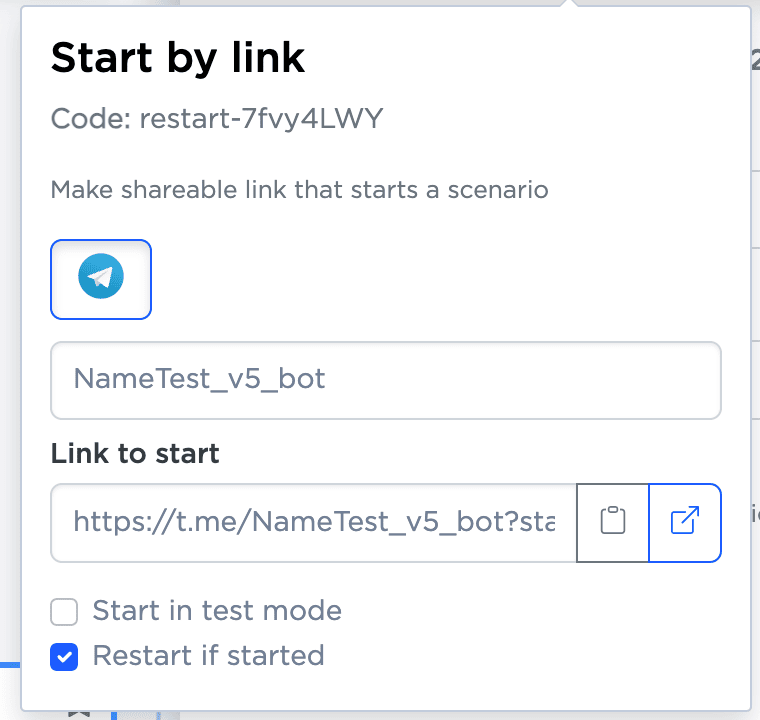
In the dialog that opens, send a unique code “restart-...” to verify the conditions and actions work, interacting with the bot as a normal user.
Following these steps, you will be able to create and customize an effective chatbot for Telegram, capable of interacting with users according to the developed scenarios.
How different companies can use chatbots in Telegram
Let's take a look at how chatbots can be useful for online stores, clinics, advertising agencies, and other industries.
- For online stores, chatbots can help process new orders and customer inquiries about existing ones and delegate complex issues to relevant specialists.
- Event industry: a chatbot can automate routine processes such as booking seats for an event and providing information about the venue, attendees, and schedule.
- Clinics and beauty salons can use chatbots to manage records and interact with patients.
- For HR specialists, chatbots in Telegram can help with the initial selection of candidates, tell job seekers about the company and its values, publish current vacancies, and answer questions about working conditions.
Still have questions? Contact us in the “Help — Chat with operator” section of your personal account and we will be happy to help you.

 3-days free trial period