Instagram* connection to Kommo
Instagram* has evolved into a full-fledged platform where brands can promote products and services, drive sales, and cultivate lasting customer loyalty. Its visually rich content format and high audience engagement make it an especially powerful channel for customer communication.
Umnico is an omnichannel platform that consolidates all customer messages into a single, intuitive interface. With its robust functionality and modern design, managing customer inquiries becomes faster, simpler, and more efficient.
Instagram* integration with Umnico allows you to:
✅ Reply to comments and Direct messages, seamlessly switching between them in the Umnico interface — without losing context or conversation history.
✅ Efficiently process customer inquiries through Umnico Inbox or an integrated CRM.
✅ Manage multiple Instagram* accounts from a single window.
The connection uses an official solution and remains fully secure when following the recommended setup guidelines.
Instagram* Integration with Kommo: Before You Start
⚡ Important: For successful Instagram* integration with Umnico, you need to:
- Have access to Facebook* Business Manager with account owner rights.
- Link your professional Instagram* account to a Facebook* business page.
- Enable message access in Instagram* settings.
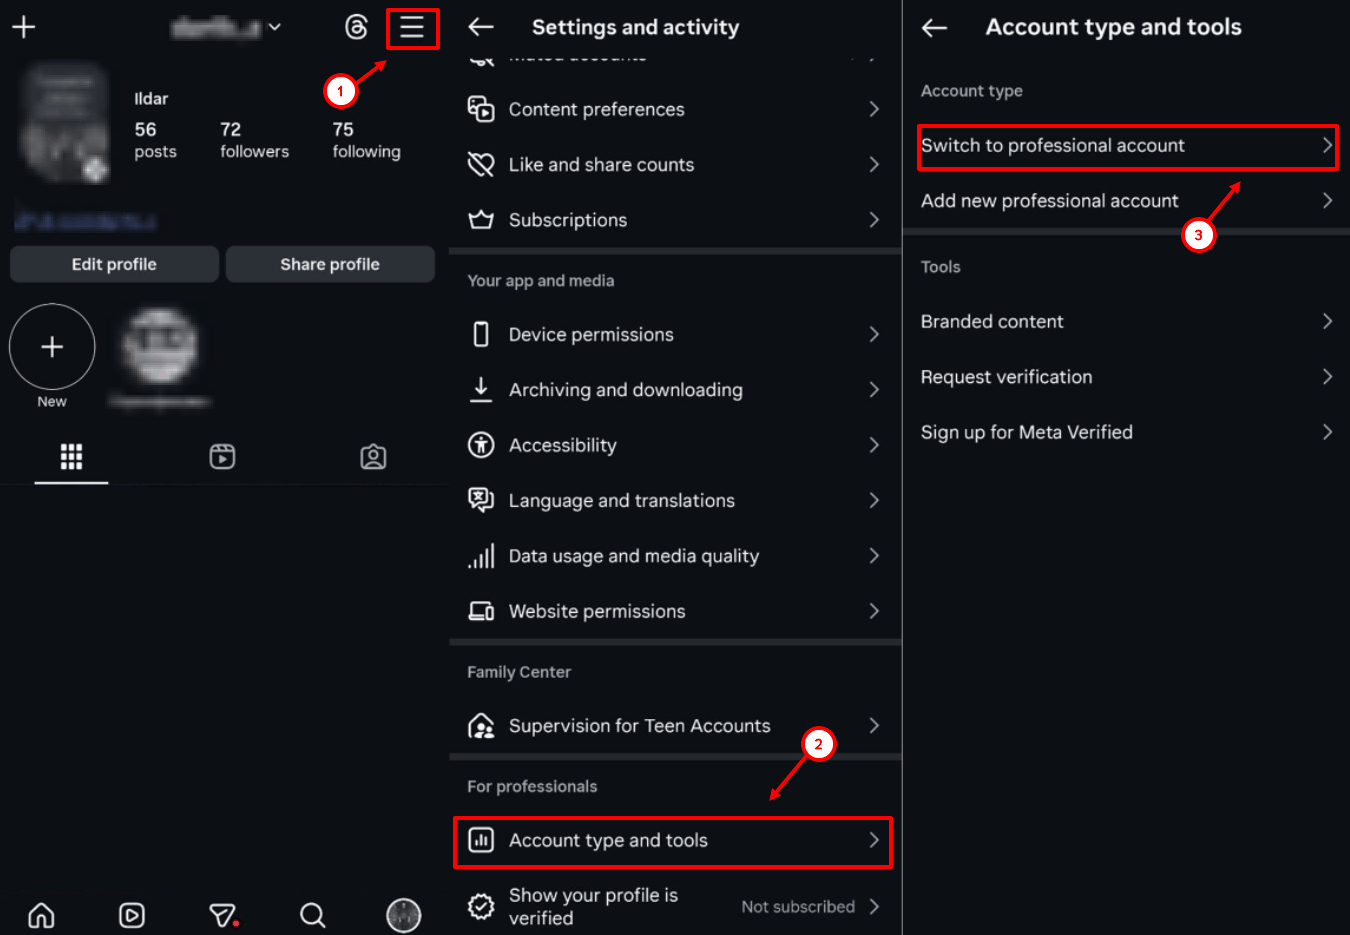
Switching Instagram* account from Personal to Professional
1. Open the Instagram* mobile app and go to “Settings”.
2. Tap “Account type and tools”.
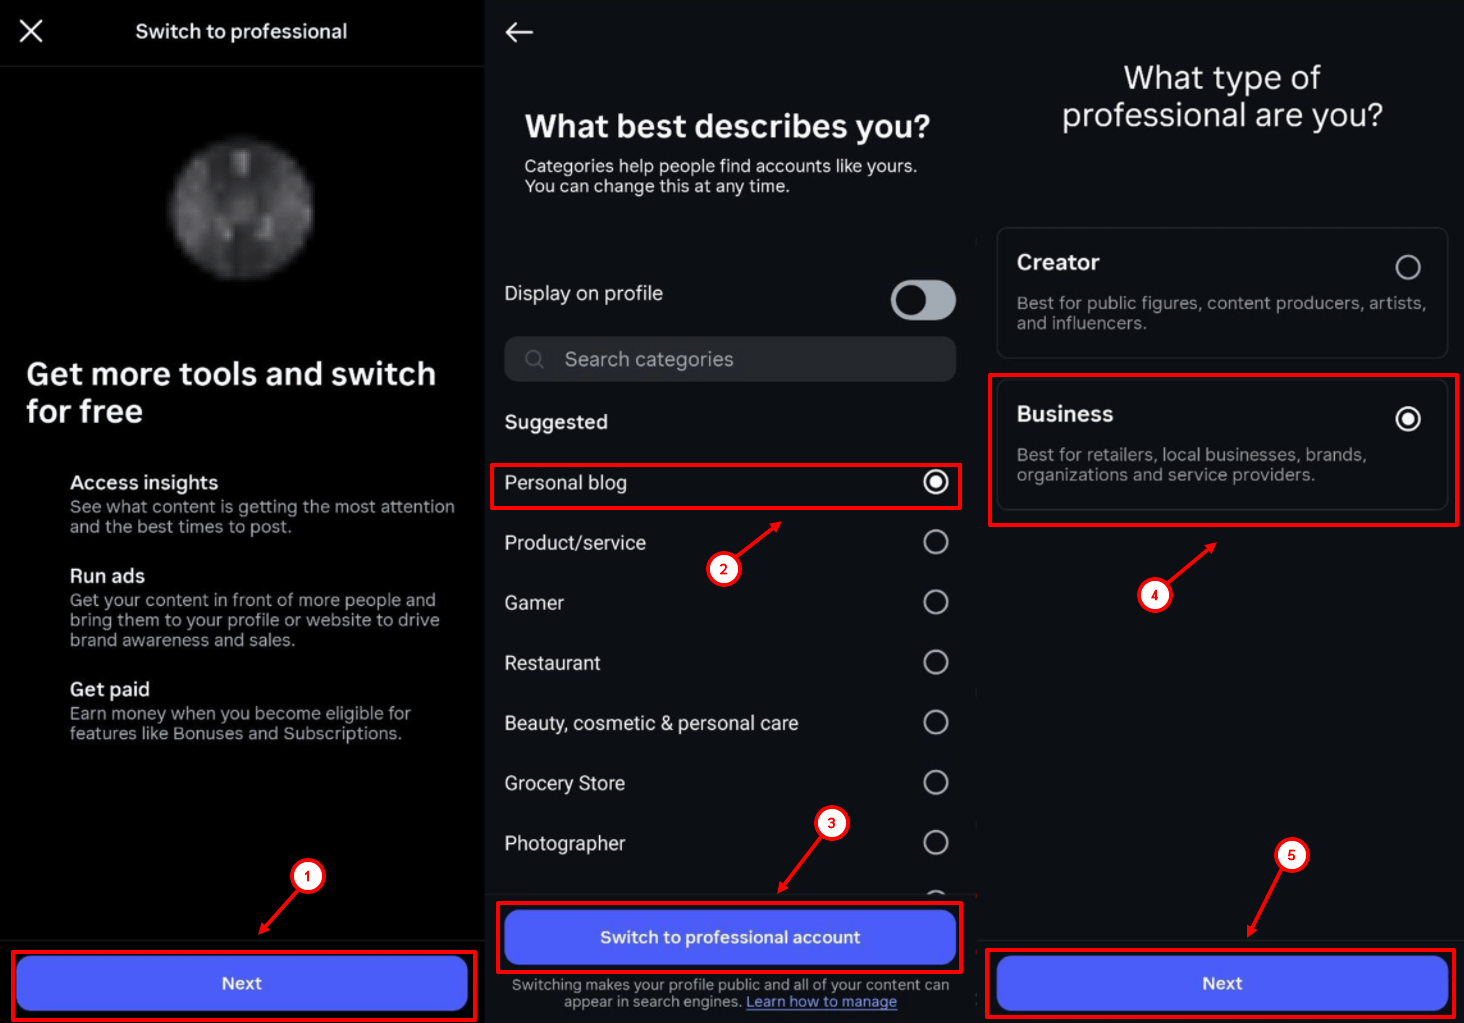
3. Select “Switch to professional Account.”
4. Tap “Next”.
5. Specify the recommended category and tap “Switch to professional account” — make sure to select “Business”, not “Author”, and tap “Next”.
After this, you need to link the account to a Facebook* business page. This will provide access to the Messaging API and enable integration with Umnico.
Enabling message access
1. Go to “Settings”.
2. Tap “Messages and Story Replies”.
3. Select “Message requests”.
4. In the “Connected tools” section, activate the “Allow access to messages” option.
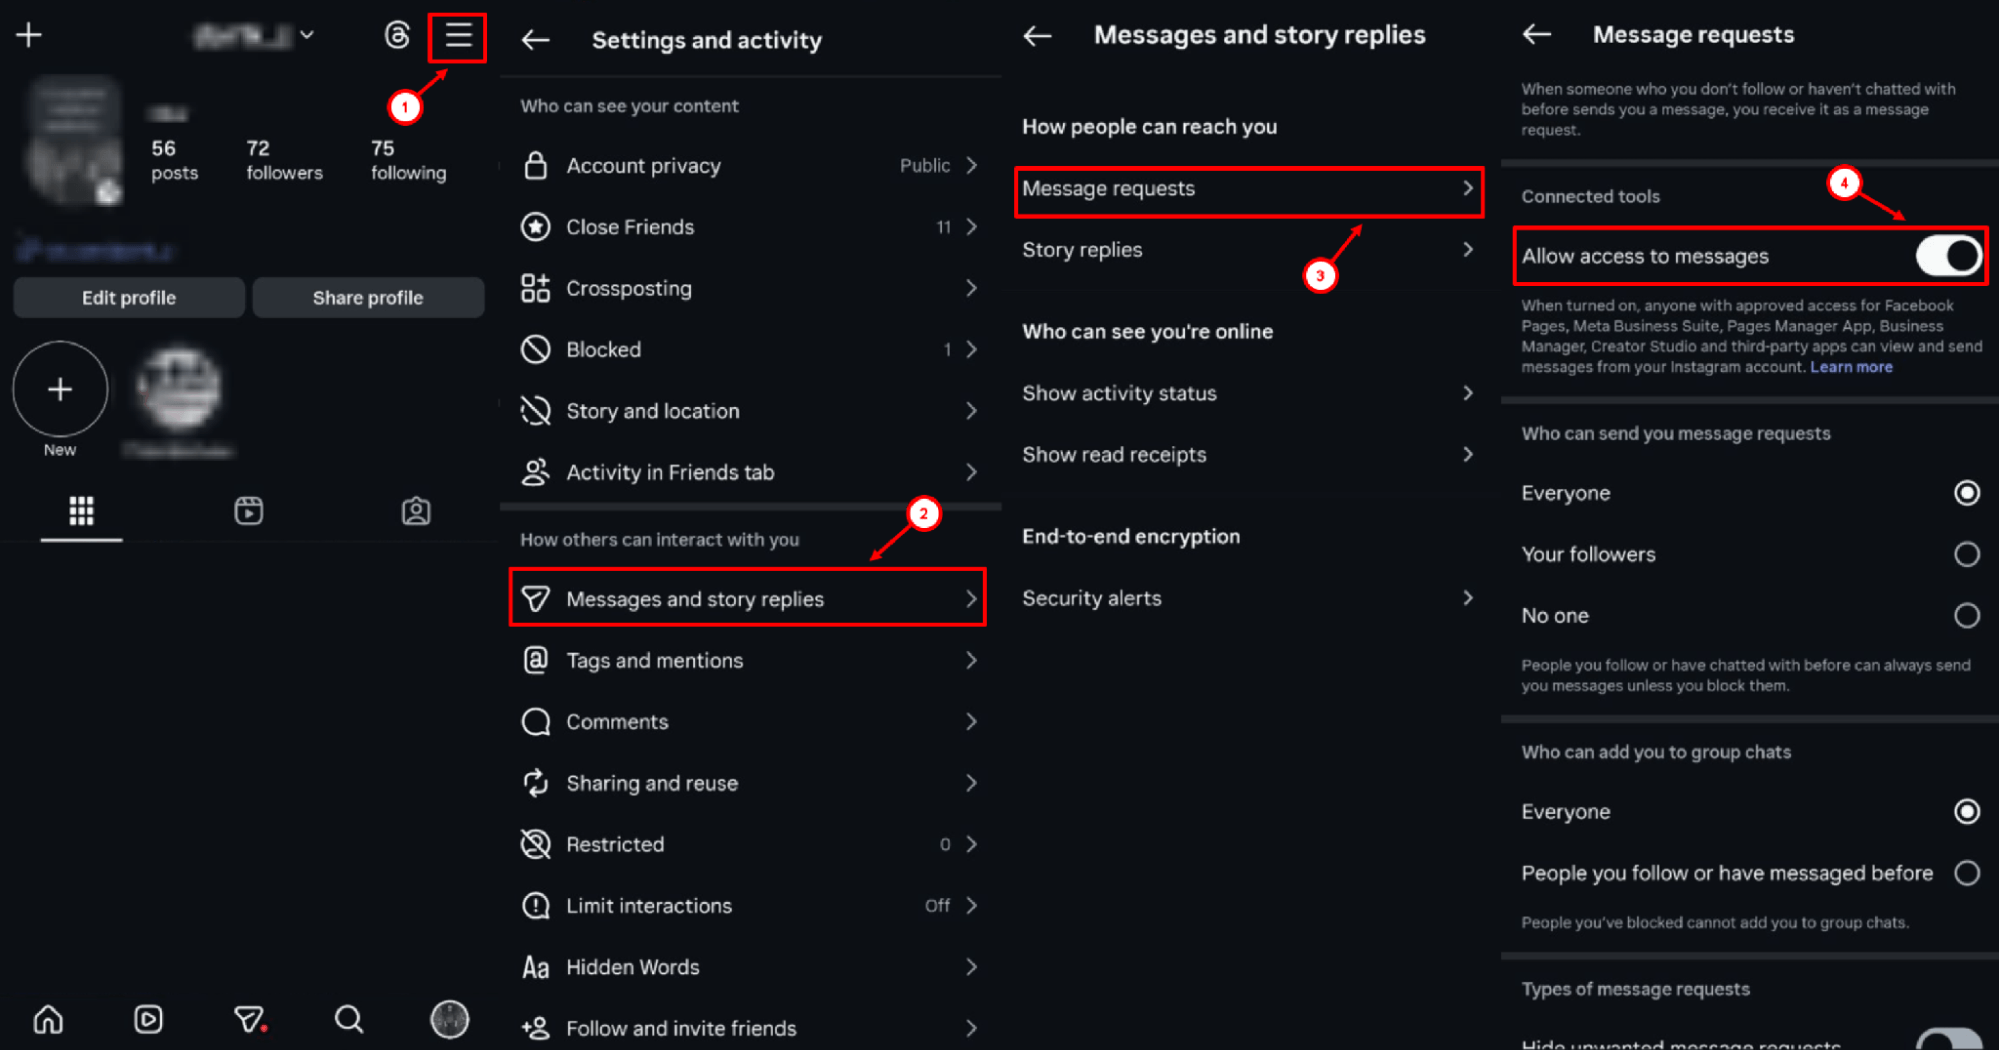
This step is mandatory for the integration with Umnico to work correctly.
Linking account to Facebook* Business page
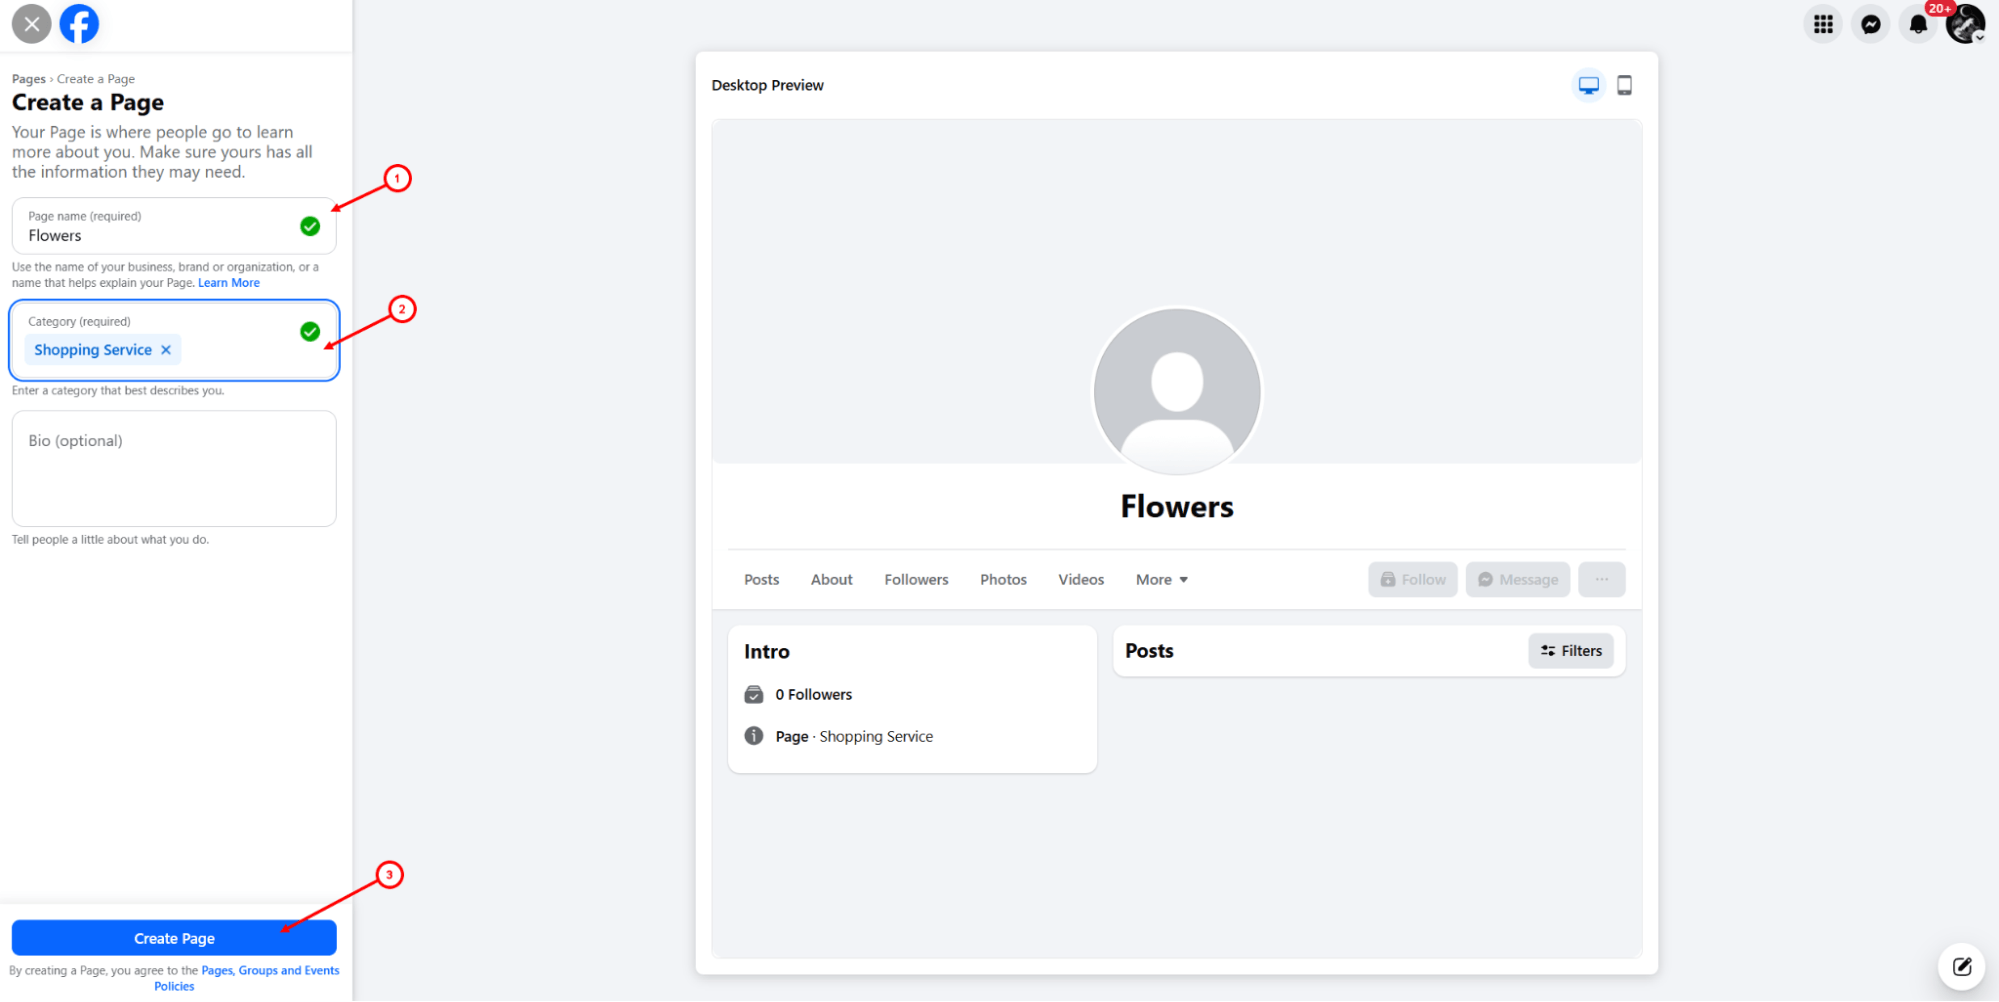
If you don't have a business page yet, create one:
1. Log in to Facebook*.
2. Click "Menu" — "Page" in the top right corner.
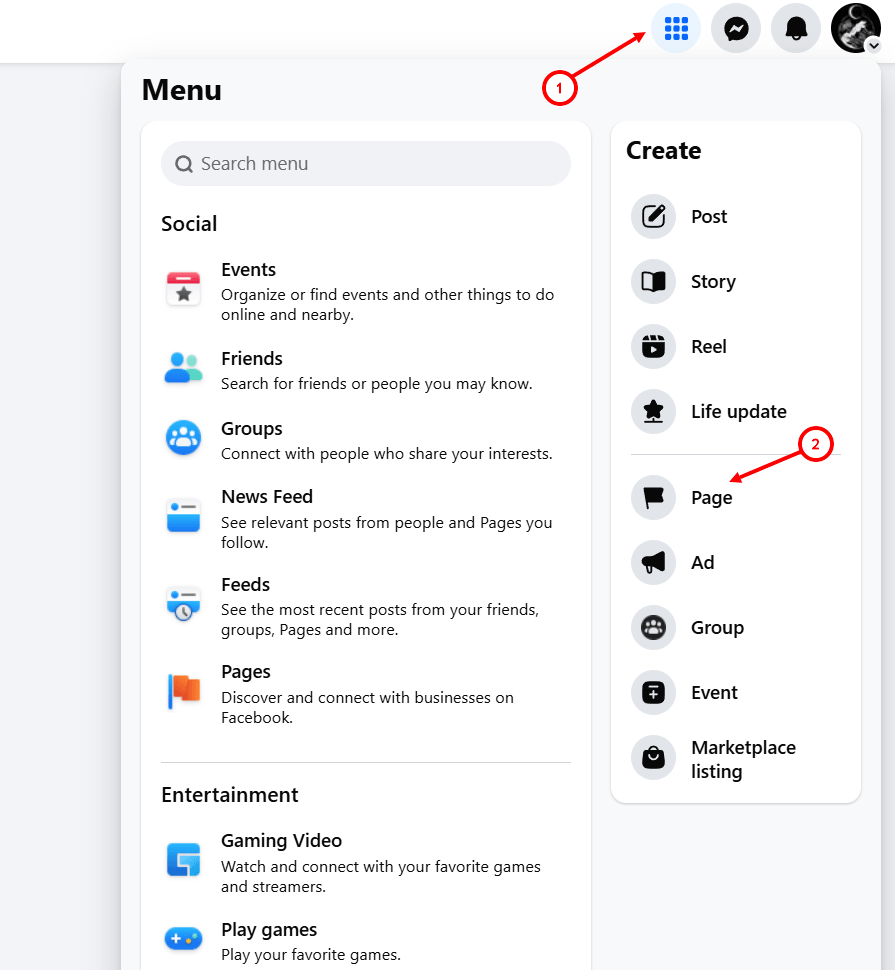
3. Fill in the “Page Name”, specify a category, and click “Create Page”.
After creating the page, link it to your Instagram* profile. This can be done in two ways:
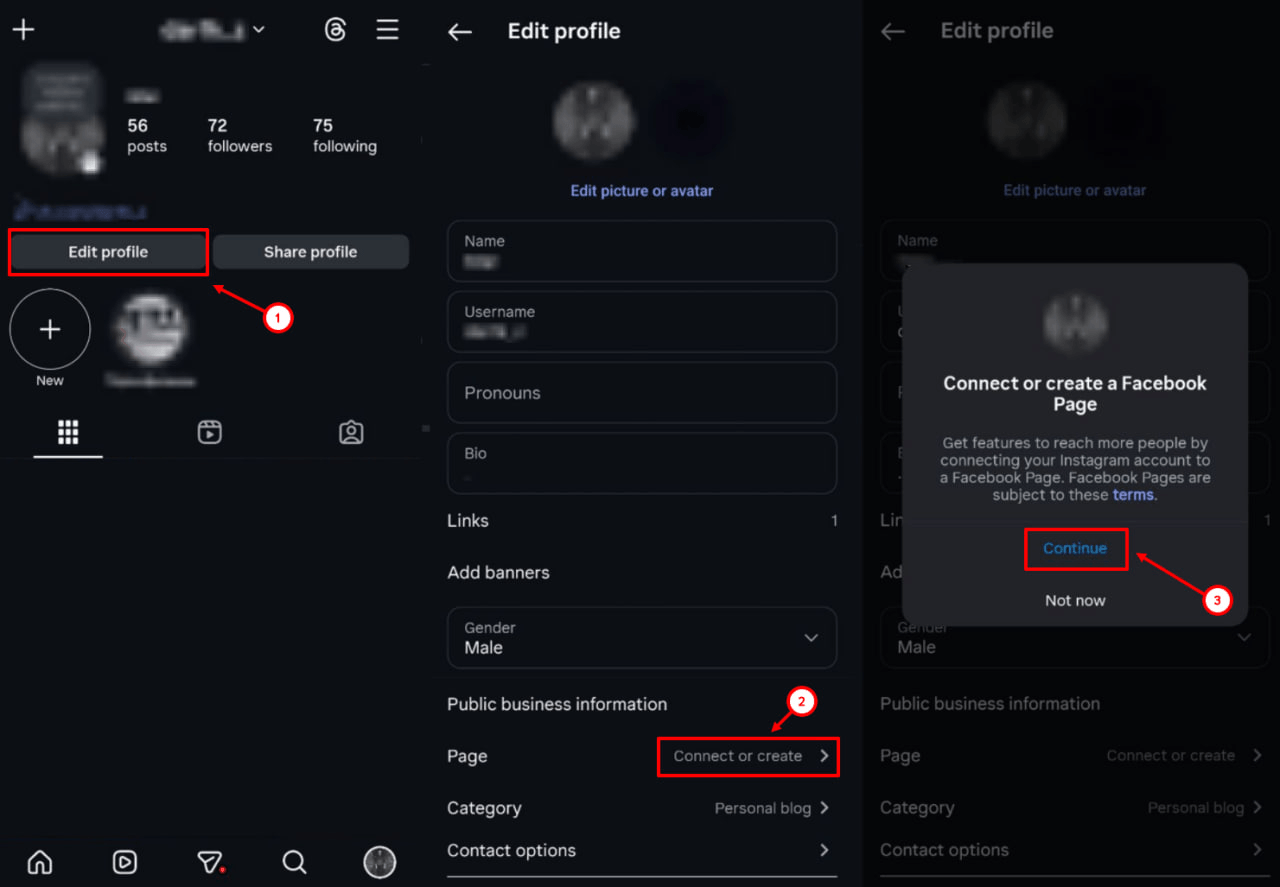
Option 1. Through Instagram*
1. Open your Instagram* profile and tap “Edit Profile”.
2. In the “Profile Information” section, find the “Page” item and tap “Connect or create”.
3. Tap “Continue”.
Option 2. Through Facebook*
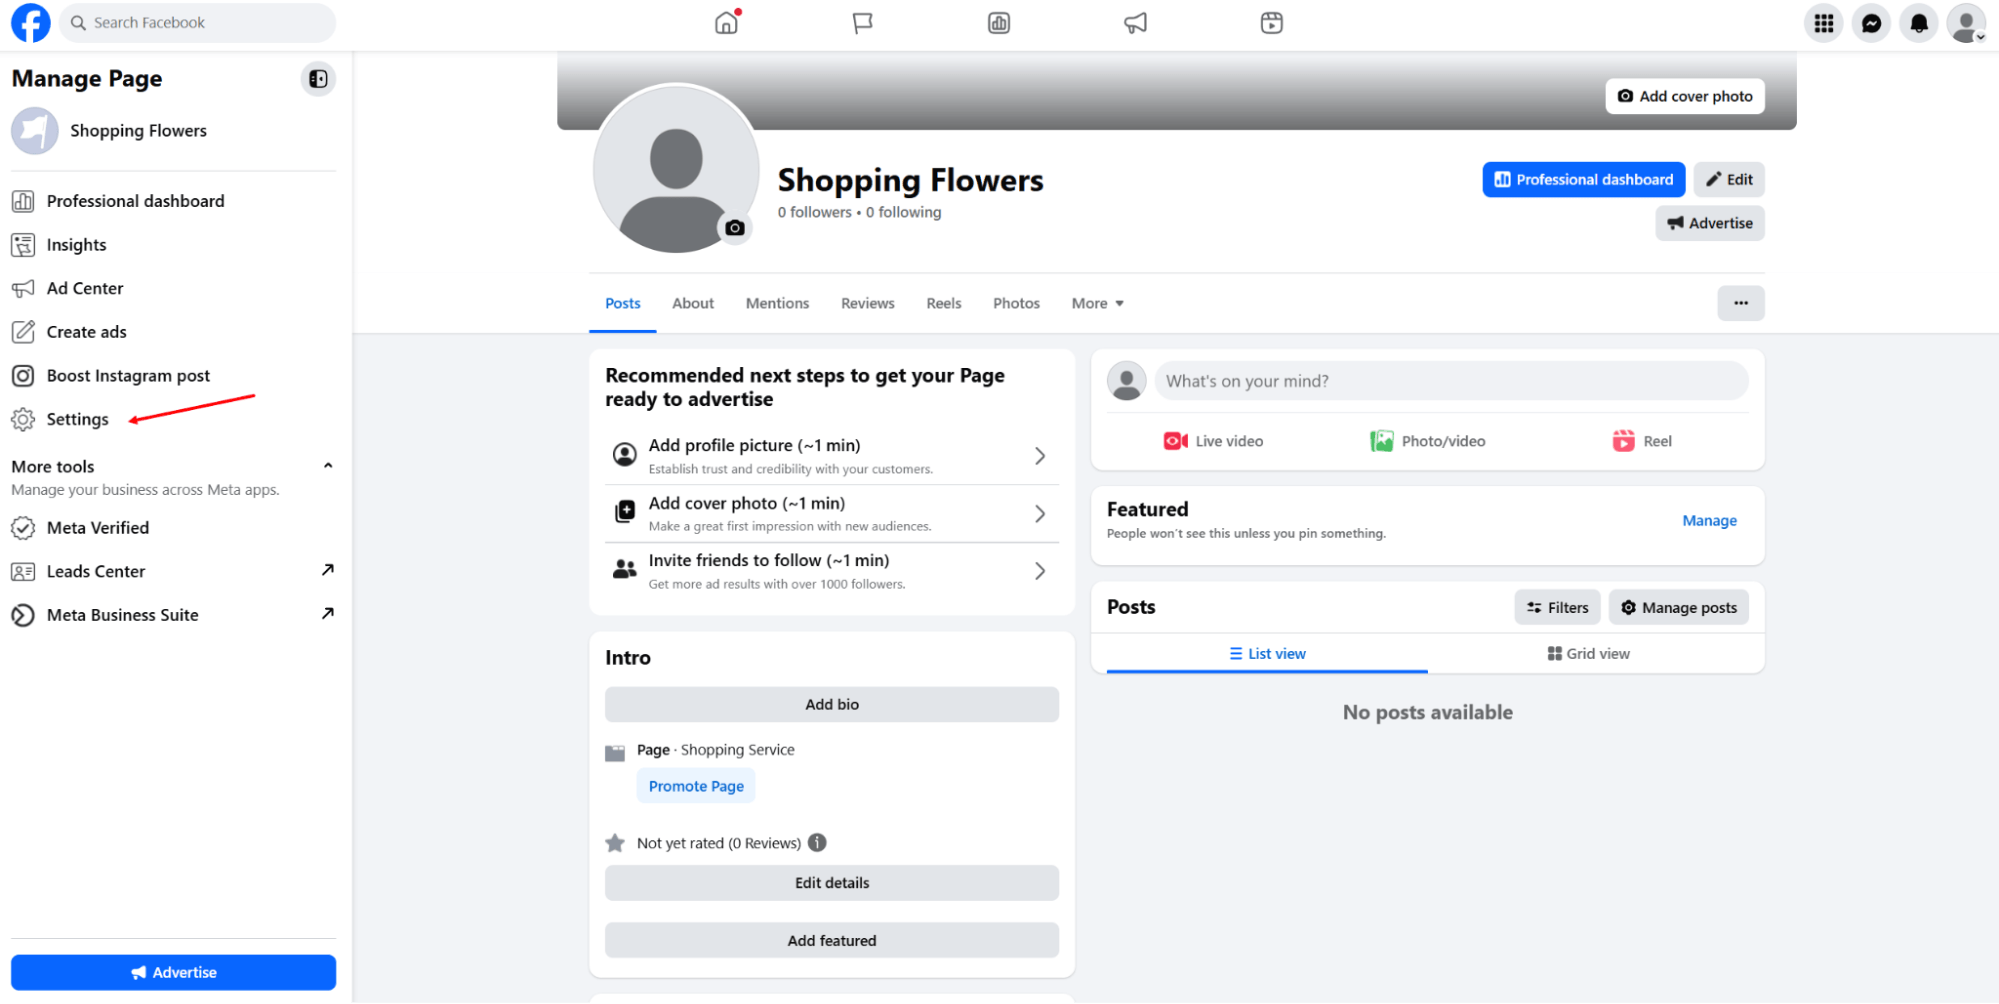
1. On Facebook*, switch from your personal profile to the business page.
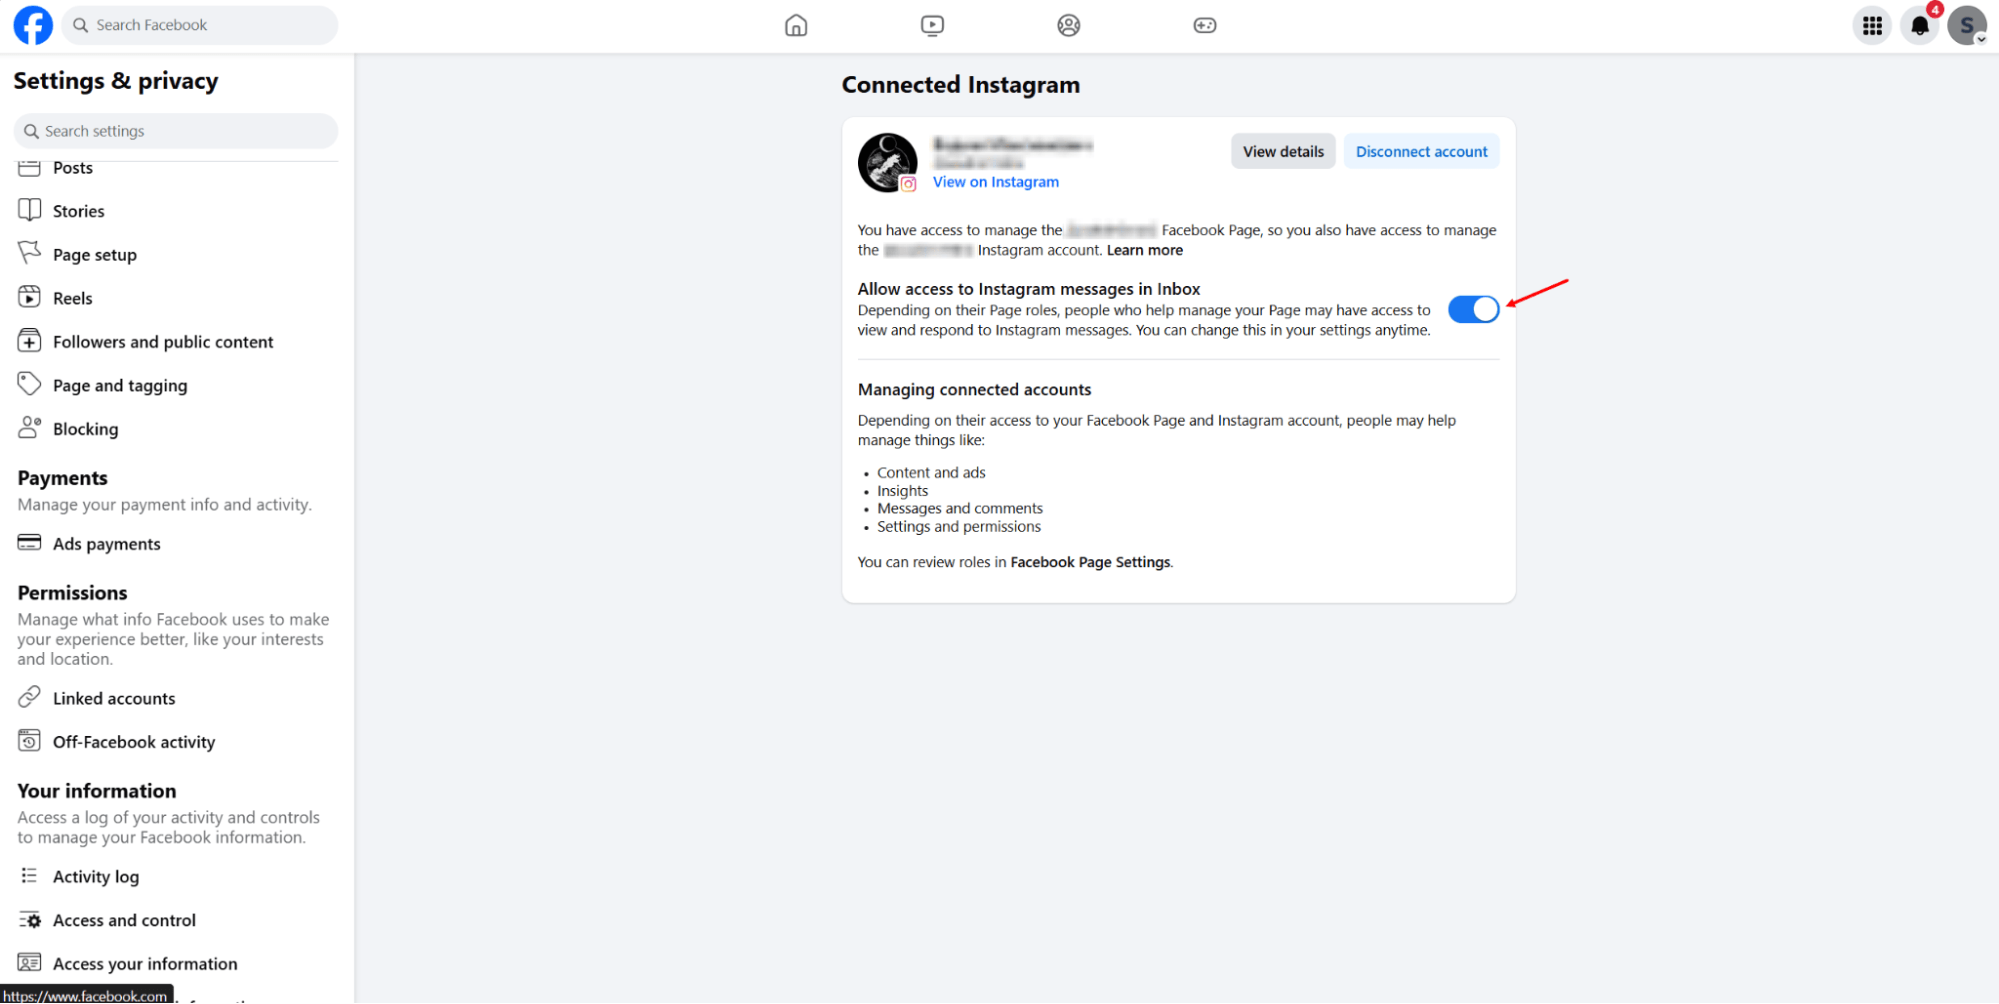
2. Go to “Settings” — “Linked accounts” — “Instagram”*.
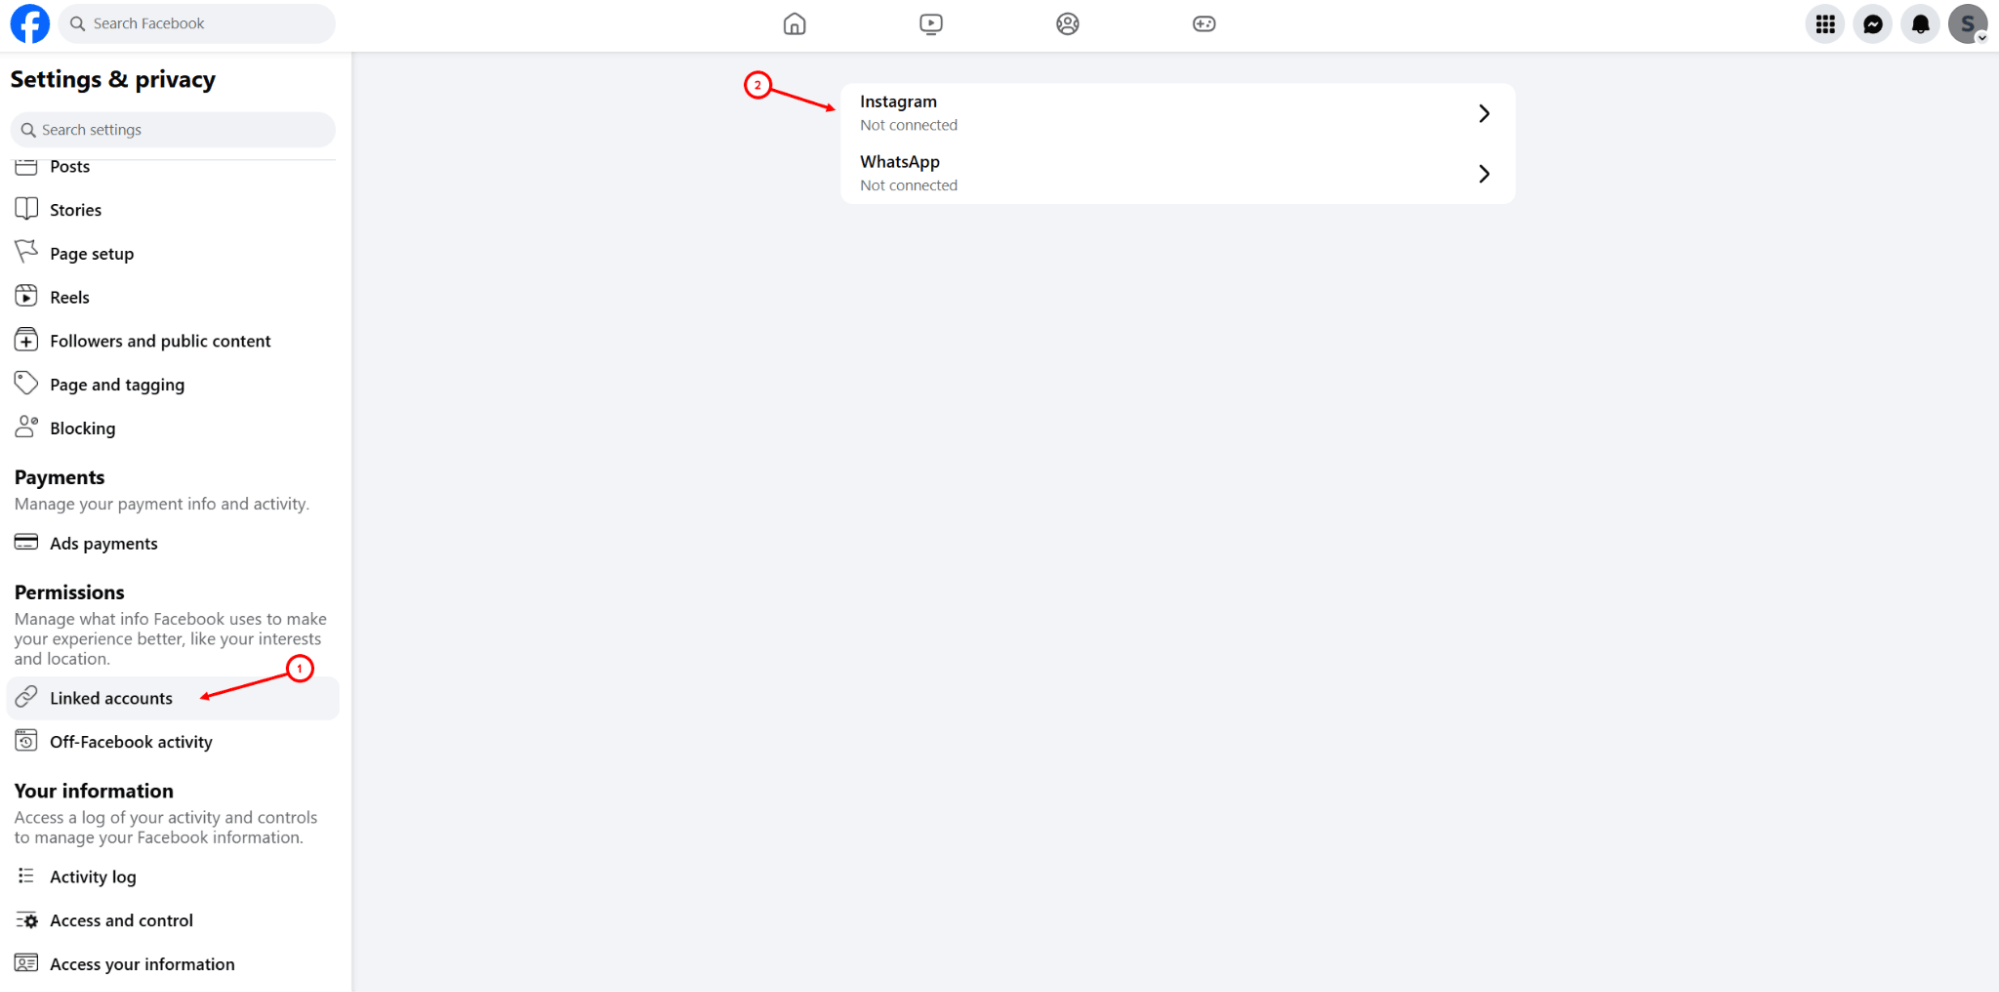
3. Click “Connect account" and log in to your Instagram* account. Make sure that in the Inbox section, access to messages from the platform is enabled.
4. Go to “Page setup” — “Page access”.
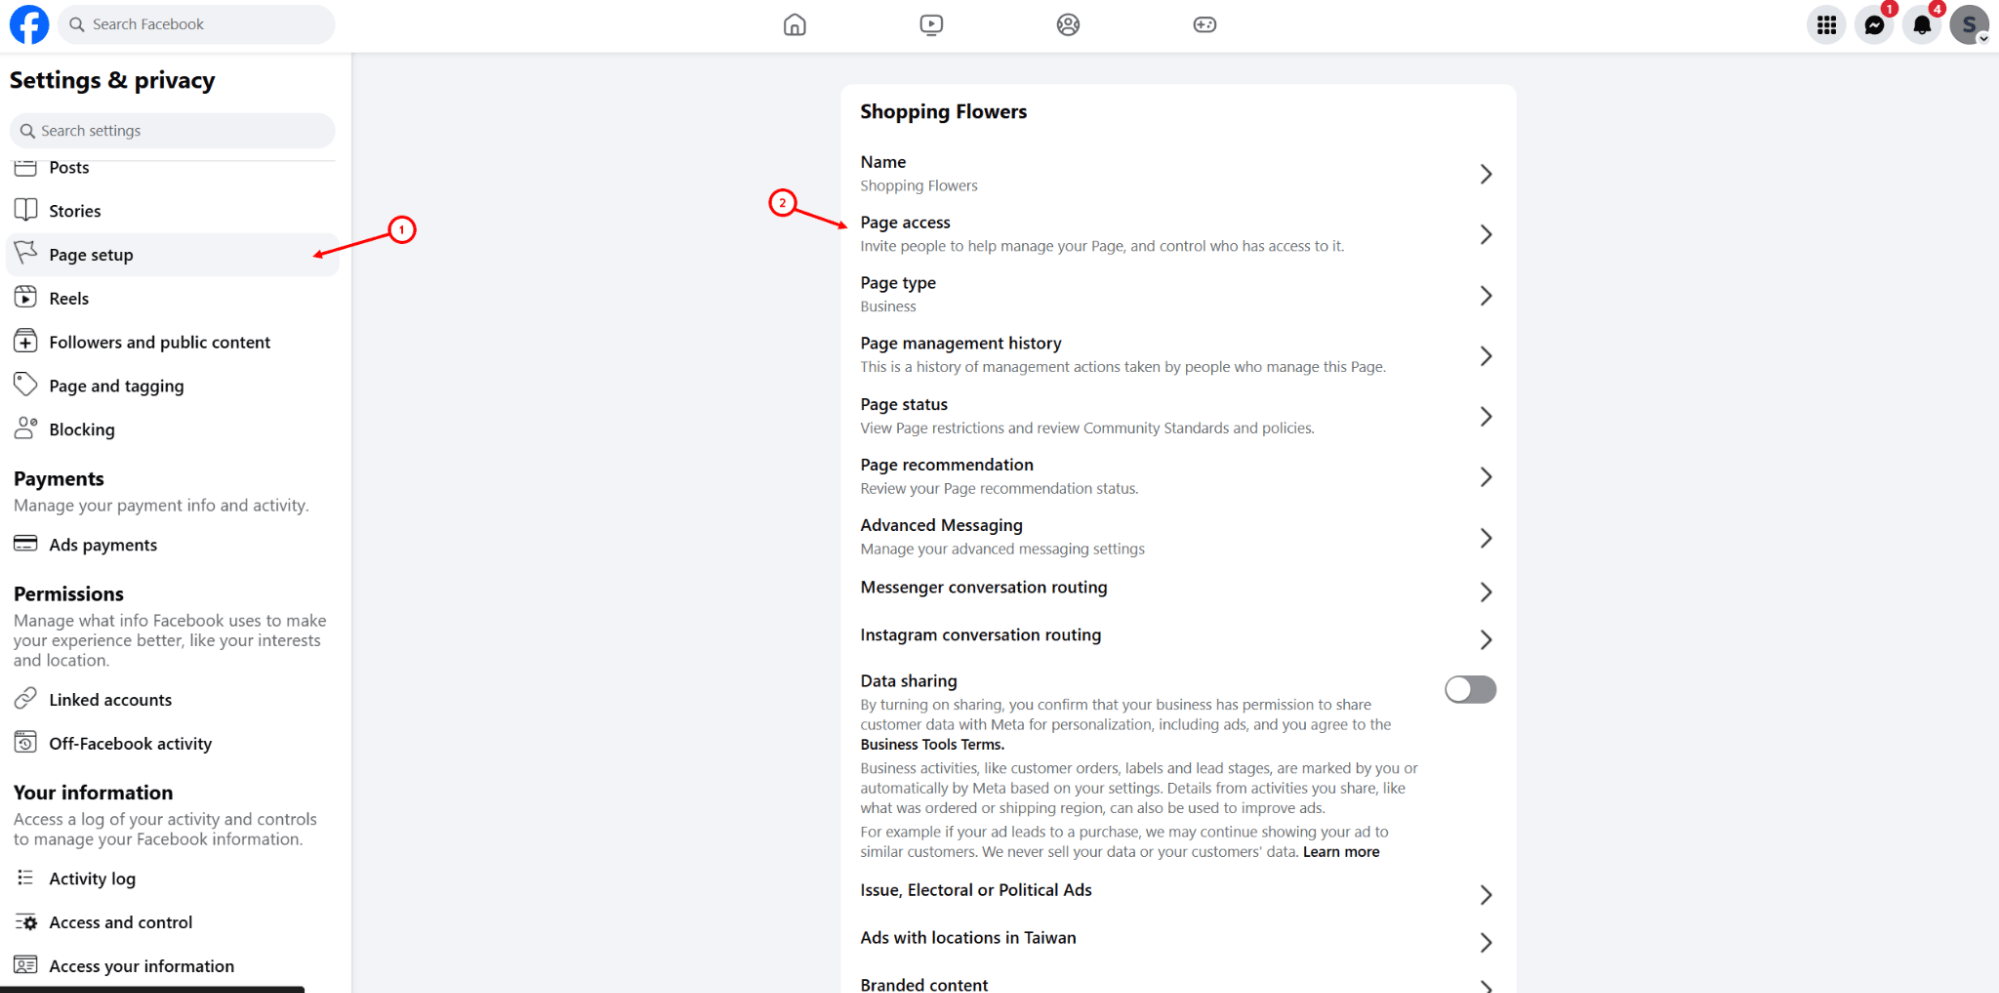
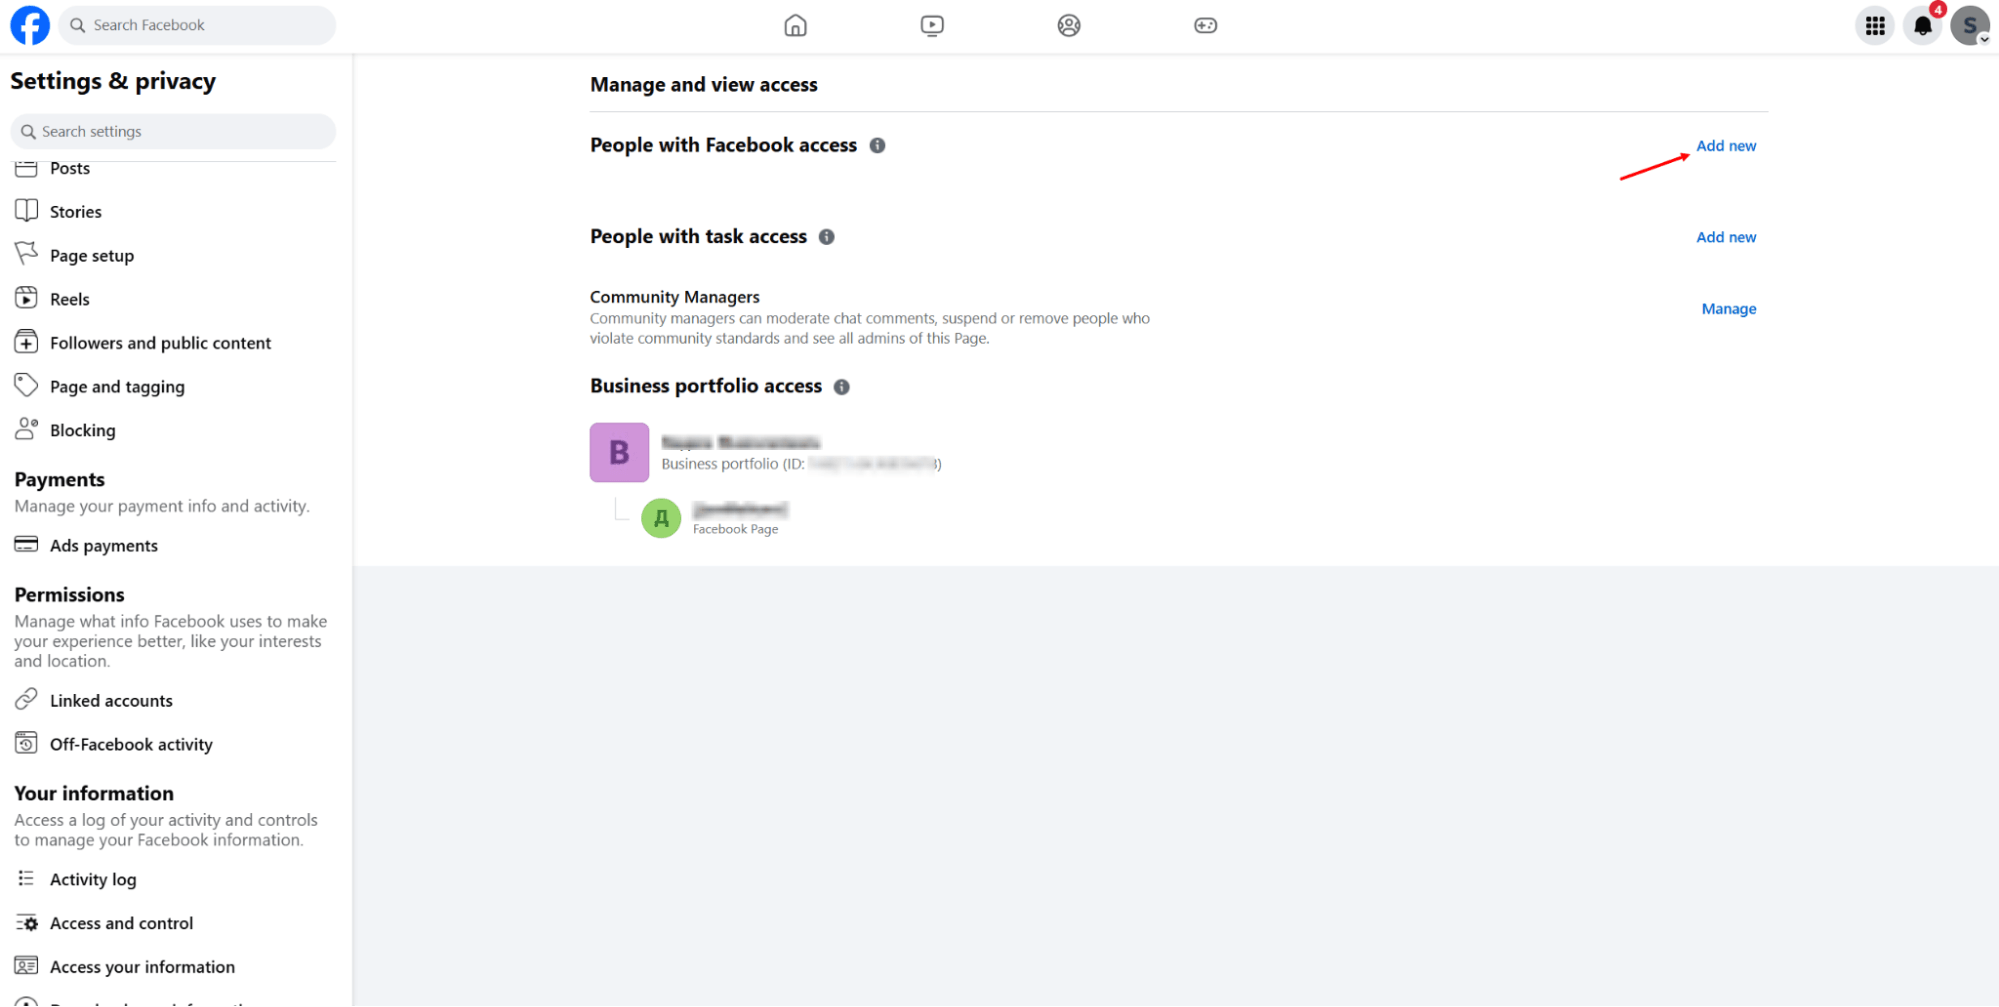
5. Click the “Add” button in the “People with Facebook* access” subsection. Grant full access to the page.
Learn more about linking Instagram* and Facebook* accounts here.
Once all the preparation steps are completed, you can proceed to connect Instagram* to Umnico.
Connecting Instagram* to Umnico
To start using Instagram* in Umnico, follow our simple instructions. The connection process will take just a few minutes.
Tutorial video
If you find it easier to learn in a visual format, watch the video to connect the channel.
Step-by-step connection instructions
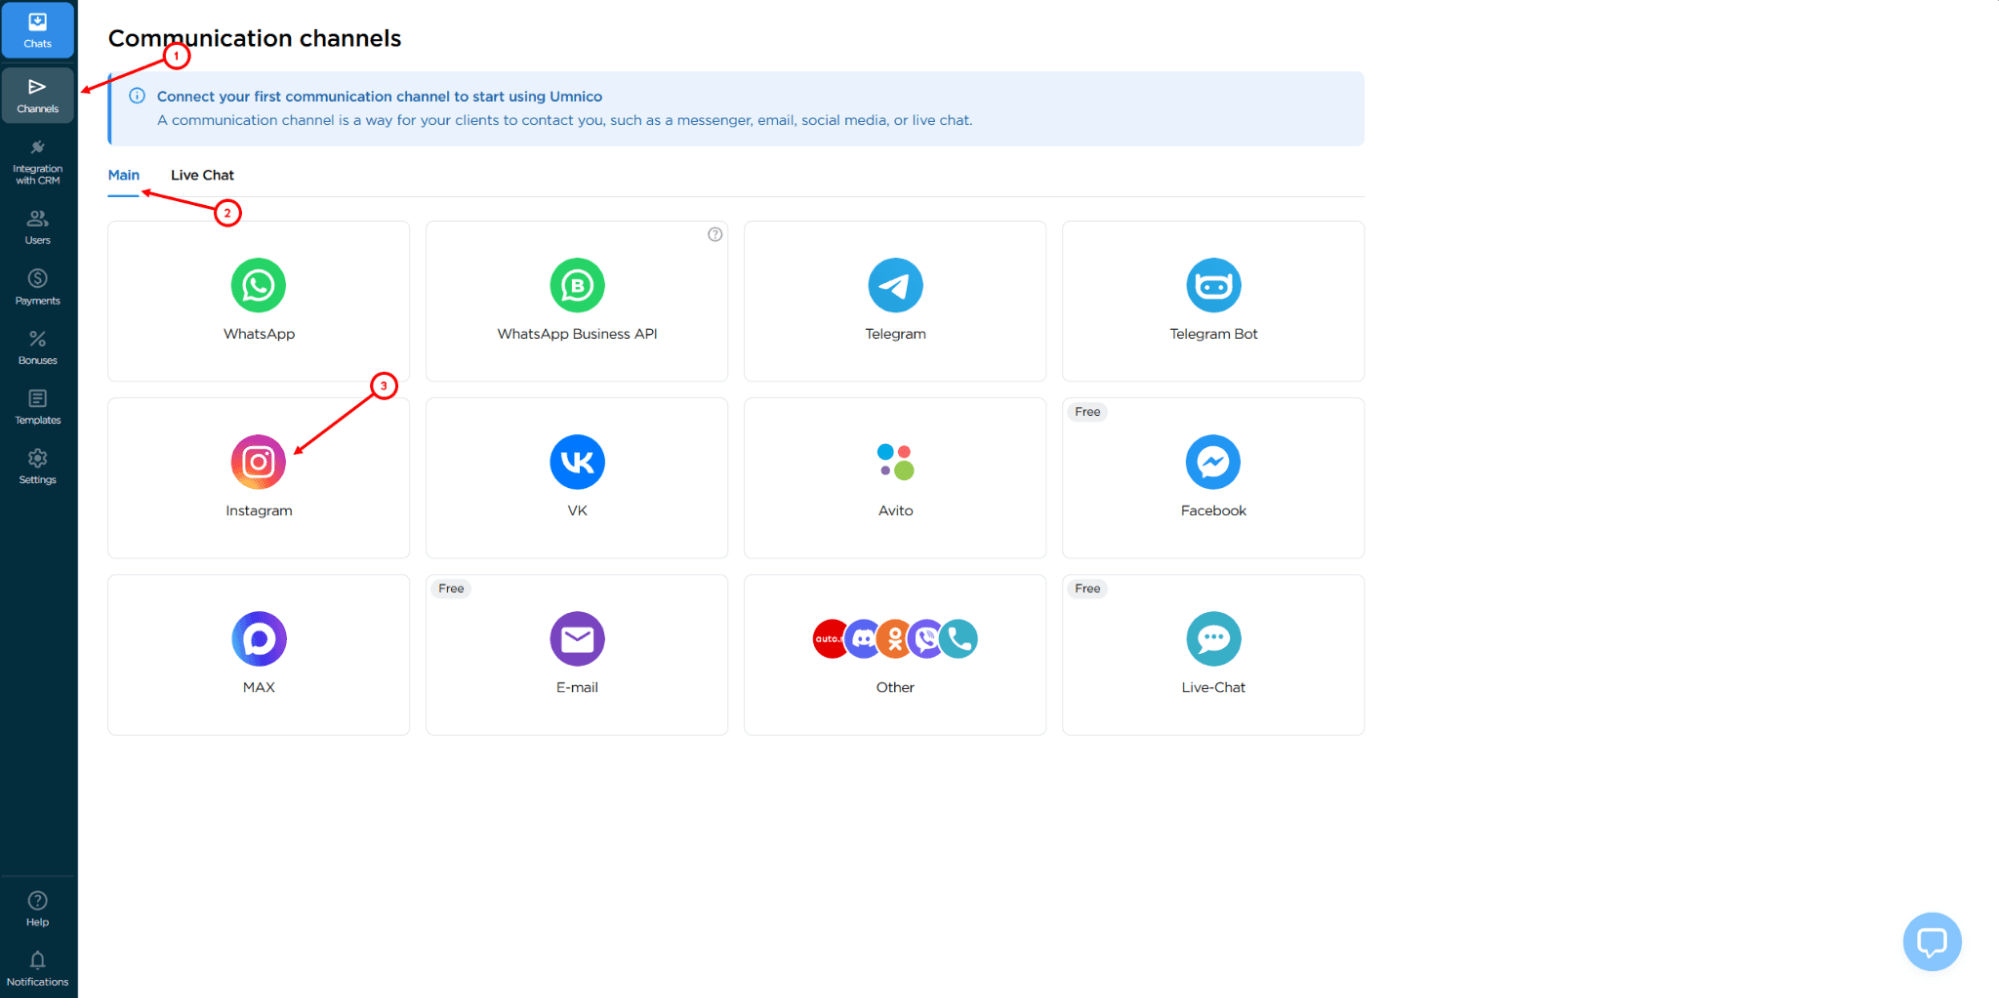
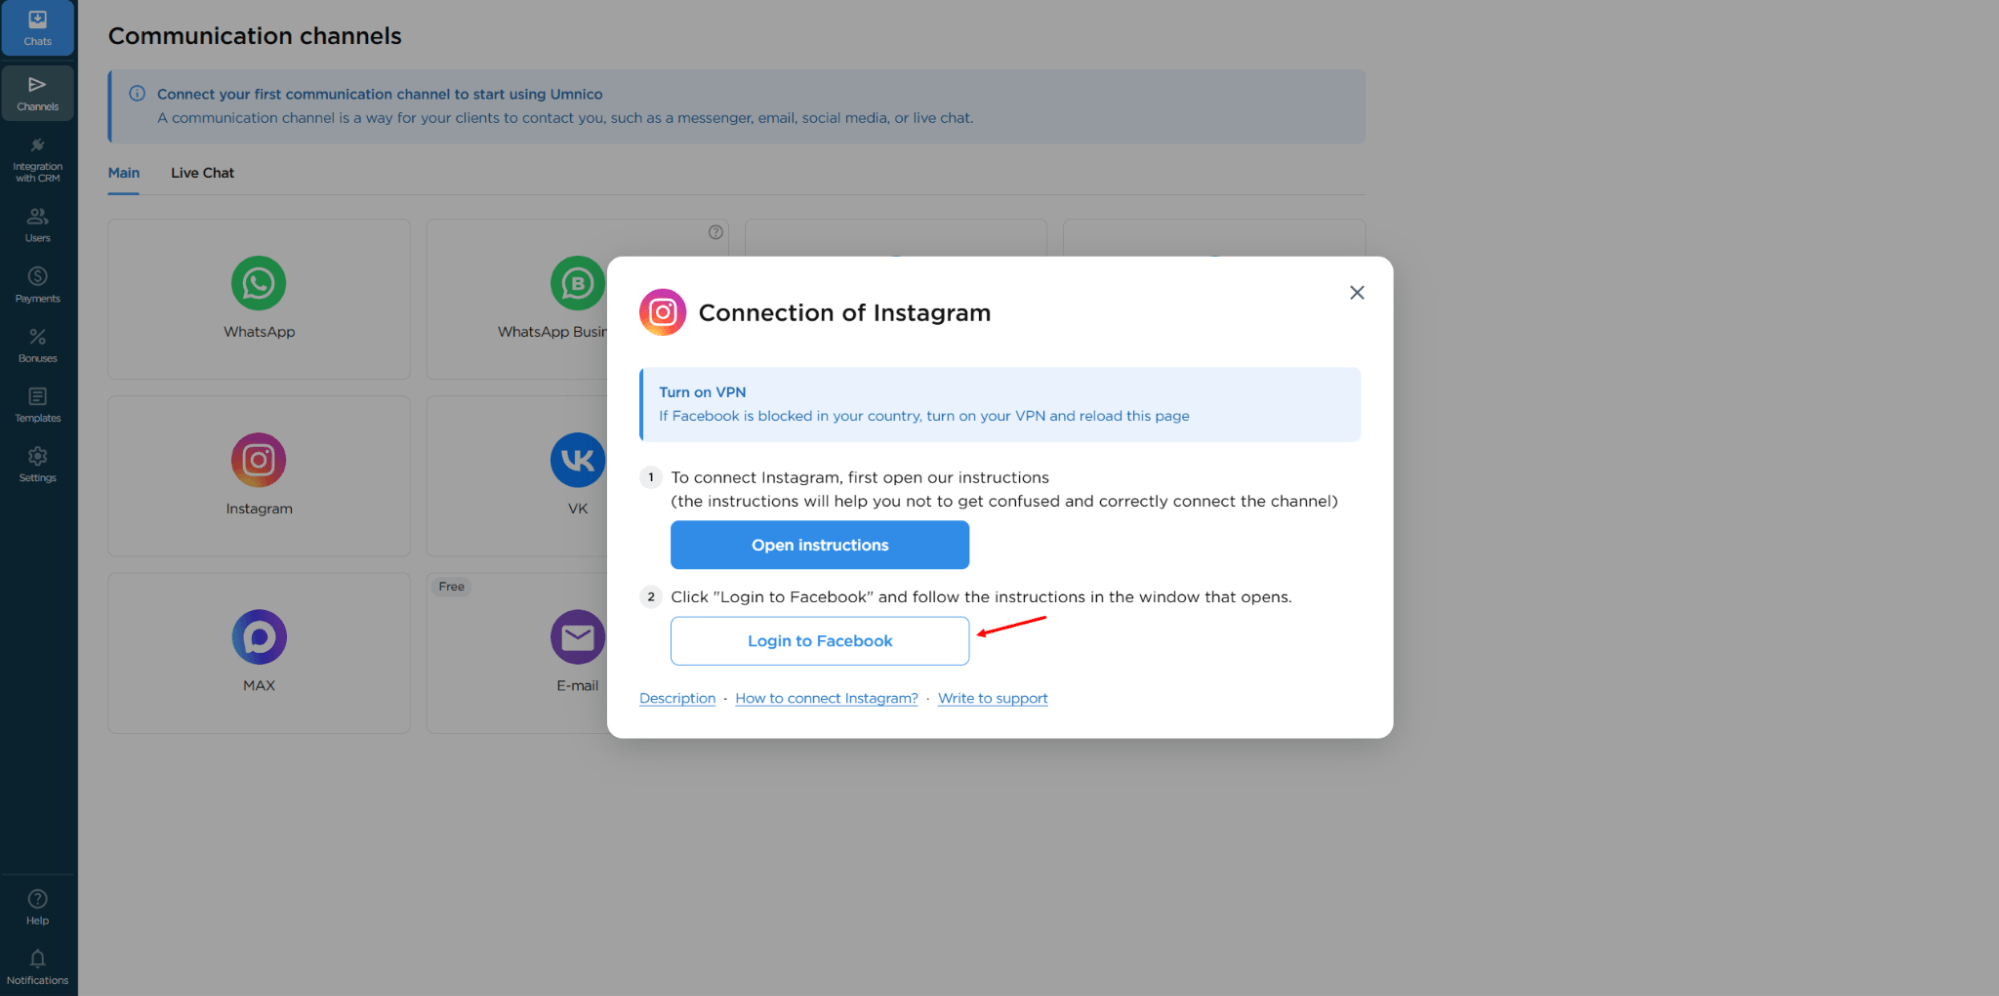
1. In your Umnico account, open the side menu: “Channels” — “Main” — “Instagram”*.
2. In the opened window, click the "Login to Facebook"* button.
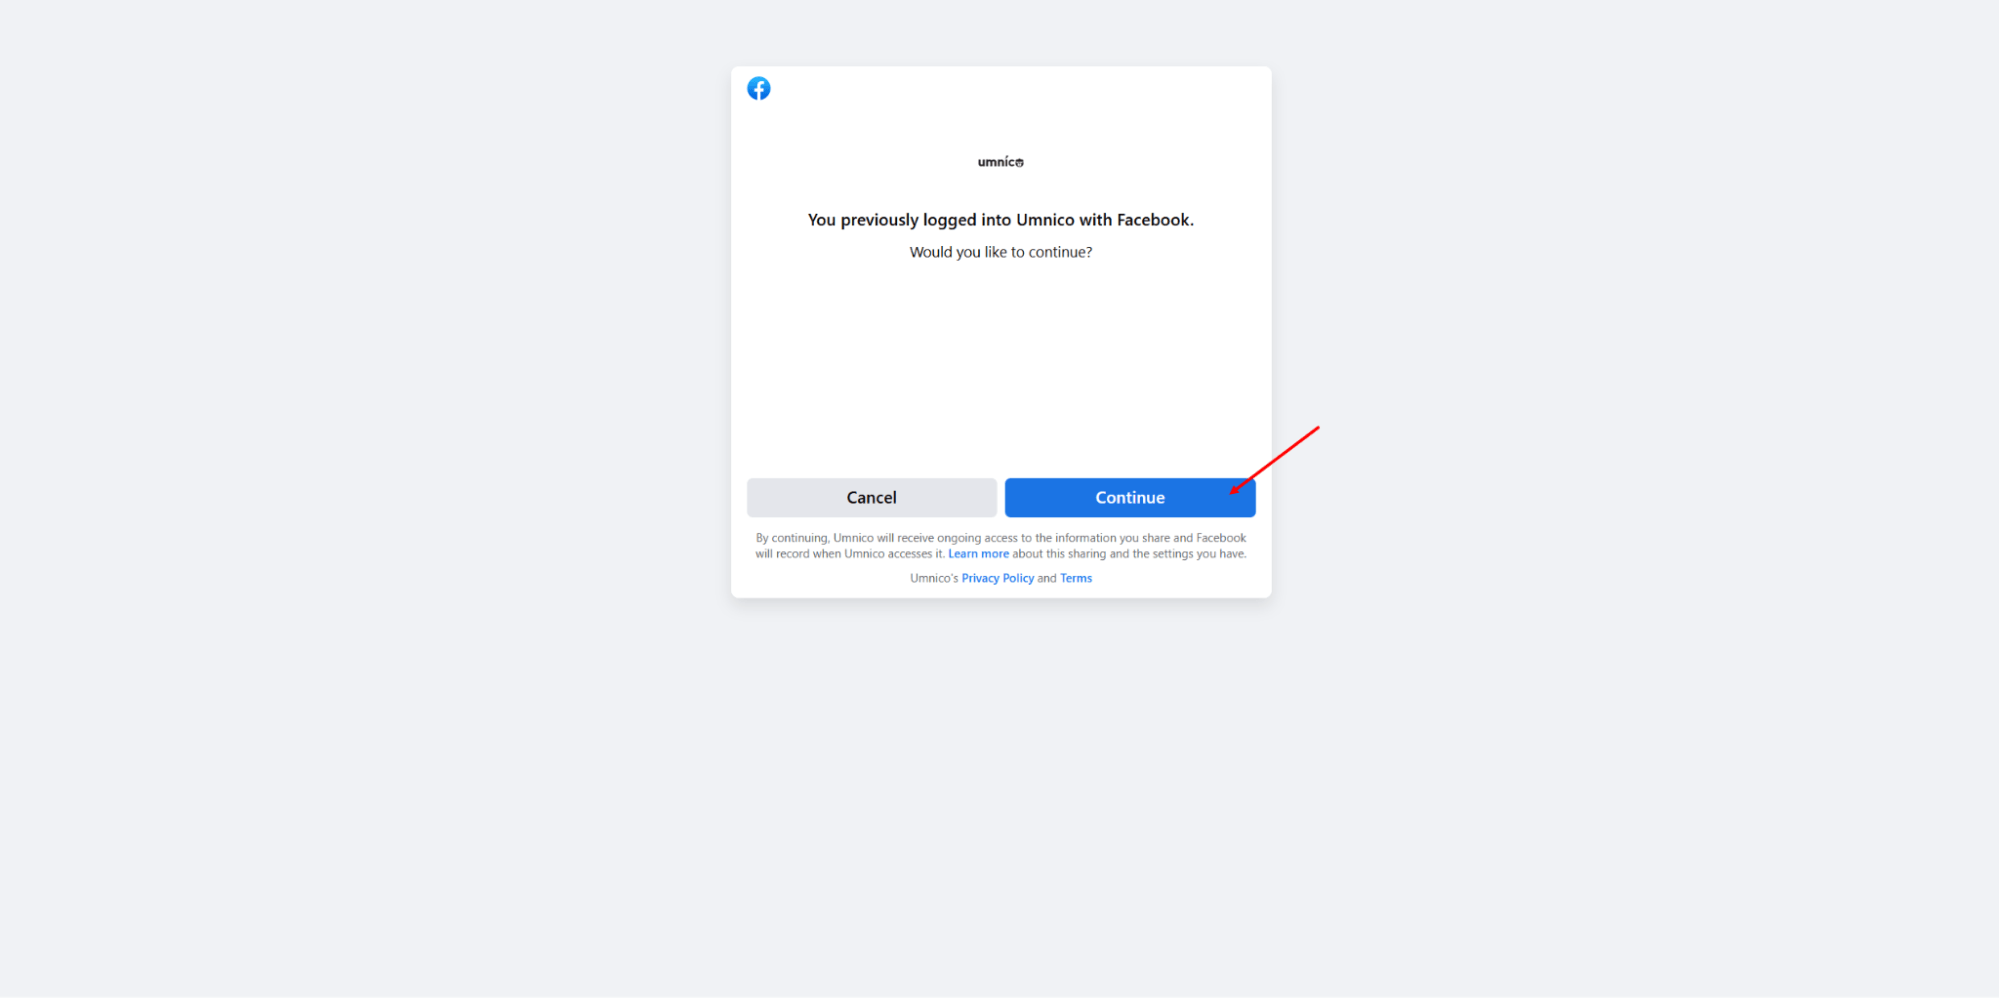
3. Log in to the Facebook* account where you have business page owner rights.
4. After successful authorization, click "Continue" to complete the Facebook* integration stage.
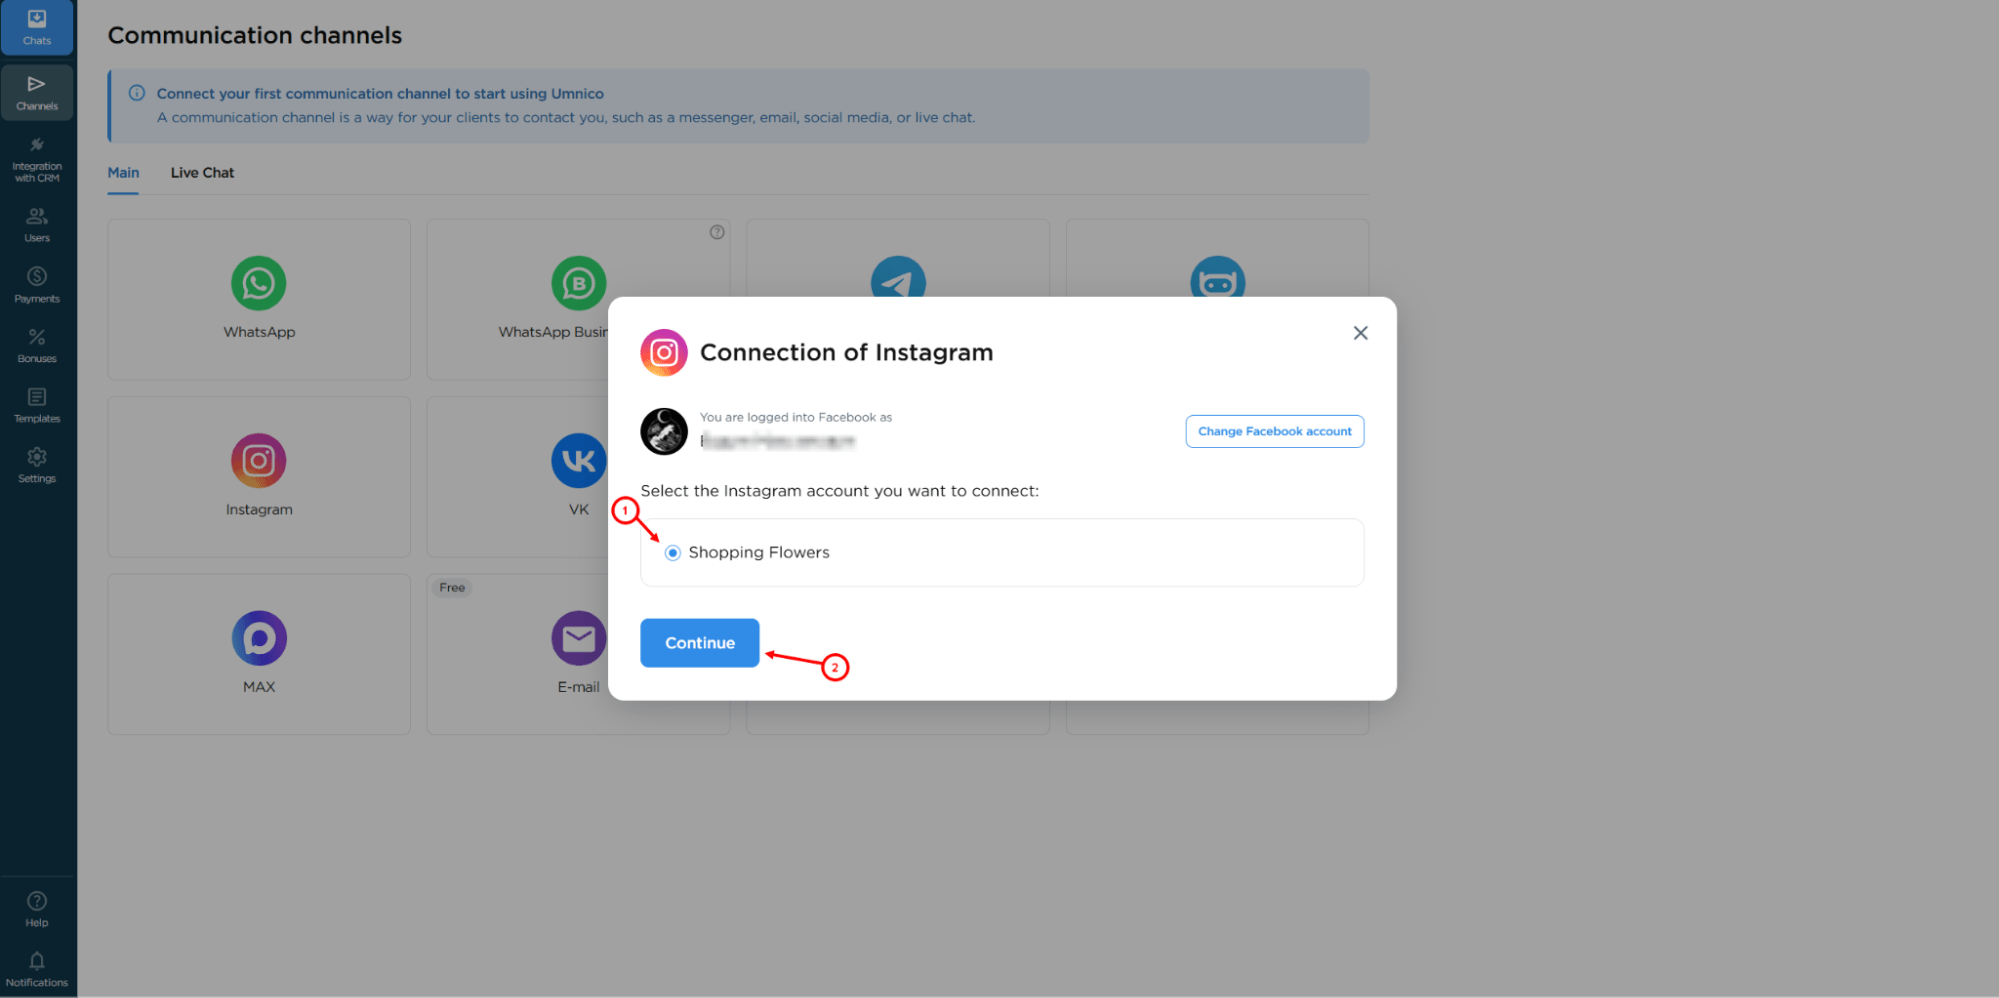
5. You will return to the Umnico interface. Select the appropriate group associated with your Instagram* account and click “Continue”.
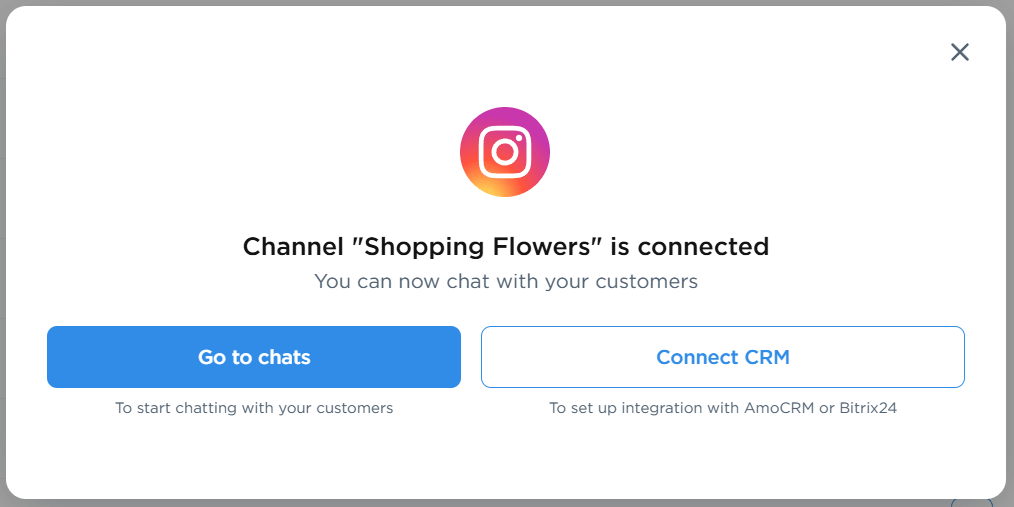
Done! All incoming direct messages and comments from Instagram* will now appear in the Umnico interface. The connected account will appear in the list of active channels.
Connecting Kommo to Umnico
The next step is to connect Umnico with Kommo so that inquiries from Instagram* automatically appear in your CRM system.
1. In your Umnico personal account, select from the side menu: "CRM Integrations” — “Kommo".
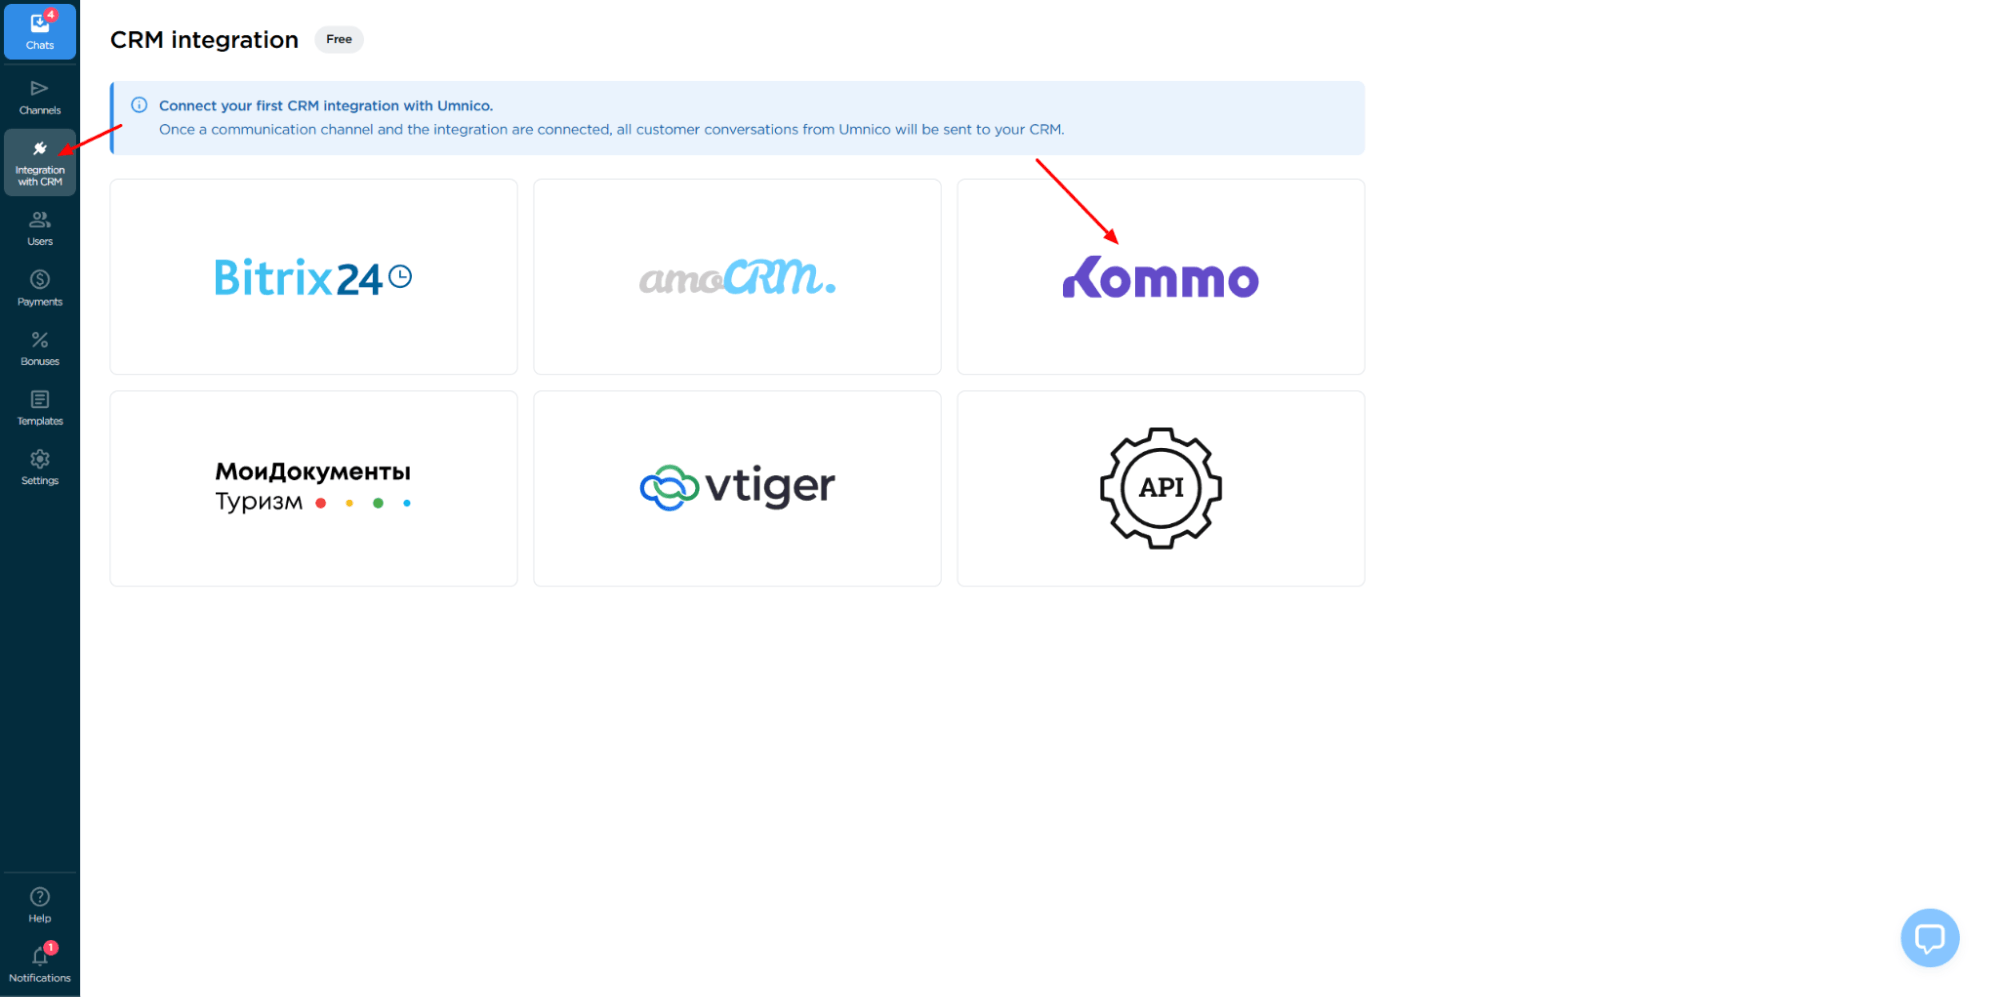
2. Click "Connect". An authorization window will open.
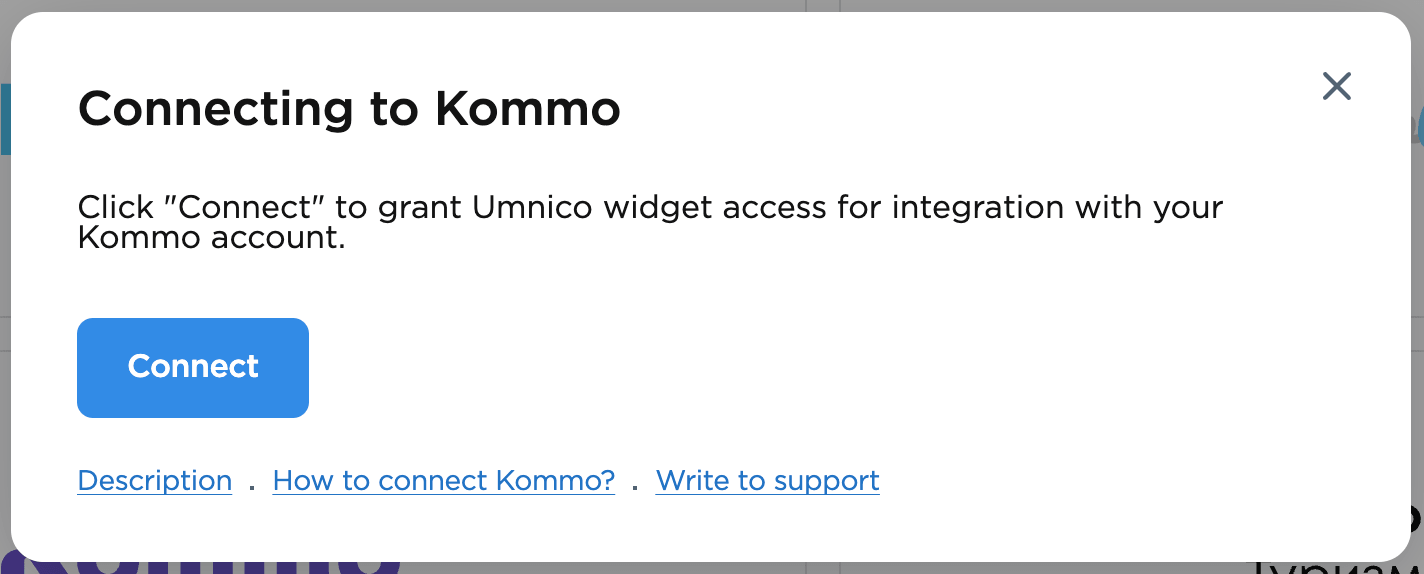
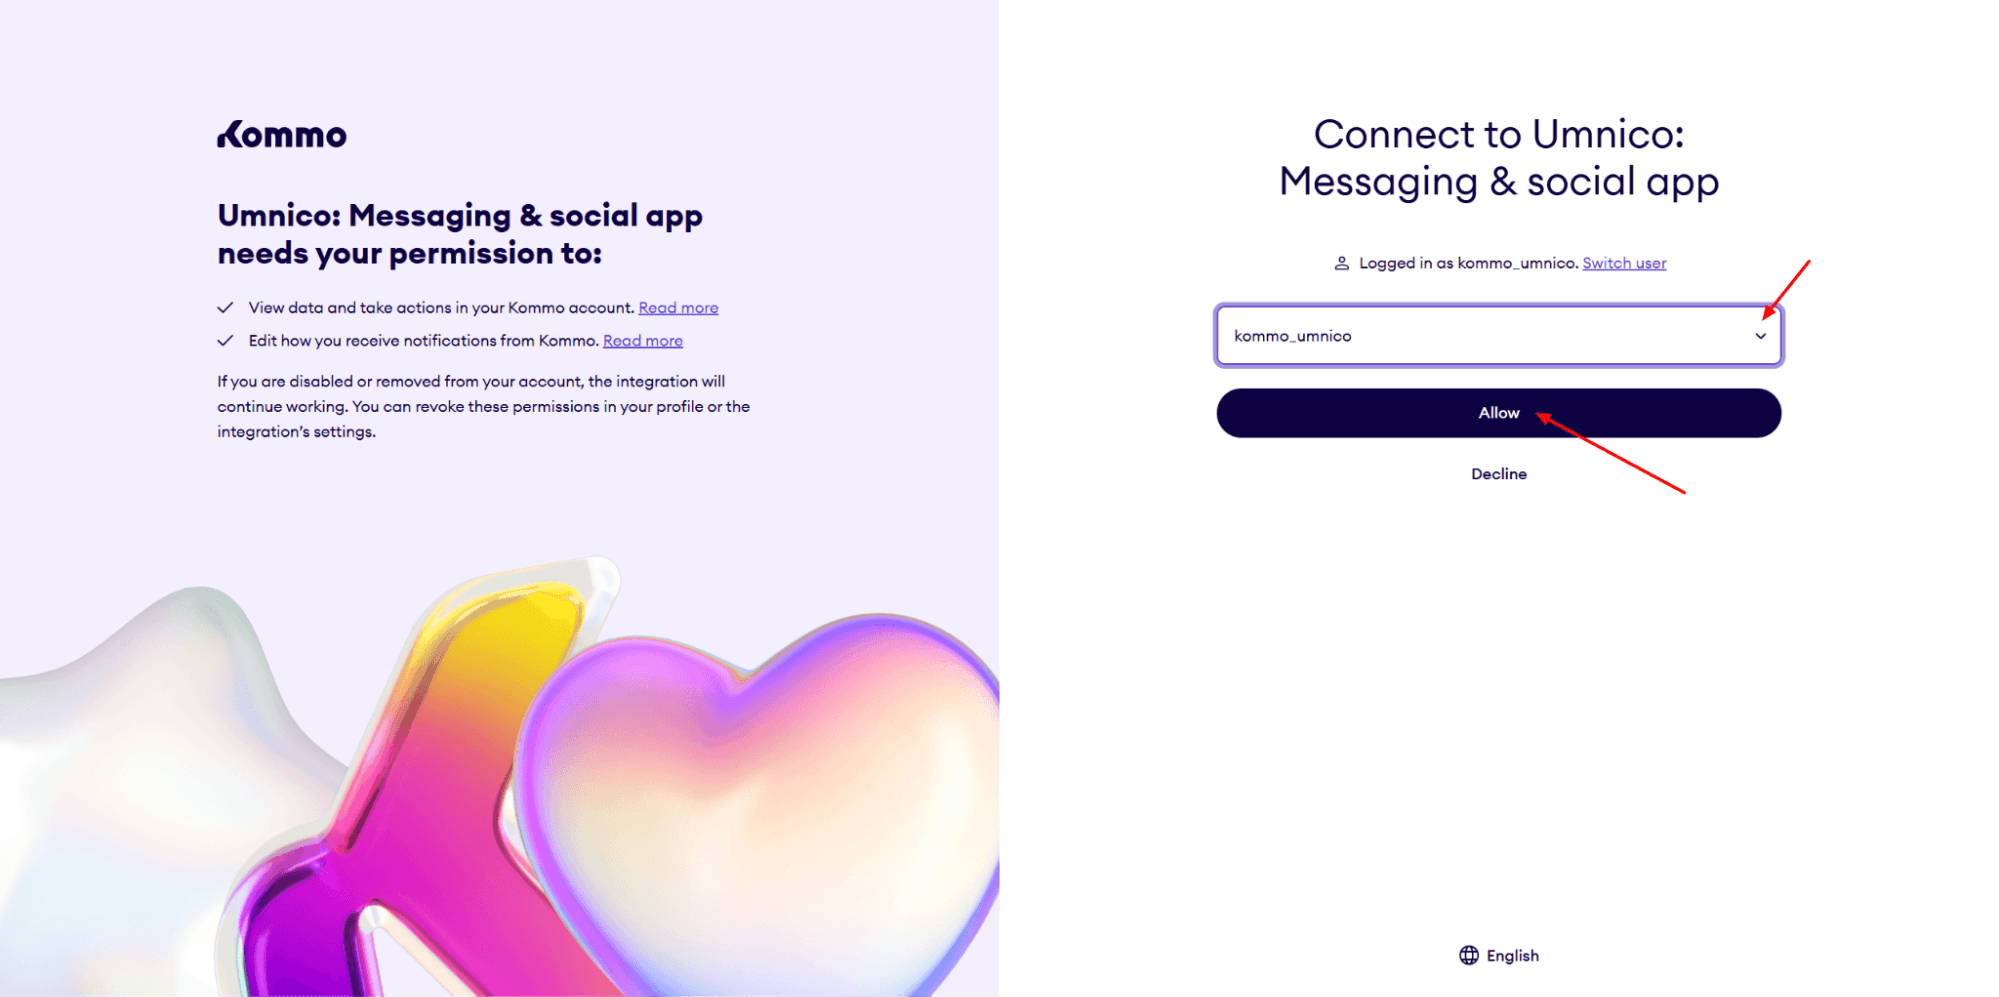
3. In the opened tab, select your Kommo account (you must be logged in) and confirm the integration permission.
4. After connecting, the Settings page will open:
Deal settings
Configure the logic for handling repeat inquiries: create a new deal or add the message to the last closed one. This prevents duplicate creation and keeps the entire customer communication history in one place.
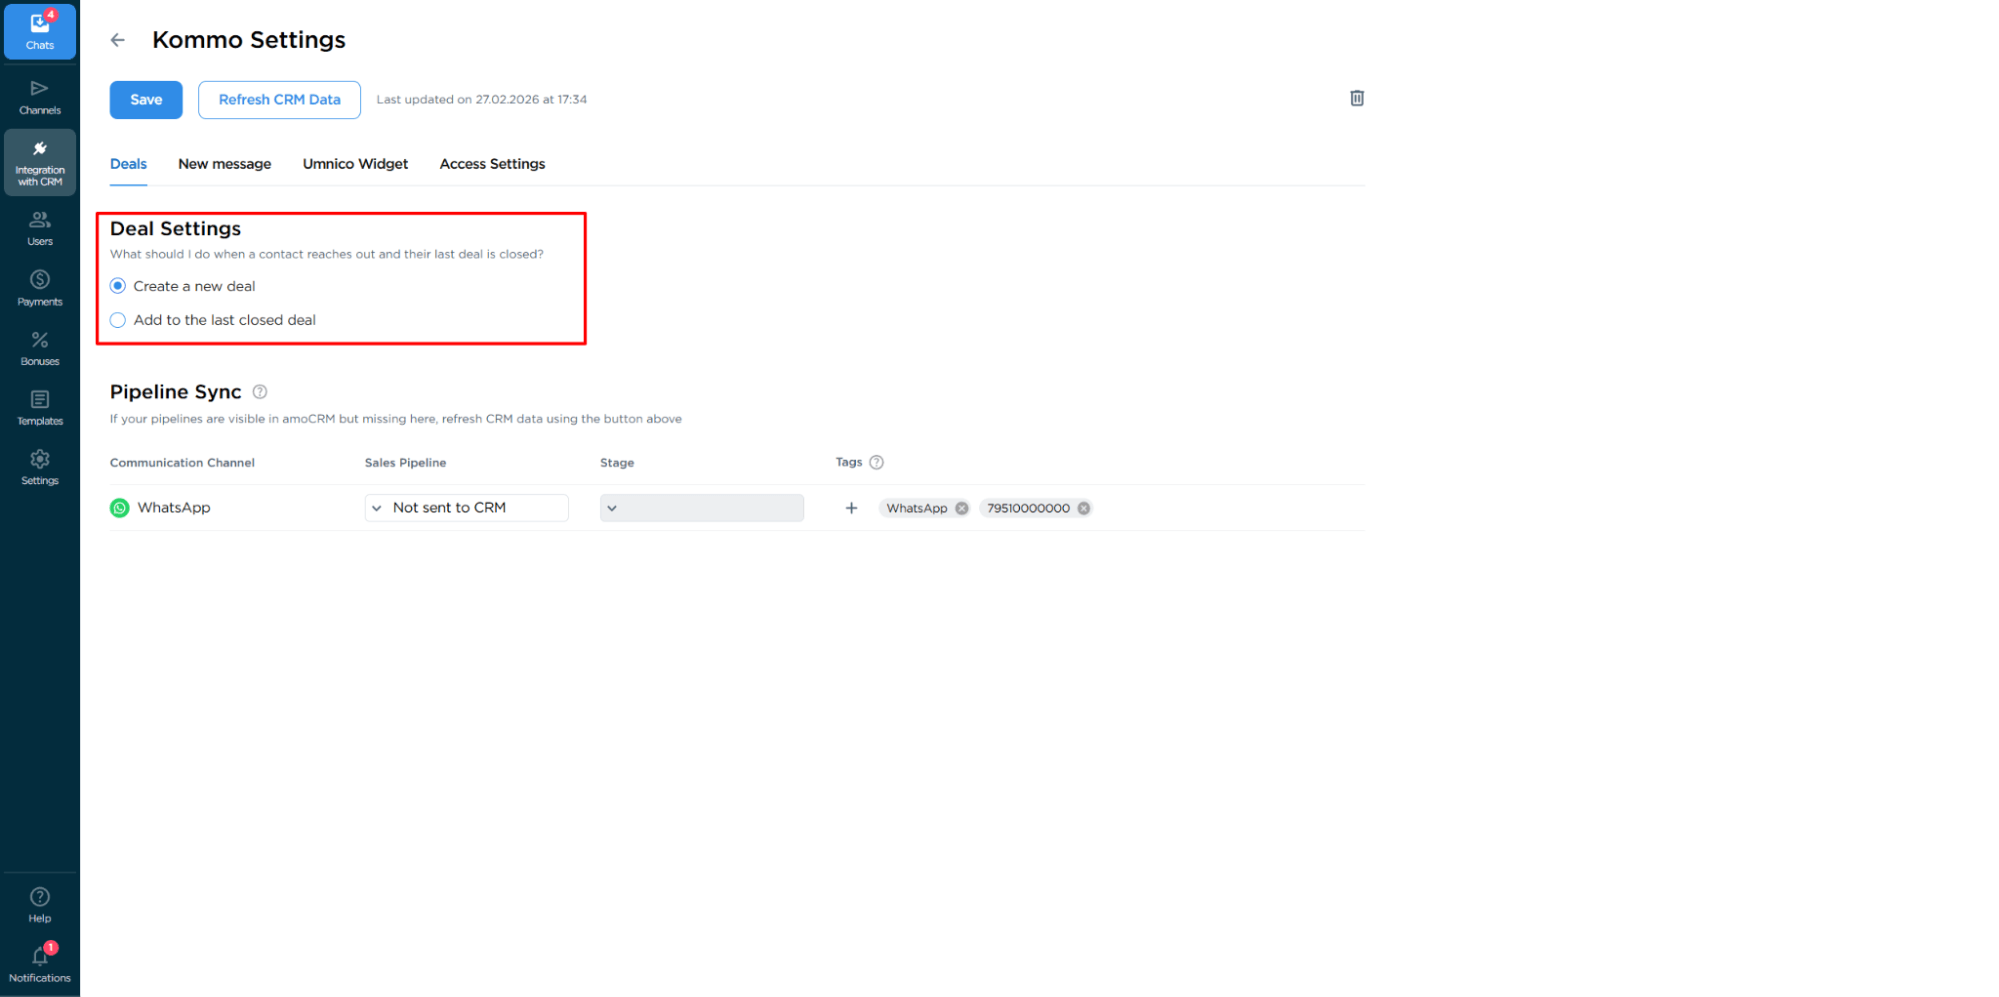
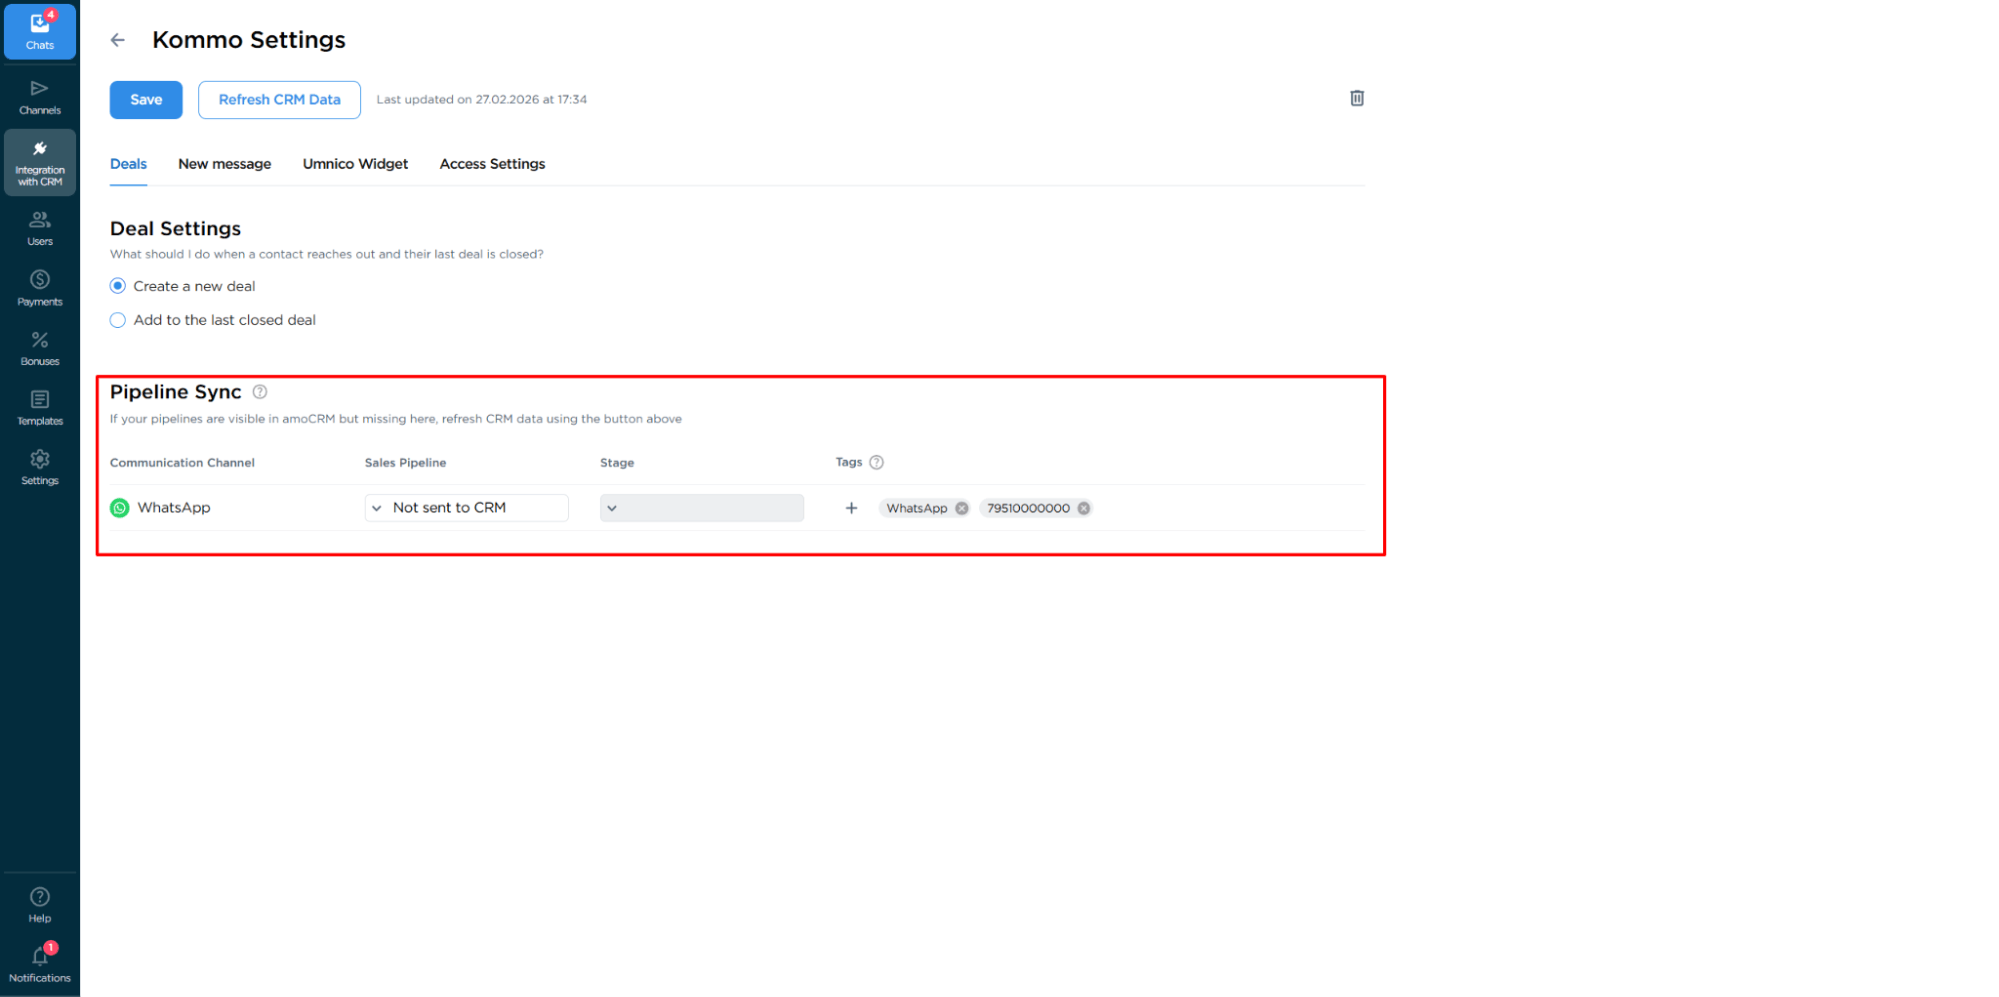
Pipeline synchronization
Select the pipeline and status for new deals from Umnico. If you send inquiries directly to the main pipeline stage, the system will automatically add tags to deals: integration channel (e.g., WhatsApp), message type (message or comment). If you choose the Send to Unsorted in Main Pipeline option, tags and work phone will not be added.
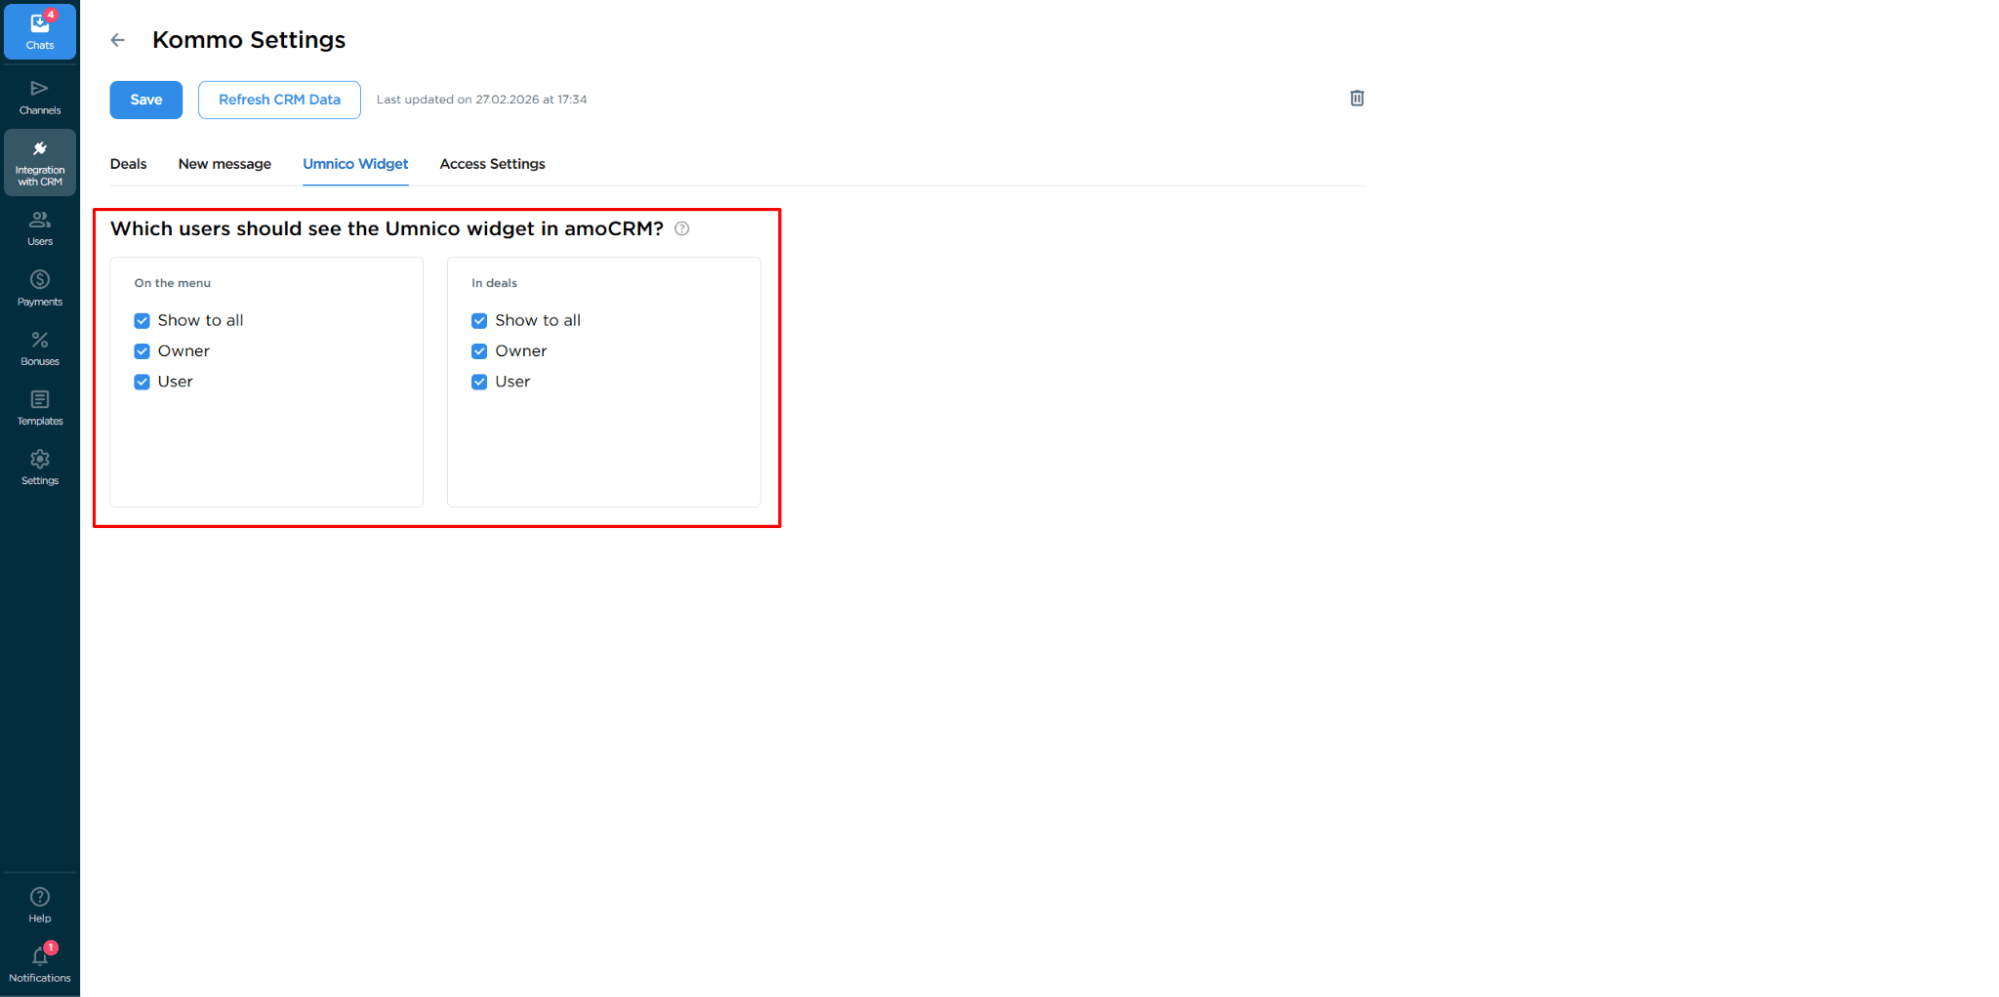
Umnico widget display settings
You can configure the display of the Umnico widget for selected operators in the Kommo interface.
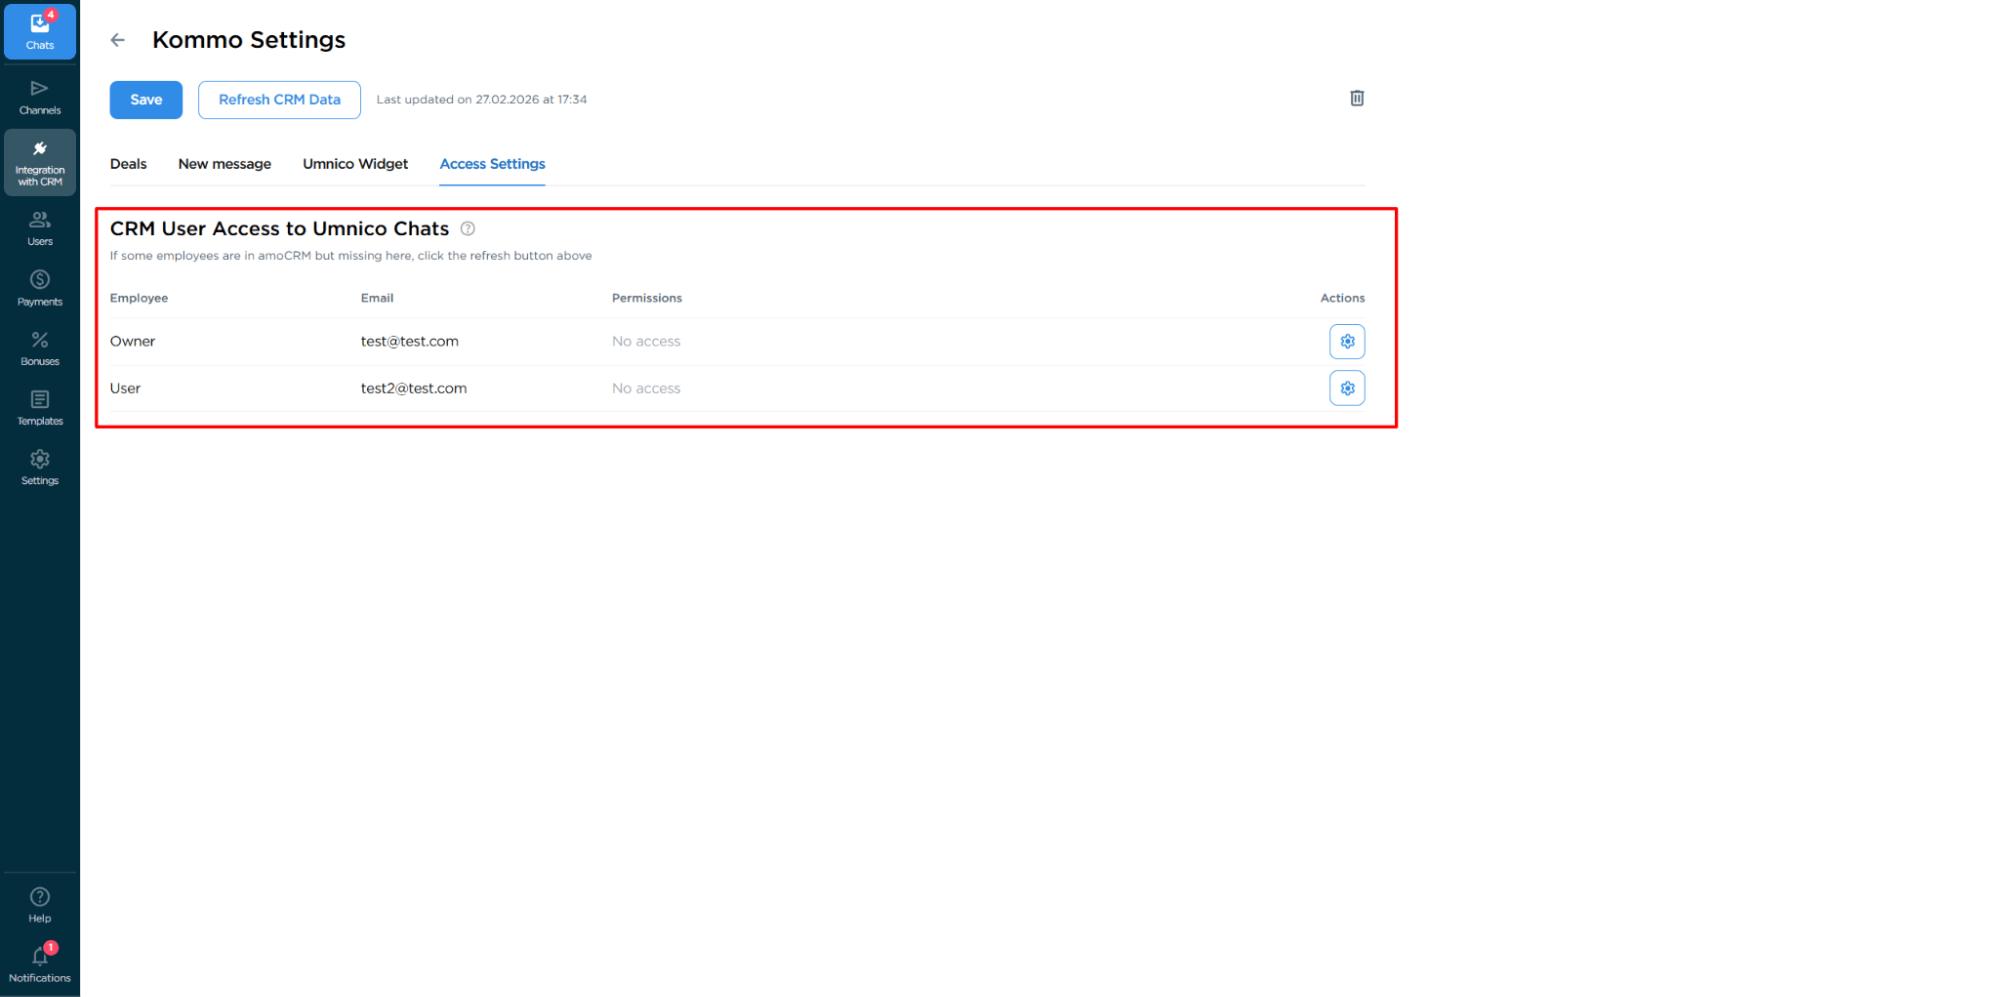
Access settings
To connect, you need to authorize in Kommo and confirm permissions for integration with Umnico. This ensures correct data transfer between platforms.
When everything is ready, click “Save” to apply the changes. The integration is configured and ready to use.

Now all incoming messages from your Instagram* business profile will be sent to Kommo.
Security of using Umnico
Umnico is not a mass messaging service and is not responsible for account blocking in case of Instagram* policy violations.
The integration with Instagram* is built on the official web version of the platform. When following all recommendations, using the service remains completely secure.
Help and Support
If you have any questions about connecting Instagram* to Kommo, contact us and we'll be happy to help.
To connect with a Umnico expert, click the “Chat with Operator” icon in the bottom right corner of the screen, or select “Help — Chat with Operator” from the menu in your personal account.
Related Guides & Articles
We recommend exploring
Connecting Instagram* to amoCRM
Connecting Instagram* to Bitrix24
You might be interested in
Setting Up an Instagram* Shop
Customer Experience Optimization: What You Should Know
 3-days free trial period